
*Affiliate links are included in this post.
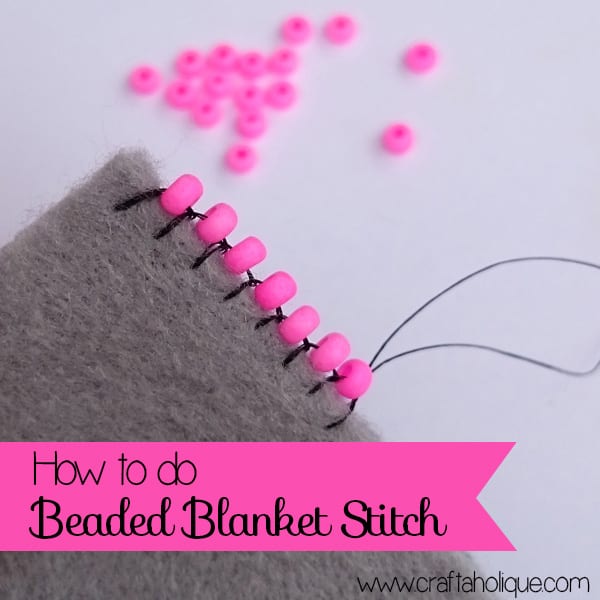
Blanket stitch is a great decorative stitch on its own for various fabric projects. And when you add beads into the equation, you can create something even more beautiful! I used beaded blanket stitch for the edging on one of my recent projects, a bead embroidery statement necklace, so I thought I’d put together a tutorial in photos so you can see how it’s done!
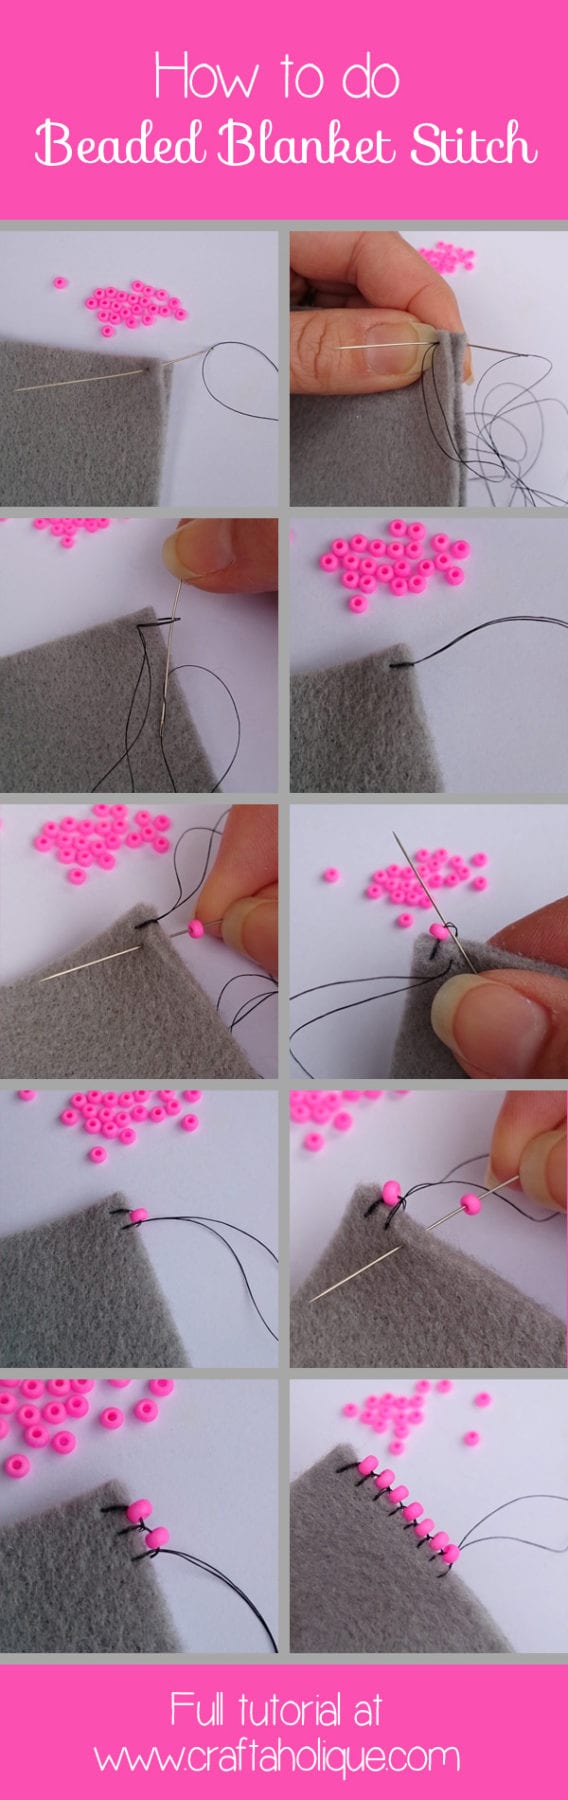
For the purpose of this tutorial, I’m sewing a beaded edging to join two pieces of felt, using black beading thread and bright pink size 8/0 seed beads (similar to these) so you can see the steps clearly.
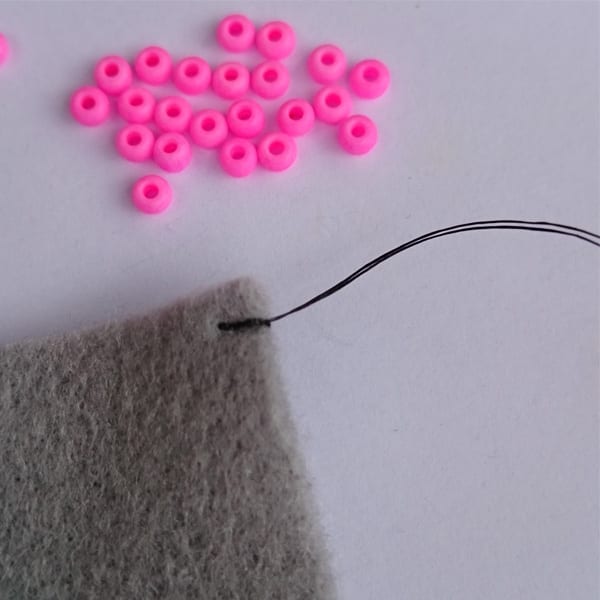
Step 1
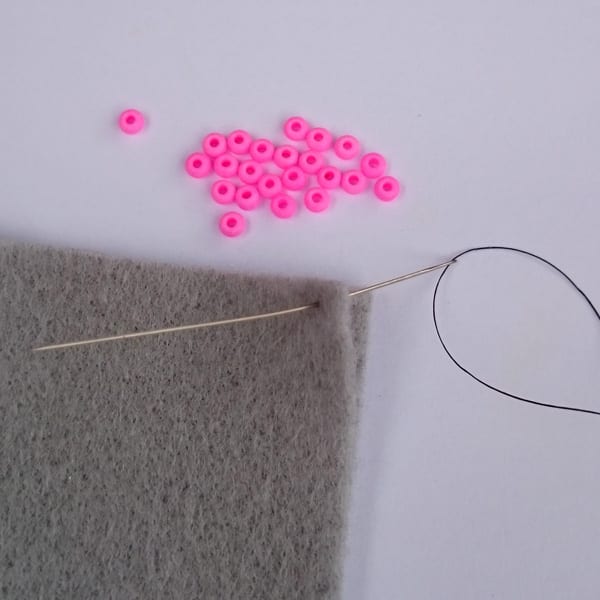
Thread a beading needle with beading thread and double it, tying a knot in the end. Go up through the inside of your fabric, in between the two pieces as this is how you can hide your knot.
Step 2
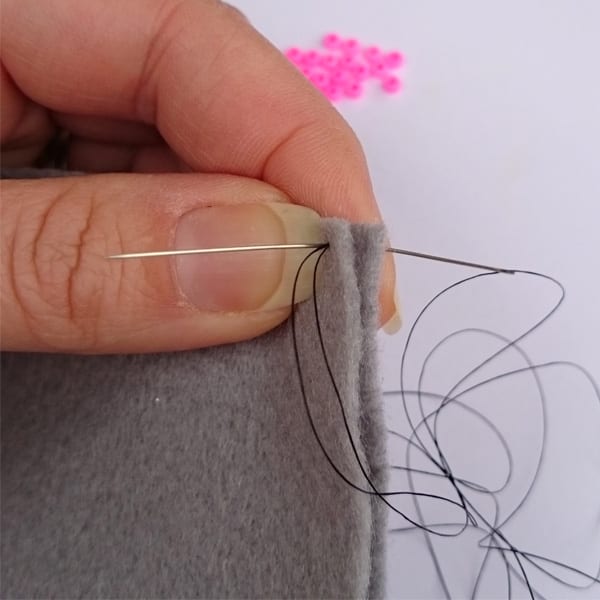 Once you’ve done that, go around the back of the fabric and go through both pieces this time, using the same hole that you went through in the last step.
Step 3
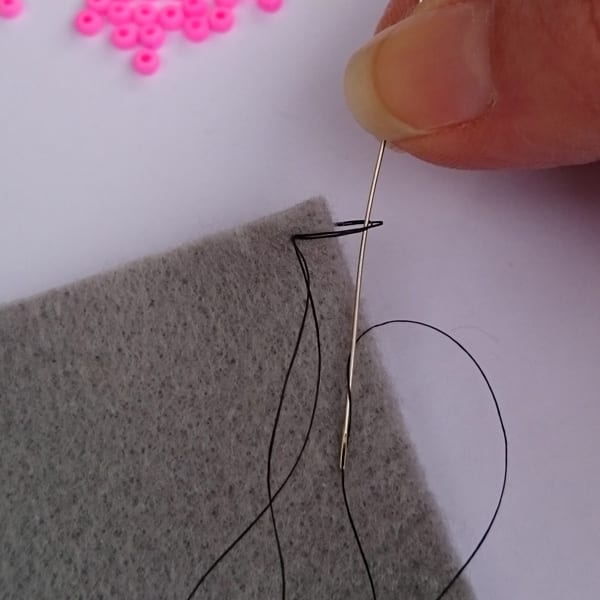
Before you pull the thread tight, pass the needle the through loop that you’ve made to secure this first stitch into place.
Step 4
And your first stitch should look like this!
Step 5
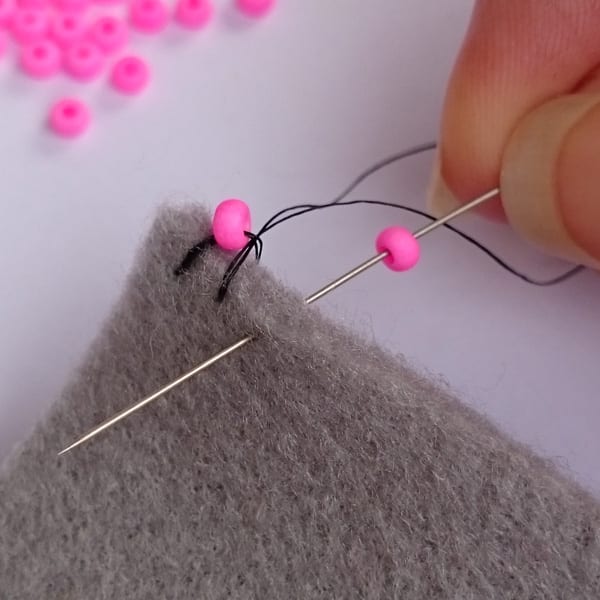
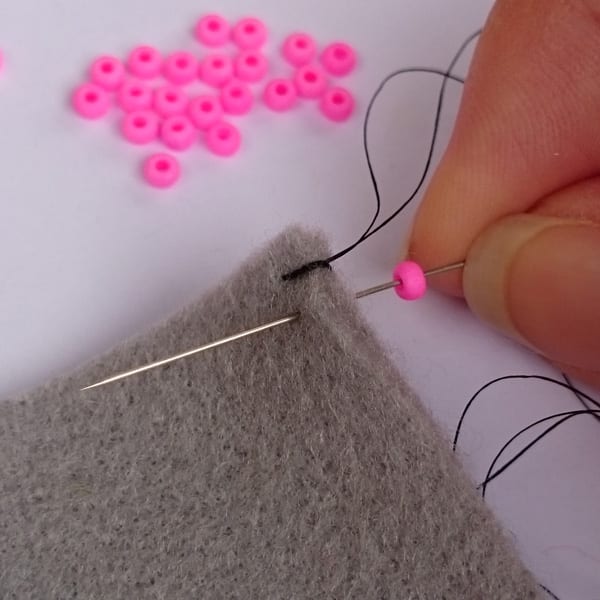 Now for the exciting part! It’s time to start sewing on the beads. Pick up a seed bead onto your needle and go through the back of the fabric, through both pieces again as shown in this photo. Leave around a 4mm gap (this is for a size 8/0 seed bead, if you’re using size 11/0 seed beads, your gap will need to be smaller).
Step 6
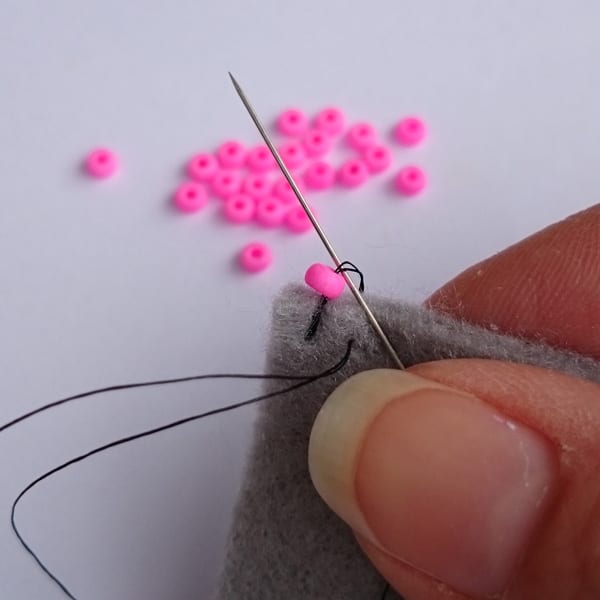
Push the seed bead into place so that it’s sitting on the edge of the fabric and before you pull the thread tight, pass your needle through the loop that you’ve made to secure this stitch.
Step 7
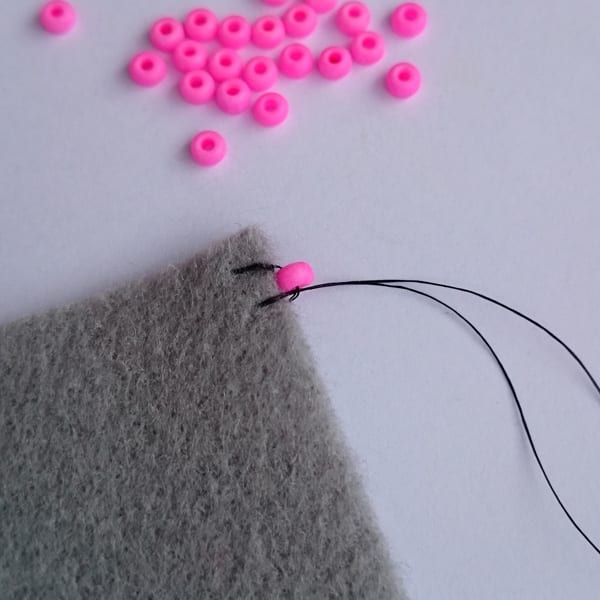
Ta da! Your first bead should be sitting nicely on the edge of the fabric.
Step 8
Pick up your second bead and repeat steps 5 to 7, remembering to leave the same amount of space for an even gap in between the stitches.
Step 9
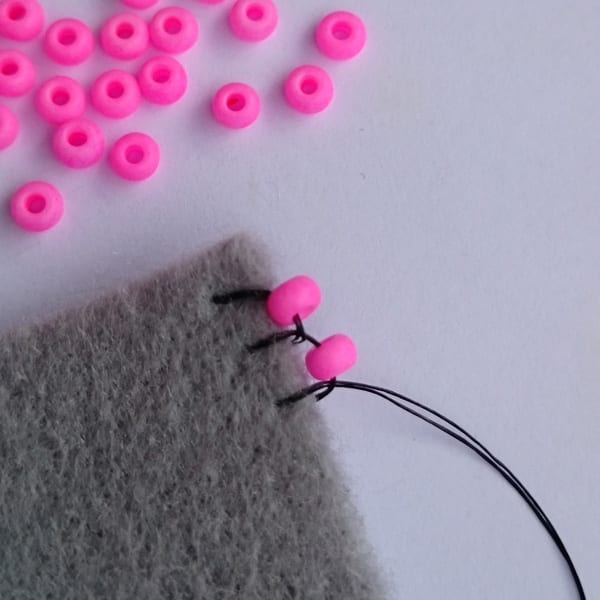
Your thread should sit to the right of that second bead as you begin to sew more beads into place.
Step 10
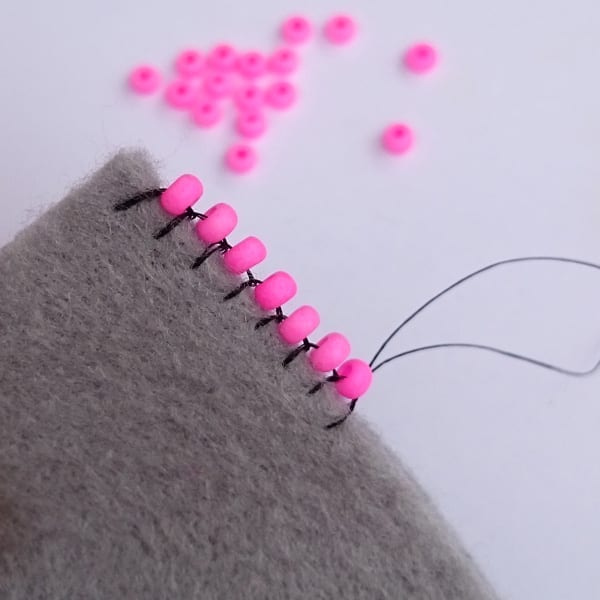
Repeat all of the steps until you’ve sewn on as many beads as you can handle!
I hope you enjoyed this tutorial! Please take a moment to share this with your social media followers if so.
*Some affiliate links are included in this post. This means that if you purchase something using one of my links, I will earn a small commission (at no cost to you) to help me keep this blog up and running. Thank you for using my links if you are able to!
 *If you’d like to use any of my images for your blog or website, please email me.
Fab tutorial! Thank you so much for posting, can’t wait to try it out. I was wondering how you manage the corners though? This is always a tricky bit for me with blanket stitch.
Hi Emma, thanks for stopping by and commenting! I’m really glad you liked this tutorial. What I do with the corners is come back through the last stitch hole next to the corner and then turn my work 90 degrees and begin blanket stitch again. So my corners end up looking like a little square with two stitches coming out of the same hole! I hope that makes sense, but just message me again if not! 🙂
I do that, also, and wondered if it was the correct way to do corners. Thank you. I just discovered your page.
Thanks for stopping by, I appreciate it!