

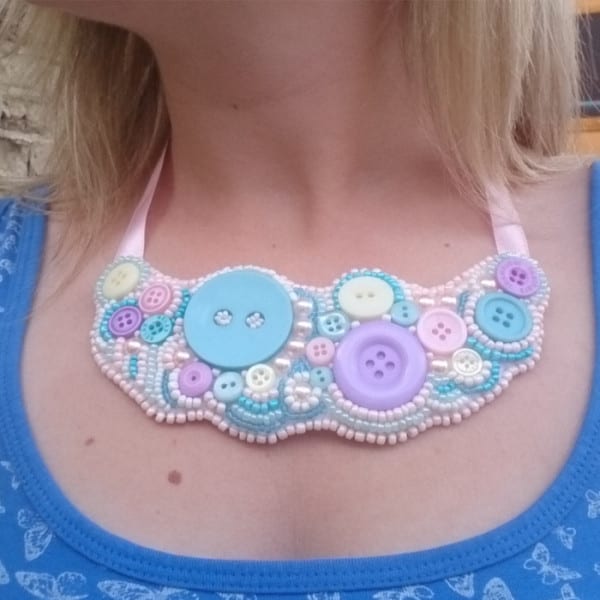
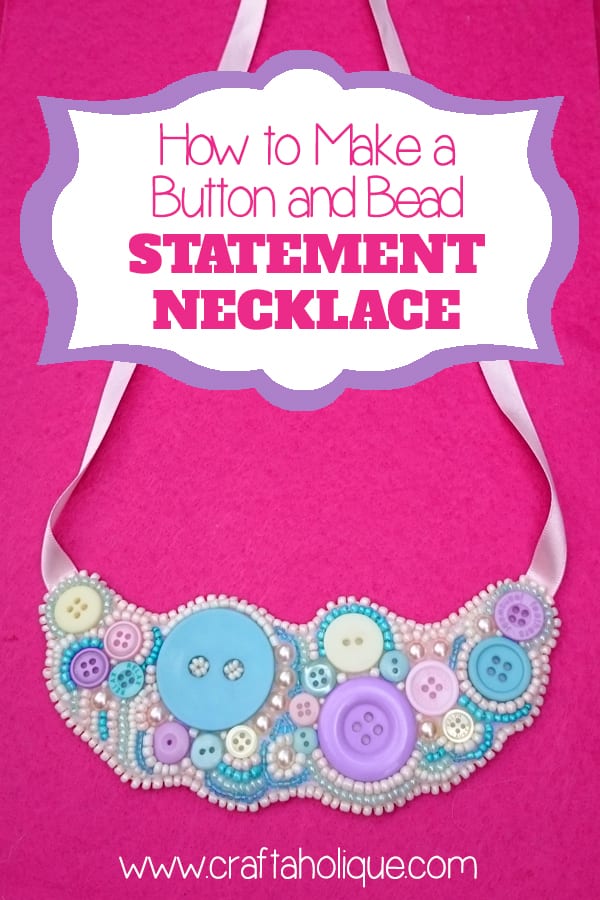
Ever since I made a bead embroidered headband for my little girl, I’ve been keen to get back to doing some more bead embroidery! I decided to make a statement necklace using some of my favourite materials – buttons, seed beads, felt and ribbon. I happened to have a mixed bag of pastel buttons so I used these to set the colour theme of this piece.
I’ve outlined below how I made this beaded statement necklace in case you’d like to have a go too!
Materials needed:
- 1 x sheet of flat felt (A4)
- Mixture of seed beads in various sizes – any type
- Mixed buttons
- Flat back acrylic pearls
- Beading thread e.g. nymo
- Beading needle size 10 or 12
- Ribbon
- Gemstone or fabric glue
- Scissors
Step 1

Using half of the sheet of felt, roughly sketch out the shape you want the main part of your necklace to be. Fold the felt sheet over so you have a double layer and cut the shape out so that you have two pieces that are the same. Don’t worry if they’re not exactly identical as you can always trim again later.
Step 2
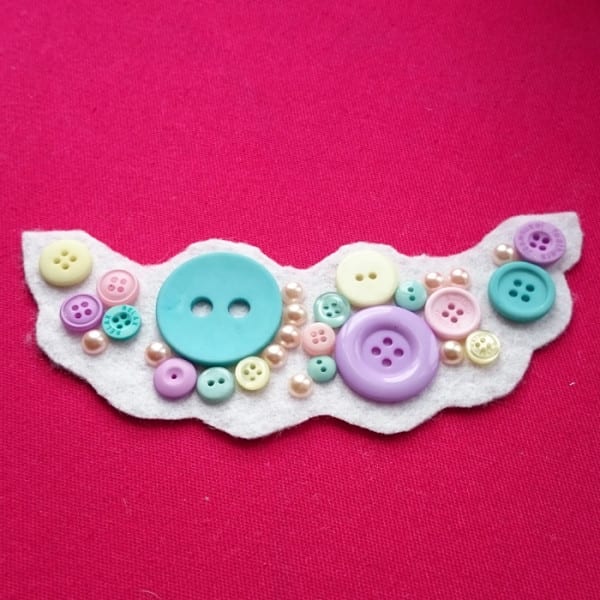
Use your gemstone or fabric glue to stick on buttons and flat back pearls wherever you want them to be. I decided to have a few random sets of buttons as usually my designs are pretty symmetrical! Leave to dry for around 15 minutes.
Step 3
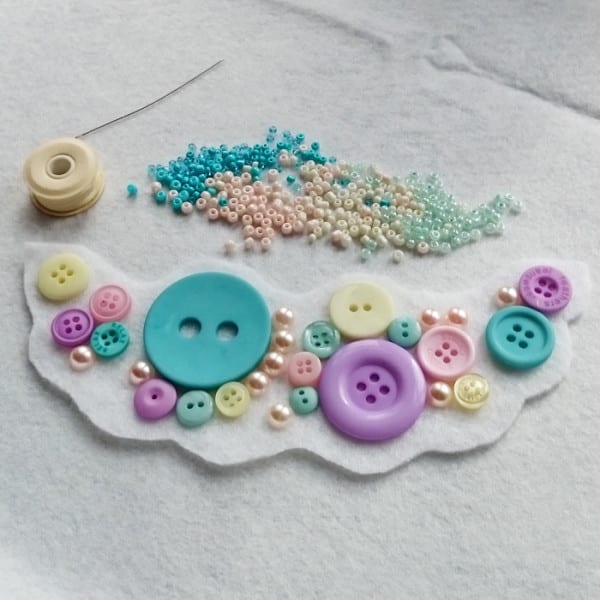
Now for the fun part! Pick out a selection of your favourite seed beads (I used mostly pastel colours to compliment my choice of buttons). Czech glass seed beads are best for this type of project as they are non-uniform and the different sizes look so interesting! Best of all, Czech glass seed beads are cheaper than Japanese seed beads too – bonus! Most of the seed beads used here are size 11/0.
What you need to do now is embroider them around the buttons and pearls that you’ve glued on. This might sounds tricky, but it’s actually quite straightforward. If you know how to do backstitch you can do this very easily.
To begin, thread your beading needle and go through the underside of the felt so that your needle comes out at the side of one of your buttons or pearls. Thread on 6 seed beads, lie them around the button or pearl and thread your needle back through the felt to the underneath again. At this point tie the thread to the tail so that your beads won’t fall off.
Go back up through the felt in between the beads that you’ve just sew on – right in the middle. Then go back through the last three beads again with your needle to secure them to the felt. After that, pick up another 6 beads and repeat!
Follow the contour of the pattern you’ve made with the buttons or pearls and work outwards until you reach the edges of the felt. You can be really creative with them and as long as there are no gaps in your beadwork, it should look great! Be sure to leave 1-2mm gap at the edges.
You might want to check out this video below on how to do bead embroidery if you’re not sure. This is the video I watched when I made my daughter’s bead embroidered headband and I found it really helpful.
Step 4

Anyway, so when you’ve added your seed beads via an embroidery technique, you might end up with something that looks like this!
Step 5
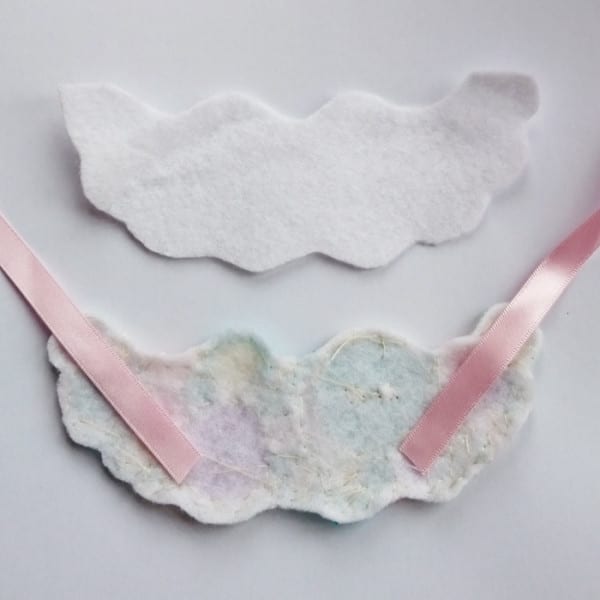
Now it’s time to add on your ribbon which will be used to fasten the necklace around your neck. Measure out how much you need and trim to size. Position the ribbon on top of the underside of your beaded felt piece and glue into place.
Step 6
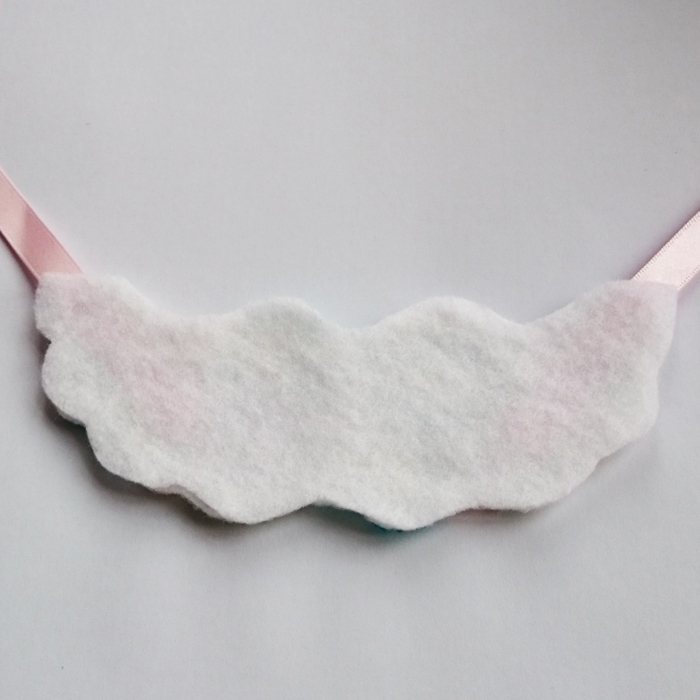
Then use the backing which you cut out earlier to stick on top of the ribbon. This hides all the unsightly threads. Leave to dry and trim any excess edges off afterwards.
Step 7
After your glue has dried, you might want to tidy up the felt edges by adding a decorative beaded edge. You can use a picot edge or a beaded blanket stitch as I’ve done here. I’ll be putting together a tutorial on beaded blanket stitch soon, so watch this space!
If you enjoyed this post, please take a moment to share this with your social media followers! Don’t forget to subscribe to be kept updated about more posts like this.
All images © Craftaholique. Please let me know if you’d like to use my images on your site.
Part of Craft Schooling Sunday, That DIY Party, Handmade Monday, Much Ado About Mondays and The Crafty Blog Stalker.


Wow really gorgeous! So wonderful to “meet” you, and I really appreciate your linking back to the party! You will surely get featured with this great project and nice photos, so hope you’ll continue to share at craft schooling Sunday! Plus if you could see my button stash you’d understand how excited I am about this!
Thank you so much for your lovely comment! I found your site yesterday and am looking forward to reading more of your posts. I’ll definitely be linking up again, thanks for the opportunity! 🙂
That is a very pretty and clever necklace and you have explained it beautifully x
Thank you so much for stopping by and commenting! I’m looking forward to checking out your blog shortly. 🙂 x
What a great project. I really want to give it a try.
Thanks Ginny! It was a lot of fun, I’d recommend it! 🙂
This is so creative! Amazing work
Thank you very much! Appreciate you stopping by.