• Skip to primary navigation
  • Skip to main content
  • Skip to primary sidebar
  • Skip to footer
  • Home
  • Tutorials
  • Crafts
    • Jewellery Making
      • Everything jewellery
      • Beadwork
      • Wire jewellery
      • Book reviews
    • Feltmaking
    • Crochet
    • Knitting
    • Kid’s crafts
    • Book reviews
    • Other
  • Inspiration
    • Everything inspirational
    • Handmade showcase
    • Colours
    • Materials
    • Crafty Links
    • Start a Blog
  • Lifestyle
    • Tips
    • Recipes
  • About
    • Advertise
  • Contact
  • Privacy Policy
    • Cookie Policy
  • Disclaimer / Disclosure

Craftaholique

Embracing The Handmade Life | UK Craft Blog

You are here: Home / Jewellery making / Make Wire Jewellery: Wire Heart Component for Earrings or Pendants

June 2, 2013

Make Wire Jewellery: Wire Heart Component for Earrings or Pendants

Wire heart componentIt’s been a while since I last posted a tutorial, in fact it’s been a while since I was able to spend some time crafting! Sometimes life just gets in the way of doing the things we love!

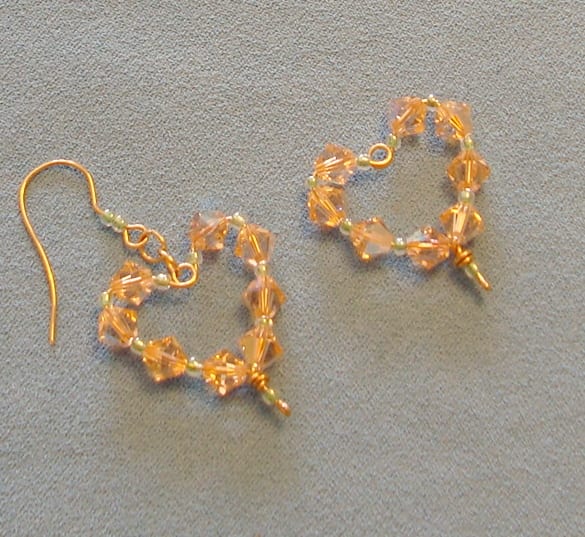
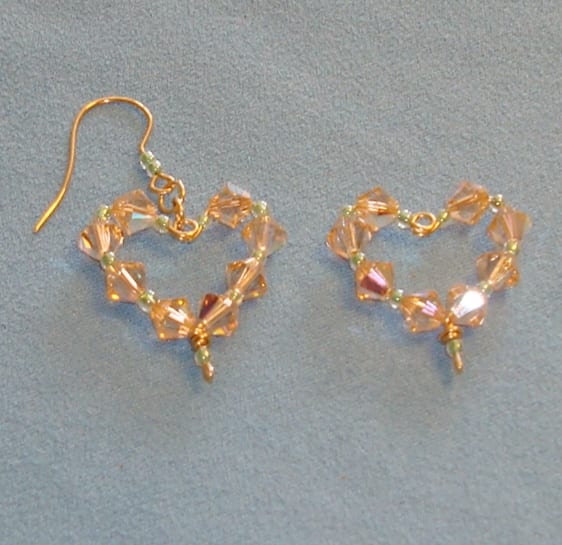
But anyway, today I have another tutorial for you on how to make wire jewellery. This is a heart component for earrings or as a pendant.

It’s very versatile and you could make a larger version of it as a decorative heart for hanging on doors or walls at home.

This project has been made using gold coloured wire, topaz Swarovski bicone beads and turquoise lined seed beads.

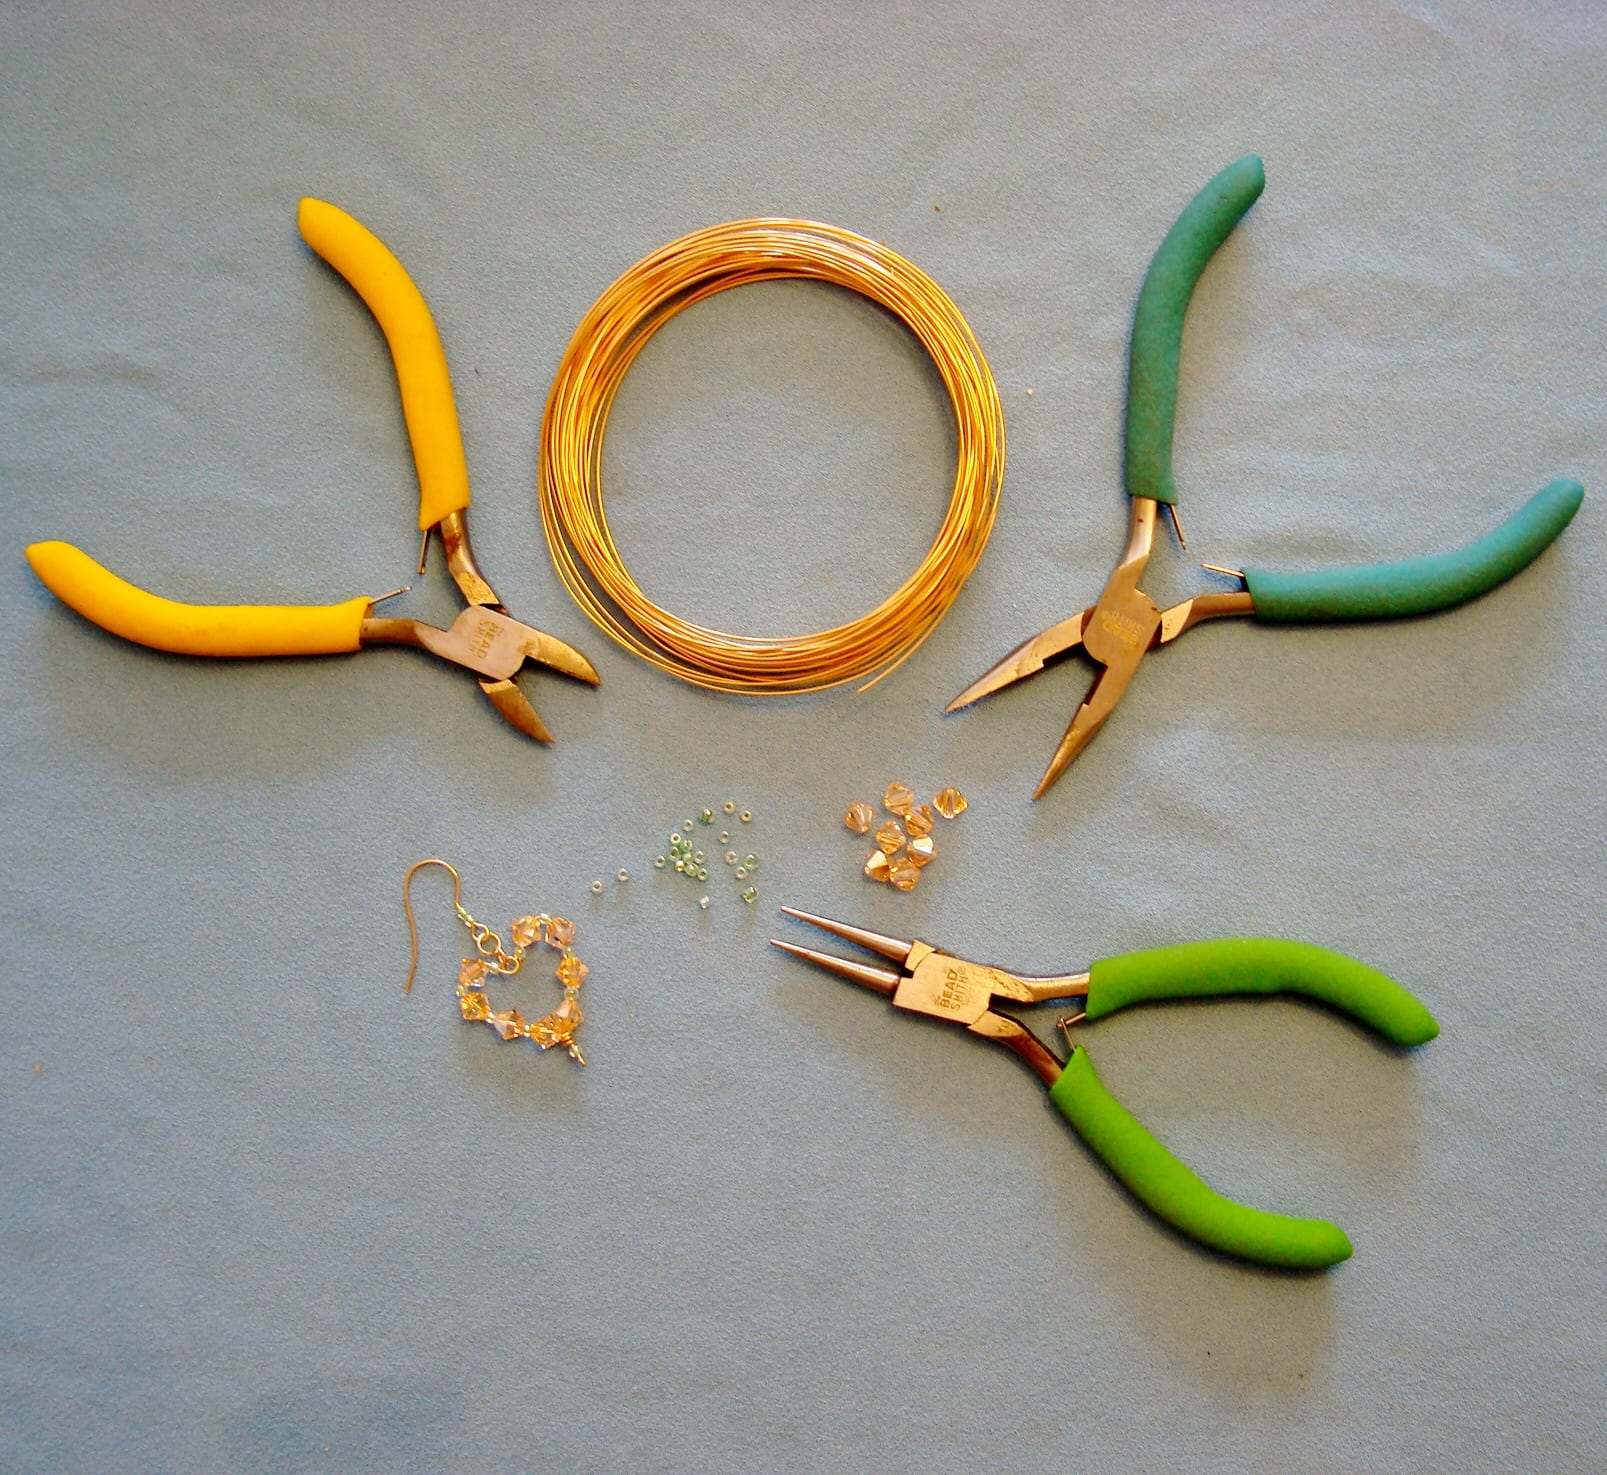
For this project you’ll need the following:

  • Jewellery wire cutters
  • Round nose pliers
  • Flat nose pliers
  • Wire (0.8mm gauge)
  • 16 x size 11 seed beads if making earrings, 8 of them for a pendant
  • 16 x 6mm Swarovski bicones if making earrings, 8 of them for a pendant
  • 2 x earwires to match the colour of wire used
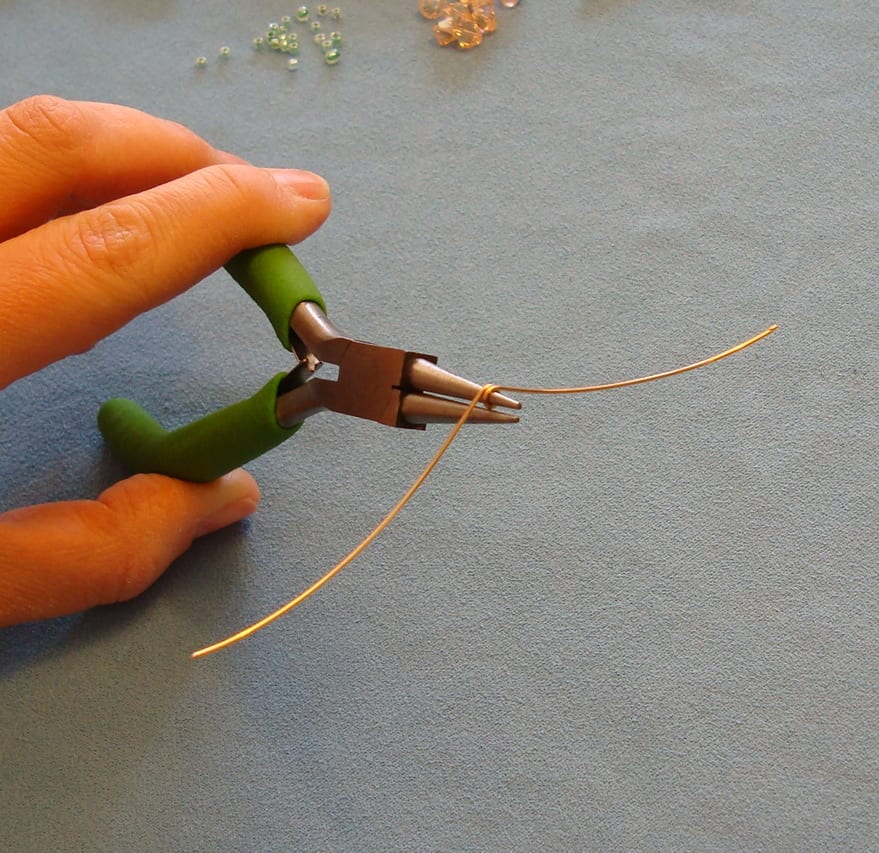
Materials for making a wire heart component

Step 1

With the wire cutters, cut off around 4 inches of wire. Take the middle of the wire with the round nose pliers and wrap the wire over the pliers in both directions like in this picture below to form a loop. This will be the loop where you can attach a pendant bail or earwires.

Just a quick note on the wire, it does need to be strong enough to stay in shape as well as being thin enough to string on seed beads, so the 0.8mm gauge wire is perfect for this project.
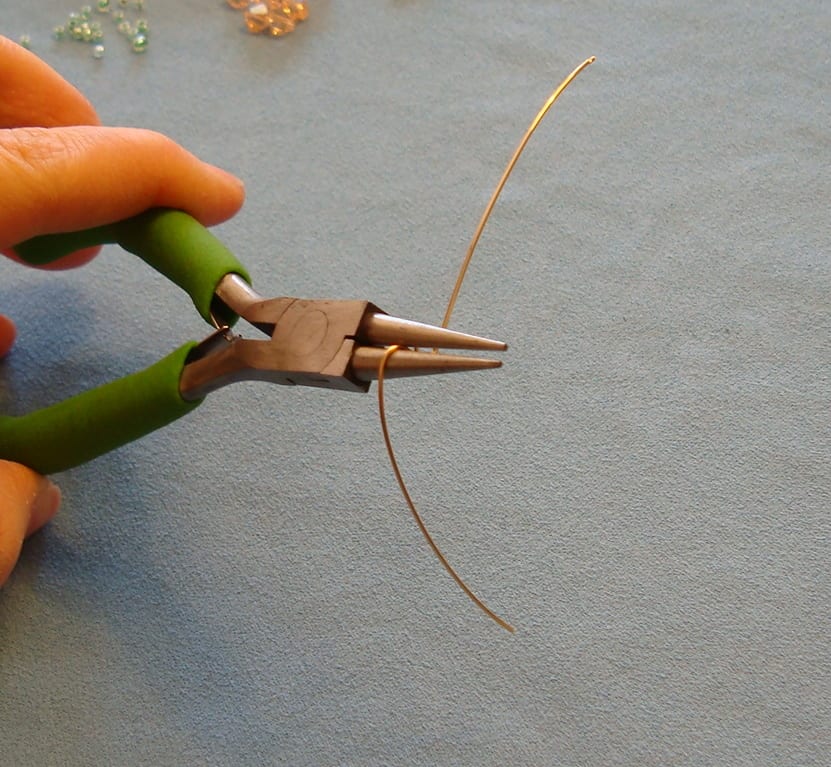
How to make a wire heart component

Step 2

Using the widest point of the round nose pliers, wrap the wire over on one side as close as possible to the loop that you’ve just made.
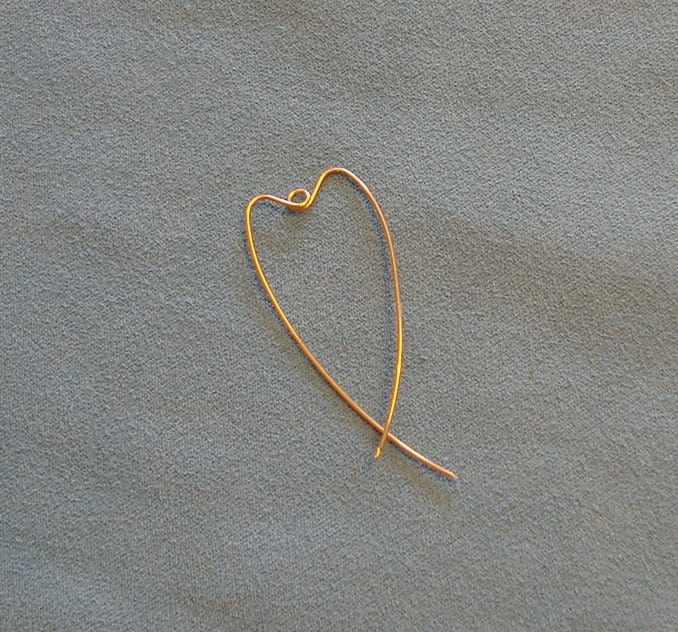
How to make a wire heart component

Step 3

Repeat step 2 on the other side of the loop so that your component now looks like this. Don’t worry too much about the shape for now, as once your beads are on, you can then form the shape that you would like.

How to make a wire heart component

Step 4

On one side, slide on a seed bead and a swarovski crystal bicone. It might be tricky to push the bicone onto the section that has been shaped, if so, just bend the wire slightly the other way in order to position the bead. It should fit snugly into place when done.
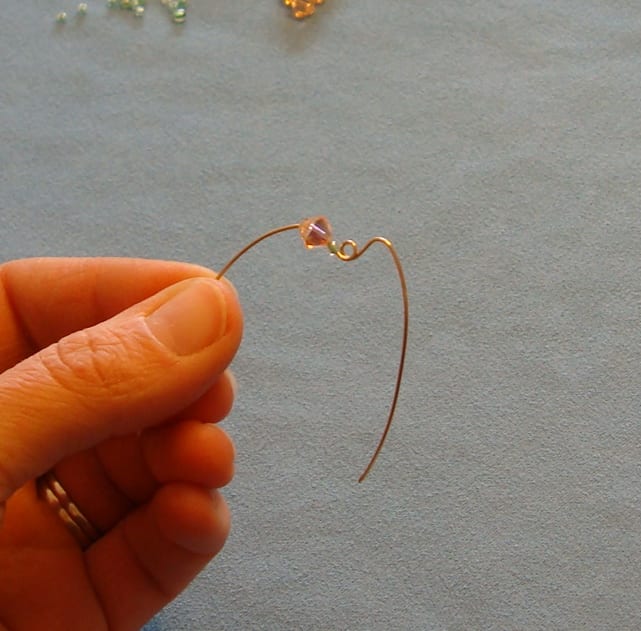
How to make a wire heart component

Step 5

String on 3 each of seed beads and bicones alternately so that you have 4 of each in total on the wire. Once the last bead is strung, use the round nose pliers to grip the wire after the last bead and bend the wire so that the beads won’t fall off.
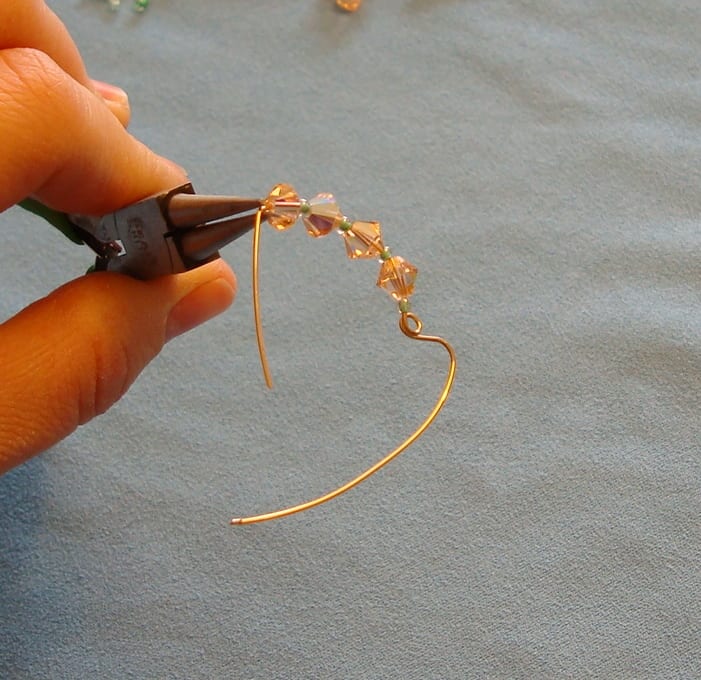
How to make a wire heart component

Step 6

Repeat step 5 on the other side of the loop.
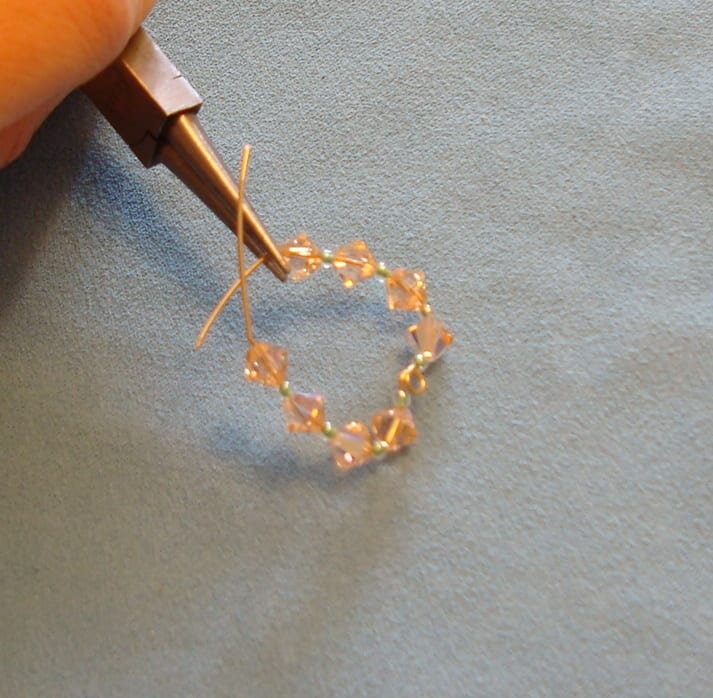
How to makea wire heart component

Step 7

Once all the beads are strung, pull both ends of the wire together and wrap around each other. Do this whilst keeping the tension tight so the beads remain close together.
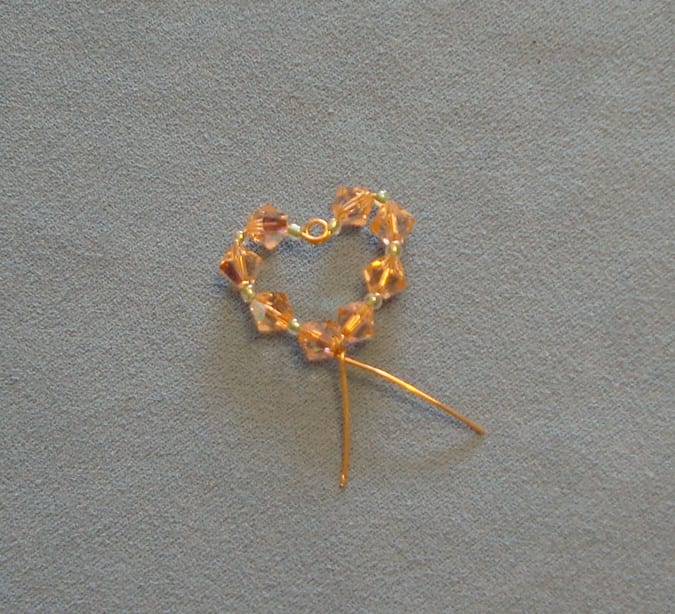
How to make a swarovski crystal wire heart component

Step 8

Use the flat nose pliers to hold one end of the wire in place and wrap the other end of the wire around it. You can trim it as you see fit but I quite like the way that it looks when wrapped around all the way. Tuck the very end part of the wrapped wire around what will be the back of the component and squash it gently with the flat nose pliers to secure.
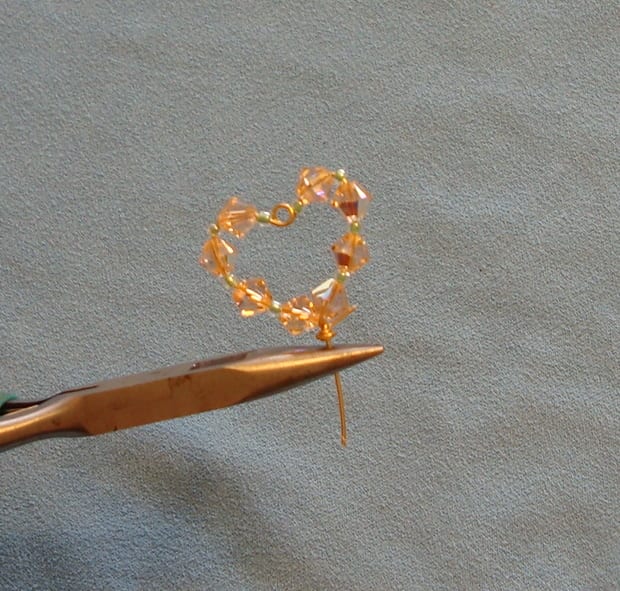
DSC03047

Step 9

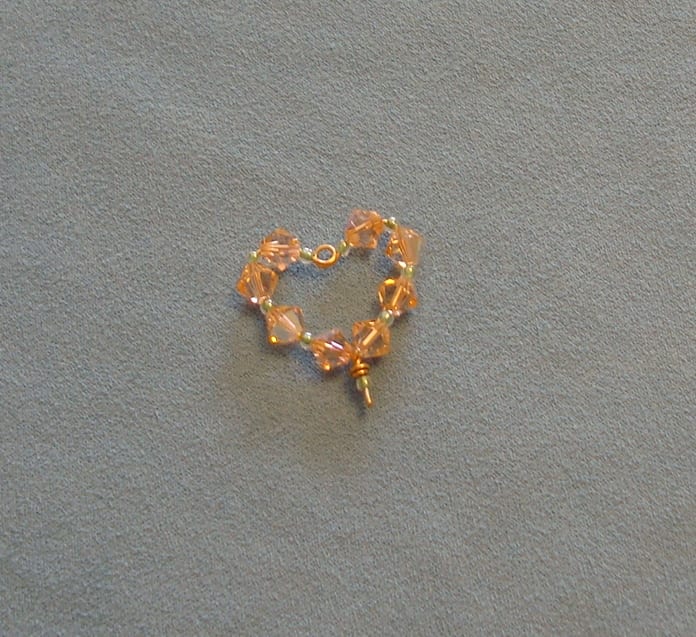
On the remaining piece of wire, string a seed bead on for some extra decoration! Finish by trimming the wire, forming a loop with the round nose pliers and squashing it with the flat nose pliers.

Swarovski crystal wire heart component

Step 10

For the earwires, you can make your own to match using the same wire. See my tutorial on how to make earwires! Or you can use some that are ready made in a similar colour. I just used a couple of jump rings to attach the earwire to the loop in the middle of the wire heart component. You can also attach to a pendant bail and wear with a necklace.

How to make a swarovski heart component for earrings or pendants

I hope you liked this tutorial on making wire jewellery! As always, I’d love to hear from you. If you fancy making some other projects, you can see my other tutorials here!

Share this post!
  • save 
  • share 
  • tweet 
  • email 

Filed Under: Jewellery making, Tutorials, Wire jewellery Hayley Leave a Comment

Reader Interactions

Button Craft: 5 Button Makes
Ever Wondered What It’s Like To Own A Bead Shop?

Leave a Reply Cancel reply

Your email address will not be published.

Primary Sidebar

Connect

  • E-mail
  • Facebook
  • Instagram
  • Pinterest
  • Twitter

Advert


Instagram

My latest beaded creation! Peyote with a twist. Lo My latest beaded creation! Peyote with a twist. Love the chunkiness of it and how it shimmers with the galvanised silver Miyuki Delica beads. #beads #beadwork #beadweavingpeyote #peyote #flatpeyotestitch #silver #beaded #beadedjewelryofinstagram #beadedring #beadedjewelry #miyukidelica #miyukipeyote #miyuki #miyukibeads #beading #crafts #crafting #craftblogger
My latest tubular peyote bracelet! It's made up of My latest tubular peyote bracelet! It's made up of hundreds of tiny Miyuki Delica beads in vibrant colours of metallic blue, silver, white and pink. The pattern is available in my Etsy shop, Craftaholique Designs. #beads #beadwork #beadweavingpeyote #tubularpeyotestitch #miyukipeyote #beading #beadingpattern #etsyshop #etsysellersofinstagram #etsyseller #etsyshopowner #bracelets #vibrant #tubularpeyote #beadaddict #beadaddiction #miyuki #miyukibeads
My finished bead embroidery - I've used it as an e My finished bead embroidery - I've used it as an embellishment for a beadwork storage case I've just made. I upcycled the case from an old padfolio / conference folder. Inside there's an integrated beading mat where I can do my beadwork - no more beads rolling away! I've posted a tutorial on my blog (link in bio).
My latest project... Bead embroidered flowers! I'm My latest project... Bead embroidered flowers! I'm making this as an embellishment for something. Will post the final project pic soon! #beadwork #beadembroidery #embroidery #embroiderydesign #embroideryart #embroidelicious #flowers #beads #beadedembroidery #beadedembellishment #crafts #crafting #keepcraftingcarryon #keepcraftalive #keepcraftingandcarryon #beaded #beadaddict #beadaddiction #embroideryhoop #craftblogger #crafty
Just finished this set of Miyuki Delica bracelets Just finished this set of Miyuki Delica bracelets in pretty colours of peach, white, pink and gold! I made the two diamond pattern bracelets using a bead loom. The single strand bracelet I just strung together. What do you think to my creation? #beads #beadwork #beadloom #beadloompattern #beadloomingbracelet #beadlooming #beadloombracelets #beadweaving #loombeading #loombead #beadingpattern #beadedjewelryofinstagram #beadaddict #beadaddiction #miyuki #miyukibeads #miyukidelica #crafts #crafting #craftblogger #crafty #bead #craftblogger #beadedbracelets #cuffbracelet #stackingbracelets
Though I've been beading for many years, this is t Though I've been beading for many years, this is the first time I've used a bead loom! It's pretty straightforward and quicker than peyote. #beading #beadloom #beadlooming #beadloomingbracelet #beadloomingnewbie #beadloombracelets #beadloompattern #beadwork #beadingpattern #miyuki #miyukibeads
I had tons of fun over the Easter weekend making t I had tons of fun over the Easter weekend making this rag rug sample with a kit from @raggedlife. This was part of an online workshop on rag rugging, with four other craft bloggers (hosted on Zoom by Elspeth at Ragged Life). It was brilliant! I'd highly recommend it. I've just posted about my experience on the blog - see link in bio.
Tomorrow, I'm taking part in an online rag rug wor Tomorrow, I'm taking part in an online rag rug workshop with @raggedlife! Can't wait, I've been wanting to try out rag rugging for ages. The class is being hosted on Zoom and will be fully interactive. Will post my project when I've done it!
I've needed a bit of colour in my life recently, a I've needed a bit of colour in my life recently, after the last few weeks of darkness. I made this bangle using tubular peyote stitch, with Miyuki Delica beads. Pattern available in my Etsy Shop, Craftaholique Designs!