• Skip to primary navigation
  • Skip to main content
  • Skip to primary sidebar
  • Skip to footer
  • Home
  • Tutorials
  • Crafts
    • Jewellery Making
      • Everything jewellery
      • Beadwork
      • Wire jewellery
      • Book reviews
    • Feltmaking
    • Crochet
    • Knitting
    • Kid’s crafts
    • Book reviews
    • Other
  • Inspiration
    • Everything inspirational
    • Handmade showcase
    • Colours
    • Materials
    • Crafty Links
    • Start a Blog
  • Lifestyle
    • Tips
    • Recipes
  • About
    • Advertise
  • Contact
  • Privacy Policy
    • Cookie Policy
  • Disclaimer / Disclosure

Craftaholique

Embracing The Handmade Life | UK Craft Blog

You are here: Home / Lifestyle / Recipes / Simple Spooky Treats: Eyeballs & Mummies Popsicle Cakes

October 13, 2016

Simple Spooky Treats: Eyeballs & Mummies Popsicle Cakes

Spooky Treats - Eyeballs and Mummies Popsicle Cakes for Halloween

*Affiliate links are contained in this post.

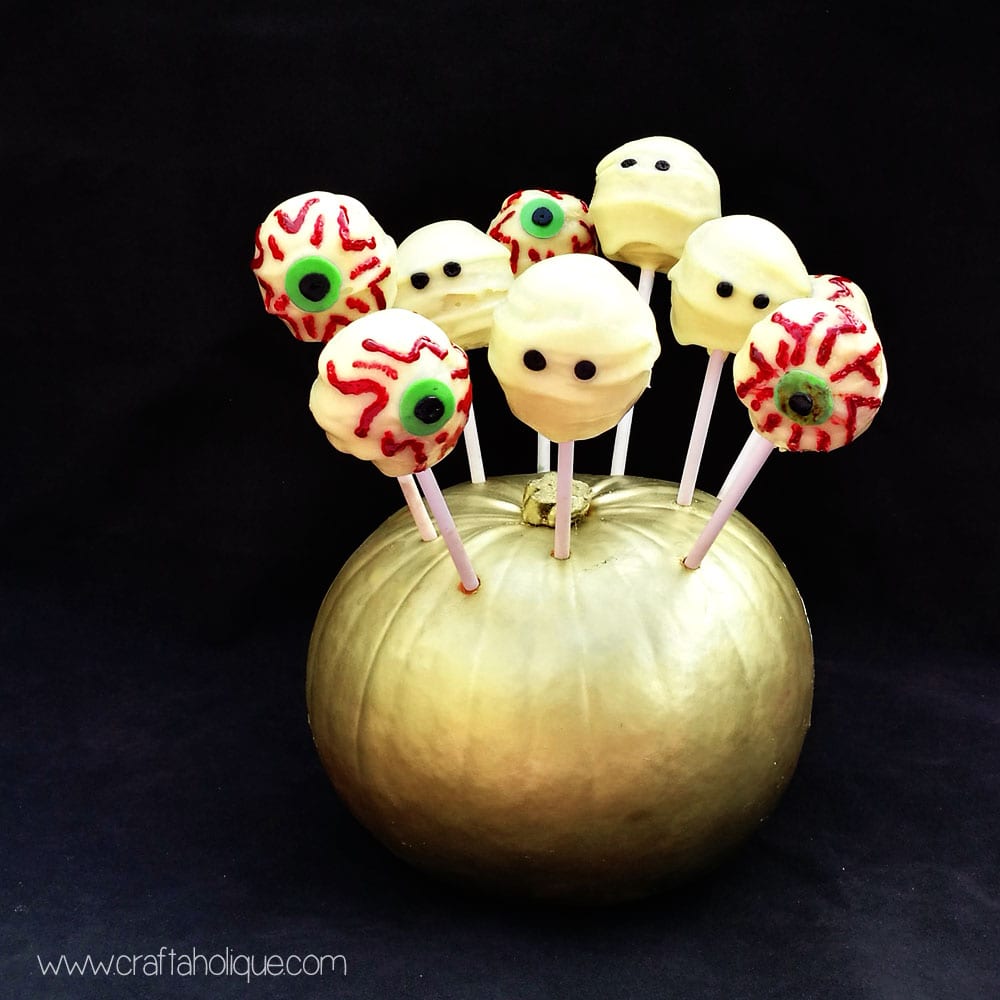
We’re really getting into the swing of Halloween in our crafty household this week. Today’s post is on how to make some simple spooky treats that resemble gloriously bloodshot eyeballs and well-wrapped mummy heads. Behind the gory appearance of these treats is a surprisingly delicious taste and texture.

They are made from cake balls (sponge cake and buttercream), which are then covered in a white chocolate ganache and decorated with fondant icing.

To make these treats, you’ll need the following ingredients / materials:

For the cake balls

  • 100g of self raising flour
  • 100g unsalted butter
  • 100g caster sugar
  • 2 x medium eggs

For the chocolate ganache

  • 75g softened unsalted butter
  • 100g icing sugar
  • 200g white chocolate
  • 100ml double cream

(Or you could buy chocolate ganache ready-made – see here).

For decorating the cake balls

  • Green and black sugarpaste / fondant icing
  • Bright red food colouring gel
  • Small cake decorating brush

Props

  • Popsicle sticks x 12
  • Pumpkin to stand the eyeballs and mummies in
  • Knitting needle or skewer (to make holes in the pumpkin)

Step 1 – make the cake mixture

Make a sponge cake by mixing together the flour, butter, sugar and eggs into a bowl. Once mixed and lump-free, pour the mixture into a lightly greased 150cm cake tin. Bake in the oven at 180 °C for 18-20 minutes until the cake is golden and springy to touch. Leave to cool on a cooling rack.

Step 2 – make the buttercream

Whilst the cake is cooling, make some buttercream by mixing together 75g of softened butter with 100g of icing sugar. Whip the buttercream until smooth and fluffy.

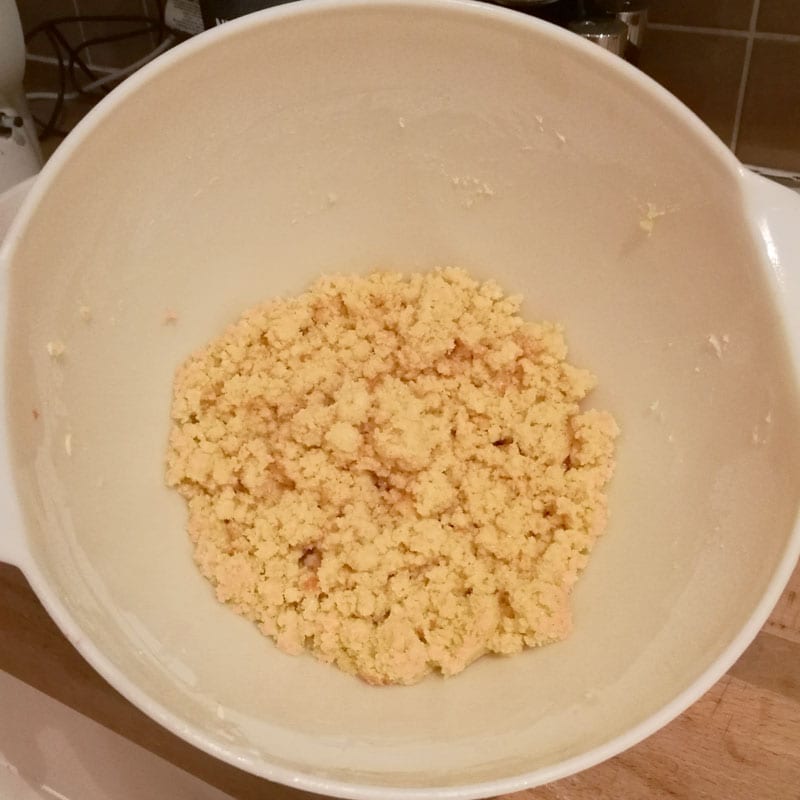
Step 3 – shape the cake into balls

Crumble the cake into a mixing bowl and then add the buttercream. Mix together until you achieve something that looks like scrambled eggs – see picture below! The mixture needs to be moist enough so that it will stick together to make round balls. Shape the mixture into around 12 golf ball sized balls and leave to one side for now.

Halloween treats - eyeball cakes and mummy cakes

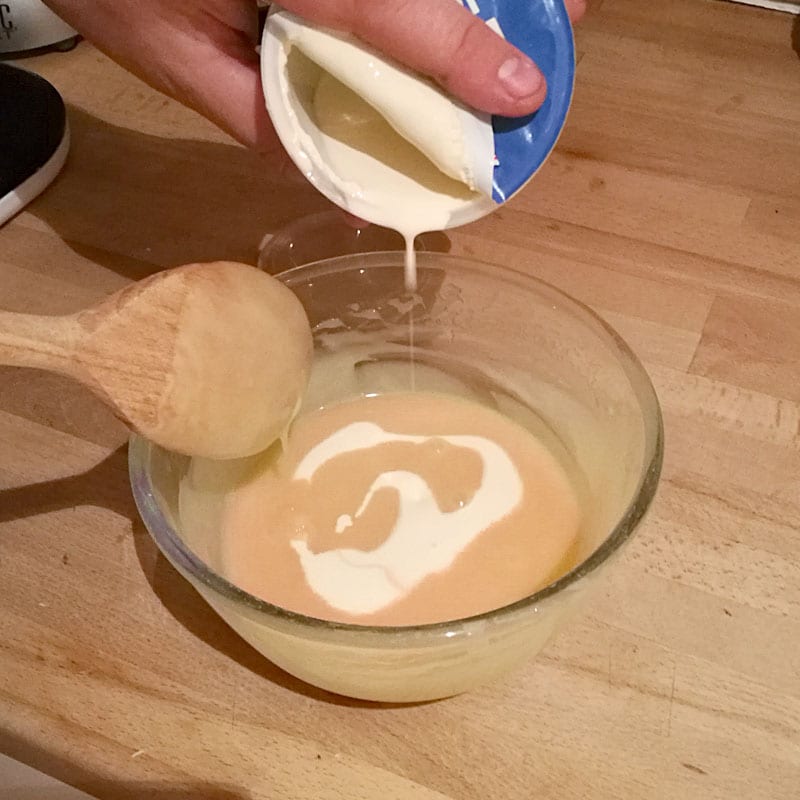
Step 4 – make the white chocolate ganache

The next step is to make the white chocolate ganache. To do this, break 200g of white chocolate into a microwaveable bowl and microwave in 30 second intervals until the chocolate has melted. When the chocolate has melted, stir in 100ml of double cream, as shown in the photo below.

Edible Halloween Treats - Eyeball Popsicle Cakes - Spooky Cakes

Step 5 – add the popsicle sticks

Take the popsicle sticks one at a time, dip them into the chocolate ganache and then insert each one into a cake ball. This will act as a glue to hold the popsicle stick in place. Once all 12 cake balls are done, put into the freezer for 10 to 15 minutes to set (not freeze).

Step 6 – prep your pumpkin

Whilst the popsicle cakes are setting, prep your pumpkin by making holes in them ready for the popsicle sticks to slot into. Use a knitting needle or a skewer for this.

Step 7 – cover the cake balls with chocolate ganache

If the chocolate ganache has started to set by the time you remove the cake balls from the freezer, give it a quick blast in the microwave again. Then dip each popsicle cake into the chocolate ganache, turning them around as you dip them and smooth the chocolate with a knife. This will give you the layered look for the mummy heads and you can make them smoother for the eyeballs. Insert the popsicle cakes into your pumpkin.

Step 8 – decorate to finish

Turn the chocolate covered popsicle cakes into eyeballs by cutting out circular shapes of green fondant icing and sticking them on. Roll tiny balls of black fondant icing to make the pupils for the eyeballs. These can be used for the mummy heads too.

To make the bloodshot part of the eyeballs, use a small cake decorating brush to stroke on a little bright red gel food colouring in vein-like shapes.

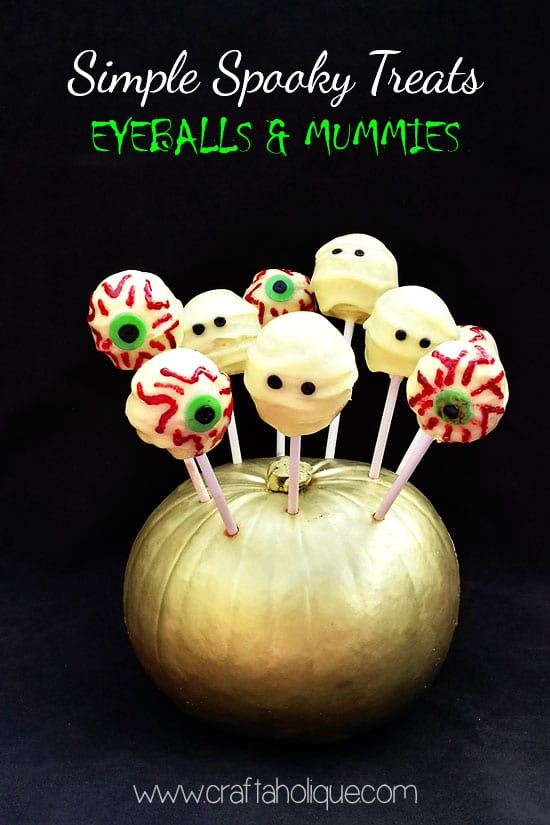
Spooky treats for Halloween – complete!

The finished result is pretty eye-catching (pardon the pun). 🙂 These treats really do taste amazing – the cake and buttercream centres are wonderfully soft and sweet. I hope you enjoy this recipe and that it helps make your Halloween a spooky one!

If you liked this post, please take a moment to share it online. Why not subscribe to my newsletter to be kept updated about future posts like this?

*Affiliate links are contained in this post to ingredients and materials that may help you make these spooky treats. If you make a purchase using one of my links, I’ll earn a small commission which will help me to keep this site up and running. Thank you for using my links if you are able to!

Autumn Treats - Spooky Cakes for Halloween - Eyeballs and Mummies - Craftaholique

Share this post!
  • save 
  • share 
  • tweet 
  • email 

Filed Under: Other, Recipes Hayley 1 Comment

Reader Interactions

Halloween DIY – No Carve Glitzy Pumpkins
Handmade Showcase: Giant Knitting & Where to Buy Giant Yarn

Trackbacks

  1. Eyeball and Mummy Cake Pops – Edible Crafts says:
    October 15, 2016 at 5:01 pm

    […] here on Craftaholique for the recipe and […]

    Reply

Leave a Reply Cancel reply

Your email address will not be published.

Primary Sidebar

Connect

  • E-mail
  • Facebook
  • Instagram
  • Pinterest
  • Twitter

Advert


Instagram

I finally finished this bead loom bracelet! Starte I finally finished this bead loom bracelet! Started it before the first lockdown... I think I lost my mojo for a while! So this is a flat piece of beadwork, which I then glued onto a cuff bracelet blank.
Started this loom beading project last May... Prou Started this loom beading project last May... Proud to say I finally finished it more than one year later! More photos coming soon! What's your longest ever project? #beads #beadwork #loombeading #crafts #crafting #craftblogger #crafty #longestprojectever
My latest beaded creation! Peyote with a twist. Lo My latest beaded creation! Peyote with a twist. Love the chunkiness of it and how it shimmers with the galvanised silver Miyuki Delica beads. #beads #beadwork #beadweavingpeyote #peyote #flatpeyotestitch #silver #beaded #beadedjewelryofinstagram #beadedring #beadedjewelry #miyukidelica #miyukipeyote #miyuki #miyukibeads #beading #crafts #crafting #craftblogger
My latest tubular peyote bracelet! It's made up of My latest tubular peyote bracelet! It's made up of hundreds of tiny Miyuki Delica beads in vibrant colours of metallic blue, silver, white and pink. The pattern is available in my Etsy shop, Craftaholique Designs. #beads #beadwork #beadweavingpeyote #tubularpeyotestitch #miyukipeyote #beading #beadingpattern #etsyshop #etsysellersofinstagram #etsyseller #etsyshopowner #bracelets #vibrant #tubularpeyote #beadaddict #beadaddiction #miyuki #miyukibeads
My finished bead embroidery - I've used it as an e My finished bead embroidery - I've used it as an embellishment for a beadwork storage case I've just made. I upcycled the case from an old padfolio / conference folder. Inside there's an integrated beading mat where I can do my beadwork - no more beads rolling away! I've posted a tutorial on my blog (link in bio).
My latest project... Bead embroidered flowers! I'm My latest project... Bead embroidered flowers! I'm making this as an embellishment for something. Will post the final project pic soon! #beadwork #beadembroidery #embroidery #embroiderydesign #embroideryart #embroidelicious #flowers #beads #beadedembroidery #beadedembellishment #crafts #crafting #keepcraftingcarryon #keepcraftalive #keepcraftingandcarryon #beaded #beadaddict #beadaddiction #embroideryhoop #craftblogger #crafty
Just finished this set of Miyuki Delica bracelets Just finished this set of Miyuki Delica bracelets in pretty colours of peach, white, pink and gold! I made the two diamond pattern bracelets using a bead loom. The single strand bracelet I just strung together. What do you think to my creation? #beads #beadwork #beadloom #beadloompattern #beadloomingbracelet #beadlooming #beadloombracelets #beadweaving #loombeading #loombead #beadingpattern #beadedjewelryofinstagram #beadaddict #beadaddiction #miyuki #miyukibeads #miyukidelica #crafts #crafting #craftblogger #crafty #bead #craftblogger #beadedbracelets #cuffbracelet #stackingbracelets
Though I've been beading for many years, this is t Though I've been beading for many years, this is the first time I've used a bead loom! It's pretty straightforward and quicker than peyote. #beading #beadloom #beadlooming #beadloomingbracelet #beadloomingnewbie #beadloombracelets #beadloompattern #beadwork #beadingpattern #miyuki #miyukibeads
I had tons of fun over the Easter weekend making t I had tons of fun over the Easter weekend making this rag rug sample with a kit from @raggedlife. This was part of an online workshop on rag rugging, with four other craft bloggers (hosted on Zoom by Elspeth at Ragged Life). It was brilliant! I'd highly recommend it. I've just posted about my experience on the blog - see link in bio.
Tomorrow, I'm taking part in an online rag rug wor Tomorrow, I'm taking part in an online rag rug workshop with @raggedlife! Can't wait, I've been wanting to try out rag rugging for ages. The class is being hosted on Zoom and will be fully interactive. Will post my project when I've done it!
I've needed a bit of colour in my life recently, a I've needed a bit of colour in my life recently, after the last few weeks of darkness. I made this bangle using tubular peyote stitch, with Miyuki Delica beads. Pattern available in my Etsy Shop, Craftaholique Designs!
If you're stuck for what to get your mum this Moth If you're stuck for what to get your mum this Mother's Day, I've put together an Etsy gift guide on my blog that you might like (link in bio). Etsy is my go-to place for gifts as you can find some really creative and unique products, plus it's a great way to support the handmade community! Featuring these amazing Etsy sellers... @pawprintillustration @kustomproductsinc @jemmamarston_design @butterflyandtoadstool @bonnenouvelle_uk @silveristicjewelry @crystalfiligree
Load More… Follow me on Instagram

Popular Posts

Popular Posts

Recent Posts

  • I’m back (with a new bead loom bracelet pattern)
  • Leaf Art Craft Project with Sharpie Pens
  • Chevron Tubular Peyote Bracelet Pattern
  • DIY Beadwork Storage Case (with Beading Mat)
  • Set of Two Bead Loom Bracelet Patterns

Advert


Recent Comments

  • Christina Athanasuleas on I’m back (with a new bead loom bracelet pattern)
  • Hayley on Beadwork Tutorial! Learn Flat Odd and Even Count Peyote Stitch
  • Jasmine on How I Salvaged My Tarnished Silver Pandora Bracelet
  • Lindsey Parry on How I Salvaged My Tarnished Silver Pandora Bracelet
  • Monica Shaw on Beadwork Tutorial! Learn Flat Odd and Even Count Peyote Stitch

Looking for Something?

Footer

My favourite place to shop handmade!

Featured on Feedspot

Disclaimer

Craftaholique is a personal blog. The content you'll find here is for your entertainment purposes only. Craftaholique is a participant in the Amazon Services LLC Associates Program, an affiliate advertising program designed to provide a means for sites to earn advertising fees by advertising and linking to www.amazon.co.uk and www.amazon.com. Read the full site disclaimer here.

Blogroll

  • Free Pretty Things For You
  • Golden Age Beads
  • Off The Beaded Path
  • The Graphics Fairy

© 2020 Craftaholique

We use cookies on our website to give you the most relevant experience by remembering your preferences and repeat visits. By clicking “Accept All”, you consent to the use of ALL the cookies. However, you may visit "Cookie Settings" to provide a controlled consent.
Cookie SettingsAccept All
Manage consent

Privacy Overview

This website uses cookies to improve your experience while you navigate through the website. Out of these, the cookies that are categorized as necessary are stored on your browser as they are essential for the working of basic functionalities of the website. We also use third-party cookies that help us analyze and understand how you use this website. These cookies will be stored in your browser only with your consent. You also have the option to opt-out of these cookies. But opting out of some of these cookies may affect your browsing experience.
Necessary
Always Enabled
Necessary cookies are absolutely essential for the website to function properly. This category only includes cookies that ensures basic functionalities and security features of the website. These cookies do not store any personal information.
Non-necessary
Any cookies that may not be particularly necessary for the website to function and is used specifically to collect user personal data via analytics, ads, other embedded contents are termed as non-necessary cookies. It is mandatory to procure user consent prior to running these cookies on your website.
SAVE & ACCEPT