• Skip to primary navigation
  • Skip to main content
  • Skip to primary sidebar
  • Skip to footer
  • Home
  • Tutorials
  • Crafts
    • Jewellery Making
      • Everything jewellery
      • Beadwork
      • Wire jewellery
      • Book reviews
    • Feltmaking
    • Crochet
    • Knitting
    • Kid’s crafts
    • Book reviews
    • Other
  • Inspiration
    • Everything inspirational
    • Handmade showcase
    • Colours
    • Materials
    • Crafty Links
    • Start a Blog
  • Lifestyle
    • Tips
    • Recipes
  • About
    • Advertise
  • Contact
  • Privacy Policy
    • Cookie Policy
  • Disclaimer / Disclosure

Craftaholique

Embracing The Handmade Life | UK Craft Blog

You are here: Home / Crafts / Cross Stitch / Pollyanna Pickering Prickly Pot Cross Stitch Kit Review

August 25, 2017

Pollyanna Pickering Prickly Pot Cross Stitch Kit Review

Pollyanna Pickering Prickly Pot Cross Stitch Kit Review by Craftaholique

*Affiliate links are included in this post.

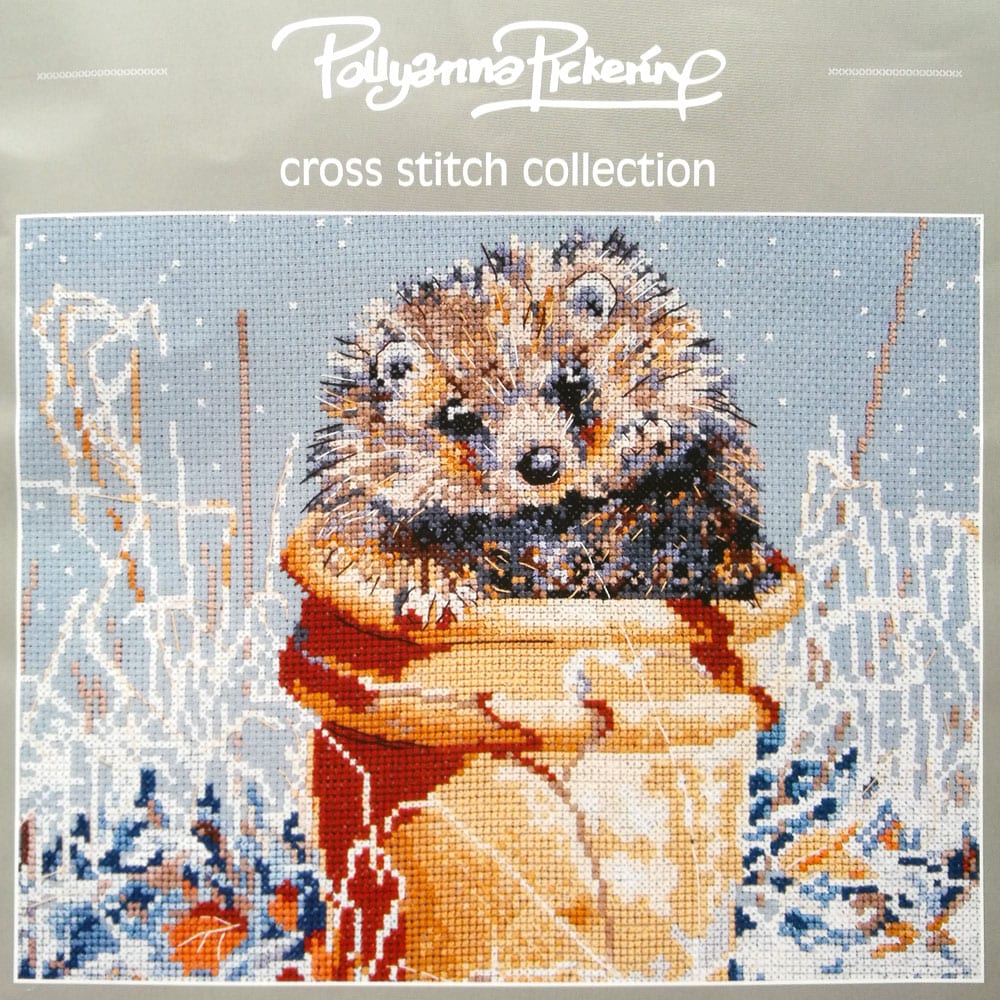
I thought I’d share with you a little something I’m working on today – this beautiful Pollyanna Pickering Prickly Pot Cross Stitch Kit, featuring a very cute and richly coloured hedgehog!

I’ve not been asked to review this product, this is a kit I treated myself to with some money I received for my birthday recently. Usually birthday money disappears into our food shopping budget, but this year, I’ve made a stand and decided to put it towards something I really wanted!

This is my first real encounter with cross stitch (I dabbled in tapestry when I visited the Stitching, Sewing & Hobbycrafts Show back in July) and I have to say I’m loving it! Although I might have bitten off slightly more than I can chew here, given that I’m a cross stitch beginner.

Pollyanna Pickering Prickly Pot Cross Stitch Kit Review by Craftaholique

I thought it might take me a month or two to finish the piece, but since working on it I’ve realised that cross stitch is not a quick craft! Nor should it be, since the art of sewing lots of tiny crosses to make a masterpiece is both entirely enjoyable and fantastic for mindfulness.

Considering that I’m racking up around 50 stitches per evening at the moment, I should have it finished in a year or so if I’m lucky!

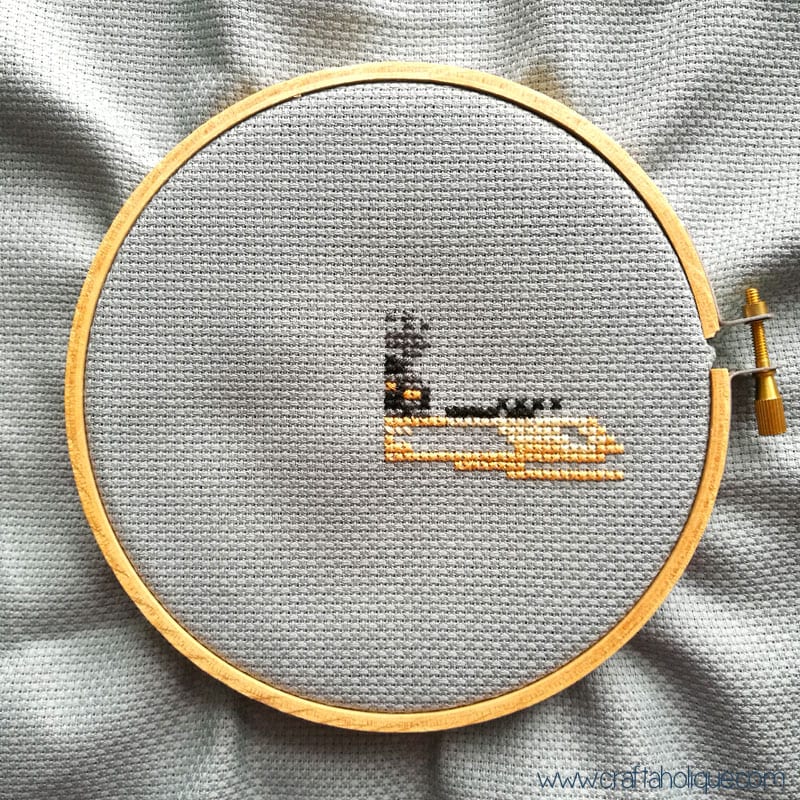
This is how far I’ve got with it during the last week (pic above). It doesn’t look much like a hedgehog yet, but I’m hopeful it may begin to resemble part of one in the next few weeks. 🙂

More about the Pollyanna Pickering Prickly Pot Cross Stitch Kit

Pollyanna Pickering Prickly Pot Cross Stitch Kit Review by Craftaholique

The size of the design is 25cm x 25cm, so perfect for turning into a piece of wall art afterwards. This kit is aimed at cross stitch lovers with a medium level skill set – I know, I’m a beginner – I just couldn’t resist the design though!

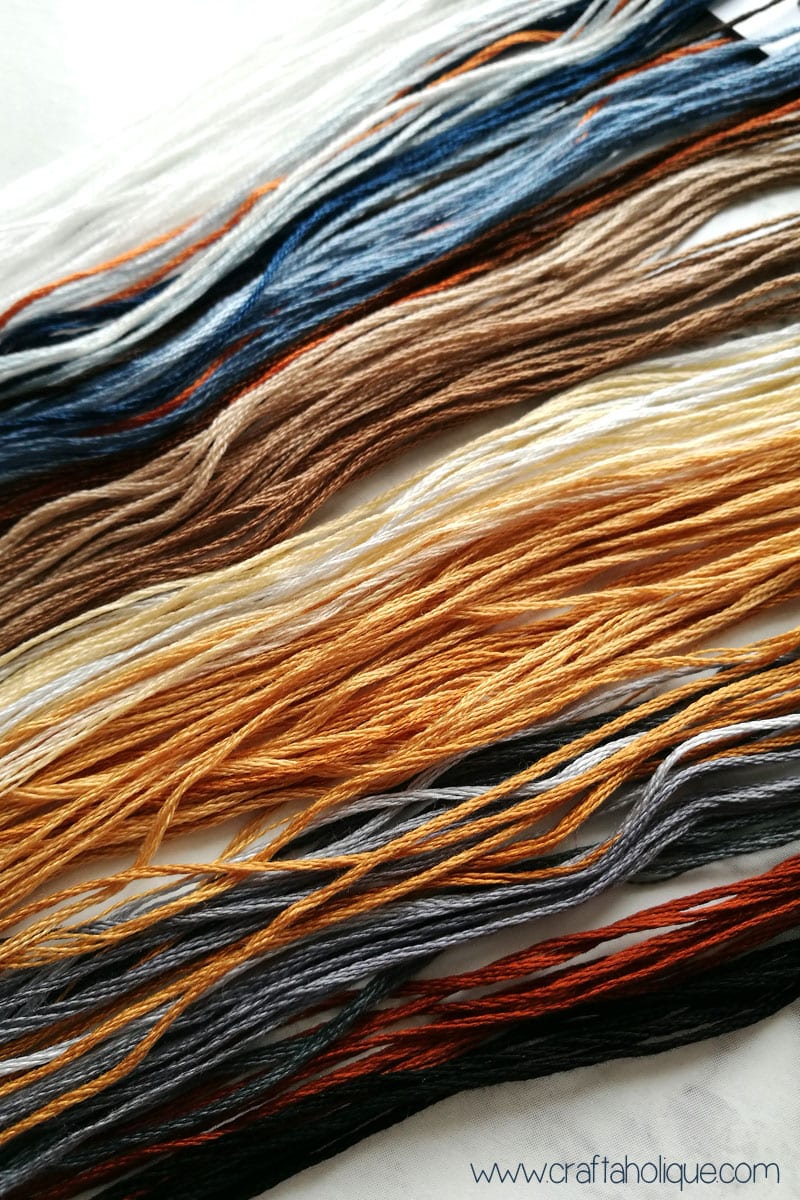
Mercifully, there’s a clear set of instructions included which detail how to do the stitches required (full cross stitch and back stitch). There’s a square of 14 count aida fabric, 2 x needles and the embroidery threads, which are coded and pre-sorted so you can see easily which colour is which. Just take a closer look at the fabulous colours for this project below…

Pollyanna Pickering Prickly Pot Cross Stitch Kit Review by Craftaholique

The pattern itself is fantastic, it’s a full visual chart where each cross stitch square is coded according to the colour chart. It cost £35 which is more than I wanted to spend on my first cross stitch kit, but like I said, I just fell in love with the design, so I had to have it!

See full details about the kit over at the Hobbycraft website here.

Things I’ve learned about cross stitch so far

Well, ironing the fabric beforehand was a bit tricky – it took ages to get the creases out! Then I had to find the centre square to start the design. Another time consuming task – I’m sure cross stitch crafters just “know” where the centre square is, but I did get my tape measure out just to make sure. I’ve paid £35 for this kit and I’m determined not to mess it up just because of starting in the wrong place!

I decided to use an embroidery hoop as I wasn’t sure how well I’d be able to hold the large fabric backing whilst sewing. To my dismay, the fabric instantly creased up again, but I’m going to worry about this later!

Note – my embroidery hoop wasn’t included in the kit, I had one lying around though. You can find them at Hobbycraft or on Etsy if you need one.

When I first started cross stitching, I kept tying a knot in the end of my thread for every new piece. It seems this isn’t required! I now just leave a short 1 inch tail and hold it in such a way that my stitches close over the tail as I’m working. Much easier than knotting (and it makes the back look a bit neater too).

Changing the thread every 5 minutes for different colours is a bit of a pain, so I’m trying to do sections of the same colour where possible. The instructions advise to work in areas no further than 2.5cm away without tying off the thread though.

A cross stitch masterpiece in progress

I’ve got a long way to go to complete the Pollyanna Pickering Prickly Pot Cross Stitch project, as you can see from the pictures. But I will update you with my progress now and then either on my blog or on Facebook (please like my page so you can see my updates)!

Are you a cross stitch fan? What are you working on right now?

Before you go, you might like these other sewing related posts below:

  • How to do Beaded Blanket Stitch
  • How to Make a Felt Owl Mobile Phone Case
  • Beadwork Tutorial: Learn Peyote Stitch

*Affiliate links are included in this post to Etsy and Hobbycraft. This means that if you make a purchase through one of my links, I will earn a small commission at no cost to you. I only ever recommend products that I think are great and any commissions help me to keep this site up and running. Thank you for using my links if you’re able to.

Pollyanna Pickering Prickly Pot Cross Stitch Kit Review by Craftaholique

*All images © Craftaholique (I have taken a photo of the front of the kit for the hedgehog images!)

Share this post!
  • save 
  • share 
  • tweet 
  • email 

Filed Under: Crafts, Cross Stitch, Inspiration Hayley 3 Comments

Reader Interactions

Felt Dog Keyring Kit Review – Amazing Craft
“Circles” Peyote Stitch Bracelet Pattern

Comments

  1. 1

    Sneaky Burrito says

    September 21, 2017 at 5:10 pm

    I know this is kind of an old post I’m replying to (I found you on Twitter and have been poking around your site since then), but to find the center square, you just fold the fabric in half twice and the center is at the corner of the folded fabric where there are no outside edges (hope that makes sense). You really don’t have to be more precise than that as there is usually a little wiggle room built in. (Just make sure you have the right orientation for your design if the fabric is rectangular…)

    I never iron the fabric beforehand. It doesn’t seem to make a difference for me with the finished product. (I have ironed afterwards, if I am getting a fancy frame to put it in.)

    Reply
    • 2

      Hayley says

      September 26, 2017 at 9:58 am

      Thanks so much for your tips! That does make sense about folding the fabric, I did do that in the end but wanted to make sure I’d definitely got the centre square so ended up measuring it too! Now I’ve been working on the cross stitch for a while, I can see that there will be plenty of room around the edge, so finding the exact centre square doesn’t really matter. Can I ask, do you wash your cross stitch work afterwards? My instructions say that I should (in cool water), but I’m worried about ruining it. What’s your experience on this? Thank you in advance if you get time to comment again!

      Reply
      • 3

        Sneaky Burrito says

        September 26, 2017 at 7:43 pm

        On the few pieces I have framed and given as gifts, I did not wash. I didn’t want to ruin anything, either, not after I’d spent hours and hours working on a project. Most of what I have given as gifts has come from kits, and sometimes the embroidery floss in kits is non-branded (I live in the US and find this to be true for most brands of kit I have access to), so I don’t know if it is colorfast, and I just didn’t want to take the risk. But, I did take care to have clean hands when stitching.

        I have not made any stitched towels, pillowcases, etc., though. If I planned to, I would probably test for colorfastness before getting started, because you never know if a guest is going to use the fancy decorative towels in the bathroom, and washing later on might be required.

        Reply

Leave a Reply Cancel reply

Your email address will not be published. Required fields are marked *

Primary Sidebar

Welcome!

Welcome!

Hi, I'm Hayley! Thanks for visiting Craftaholique, my little corner of the internet where I blog about crafts, beading, handmade products and lots of other stuff relating to creativity. Stay a while and have a browse!

Connect

  • E-mail
  • Facebook
  • Instagram
  • Pinterest
  • Twitter

Advert


Instagram

Work in progress! A new pattern I'm working on. Lo Work in progress! A new pattern I'm working on. Loving the metallic green colour. 😍 #beads #beadwork #peyote #bracelets #braceletpattern #peyotestitch #jewellerymaking #crafts #crafting
Hi all! It's been a very long time since I've post Hi all! It's been a very long time since I've posted here. I've been working on a new venture - surface pattern design. This is my first attempt at a seamless pattern. It's part of a collection I'm working on called 'Mum's Garden'. Mum loved hedgehogs, and they always frequented her garden to enjoy the food she put out for them. 😍 Honest opinions! What do you think? Could this work for wrapping paper, notebook covers, etc? Thanks for looking! #surfacepatterndesign #creativebusiness #creativeentrepreneur #graphicdesign #digitalart #hedgehogs #patterns #seamlesspattern
I finally finished this bead loom bracelet! Starte I finally finished this bead loom bracelet! Started it before the first lockdown... I think I lost my mojo for a while! So this is a flat piece of beadwork, which I then glued onto a cuff bracelet blank.
Started this loom beading project last May... Prou Started this loom beading project last May... Proud to say I finally finished it more than one year later! More photos coming soon! What's your longest ever project? #beads #beadwork #loombeading #crafts #crafting #craftblogger #crafty #longestprojectever
My latest beaded creation! Peyote with a twist. Lo My latest beaded creation! Peyote with a twist. Love the chunkiness of it and how it shimmers with the galvanised silver Miyuki Delica beads. #beads #beadwork #beadweavingpeyote #peyote #flatpeyotestitch #silver #beaded #beadedjewelryofinstagram #beadedring #beadedjewelry #miyukidelica #miyukipeyote #miyuki #miyukibeads #beading #crafts #crafting #craftblogger
My latest tubular peyote bracelet! It's made up of My latest tubular peyote bracelet! It's made up of hundreds of tiny Miyuki Delica beads in vibrant colours of metallic blue, silver, white and pink. The pattern is available in my Etsy shop, Craftaholique Designs. #beads #beadwork #beadweavingpeyote #tubularpeyotestitch #miyukipeyote #beading #beadingpattern #etsyshop #etsysellersofinstagram #etsyseller #etsyshopowner #bracelets #vibrant #tubularpeyote #beadaddict #beadaddiction #miyuki #miyukibeads
My finished bead embroidery - I've used it as an e My finished bead embroidery - I've used it as an embellishment for a beadwork storage case I've just made. I upcycled the case from an old padfolio / conference folder. Inside there's an integrated beading mat where I can do my beadwork - no more beads rolling away! I've posted a tutorial on my blog (link in bio).
My latest project... Bead embroidered flowers! I'm My latest project... Bead embroidered flowers! I'm making this as an embellishment for something. Will post the final project pic soon! #beadwork #beadembroidery #embroidery #embroiderydesign #embroideryart #embroidelicious #flowers #beads #beadedembroidery #beadedembellishment #crafts #crafting #keepcraftingcarryon #keepcraftalive #keepcraftingandcarryon #beaded #beadaddict #beadaddiction #embroideryhoop #craftblogger #crafty
Just finished this set of Miyuki Delica bracelets Just finished this set of Miyuki Delica bracelets in pretty colours of peach, white, pink and gold! I made the two diamond pattern bracelets using a bead loom. The single strand bracelet I just strung together. What do you think to my creation? #beads #beadwork #beadloom #beadloompattern #beadloomingbracelet #beadlooming #beadloombracelets #beadweaving #loombeading #loombead #beadingpattern #beadedjewelryofinstagram #beadaddict #beadaddiction #miyuki #miyukibeads #miyukidelica #crafts #crafting #craftblogger #crafty #bead #craftblogger #beadedbracelets #cuffbracelet #stackingbracelets
Though I've been beading for many years, this is t Though I've been beading for many years, this is the first time I've used a bead loom! It's pretty straightforward and quicker than peyote. #beading #beadloom #beadlooming #beadloomingbracelet #beadloomingnewbie #beadloombracelets #beadloompattern #beadwork #beadingpattern #miyuki #miyukibeads
I had tons of fun over the Easter weekend making t I had tons of fun over the Easter weekend making this rag rug sample with a kit from @raggedlife. This was part of an online workshop on rag rugging, with four other craft bloggers (hosted on Zoom by Elspeth at Ragged Life). It was brilliant! I'd highly recommend it. I've just posted about my experience on the blog - see link in bio.
Tomorrow, I'm taking part in an online rag rug wor Tomorrow, I'm taking part in an online rag rug workshop with @raggedlife! Can't wait, I've been wanting to try out rag rugging for ages. The class is being hosted on Zoom and will be fully interactive. Will post my project when I've done it!
Load More… Follow me on Instagram

Popular Posts

Popular Posts

Recent Posts

  • Craftaholique is being revived!
  • I’m back (with a new bead loom bracelet pattern)
  • Leaf Art Craft Project with Sharpie Pens
  • Chevron Tubular Peyote Bracelet Pattern
  • DIY Beadwork Storage Case (with Beading Mat)

Advert


Recent Comments

  • Hayley on BeadTool 4 Review – Make Your Own Beading Patterns
  • Susan Nicholas on BeadTool 4 Review – Make Your Own Beading Patterns
  • Heather on How I Salvaged My Tarnished Silver Pandora Bracelet
  • Hayley on DIY Beadwork Storage Case (with Beading Mat)
  • Hayley on How to Use Pinterest to Significantly Boost Your Etsy Sales

Looking for Something?

Footer

My favourite place to shop handmade!

Featured on Feedspot

Disclaimer

Craftaholique is a personal blog. The content you'll find here is for your entertainment purposes only. Craftaholique is a participant in the Amazon Services LLC Associates Program, an affiliate advertising program designed to provide a means for sites to earn advertising fees by advertising and linking to www.amazon.co.uk and www.amazon.com. Read the full site disclaimer here.

Blogroll

  • Free Pretty Things For You
  • Golden Age Beads
  • Off The Beaded Path
  • The Graphics Fairy

© 2020 Craftaholique