• Skip to primary navigation
  • Skip to main content
  • Skip to primary sidebar
  • Skip to footer
  • Home
  • Tutorials
  • Crafts
    • Jewellery Making
      • Everything jewellery
      • Beadwork
      • Wire jewellery
      • Book reviews
    • Feltmaking
    • Crochet
    • Knitting
    • Kid’s crafts
    • Book reviews
    • Other
  • Inspiration
    • Everything inspirational
    • Handmade showcase
    • Colours
    • Materials
    • Crafty Links
    • Start a Blog
  • Lifestyle
    • Tips
    • Recipes
  • About
    • Advertise
  • Contact
  • Privacy Policy
    • Cookie Policy
  • Disclaimer / Disclosure

Craftaholique

Embracing The Handmade Life | UK Craft Blog

You are here: Home / Crafts / Mother’s Day Craft Project: Upcycled Jam Jar Vase!

March 21, 2017

Mother’s Day Craft Project: Upcycled Jam Jar Vase!

Mothers Day Craft Ideas - Pretty Jam Jar Vase - Silhouette Cameo - a detailed guide from Craftaholique

*Affiliate links are included in this post.

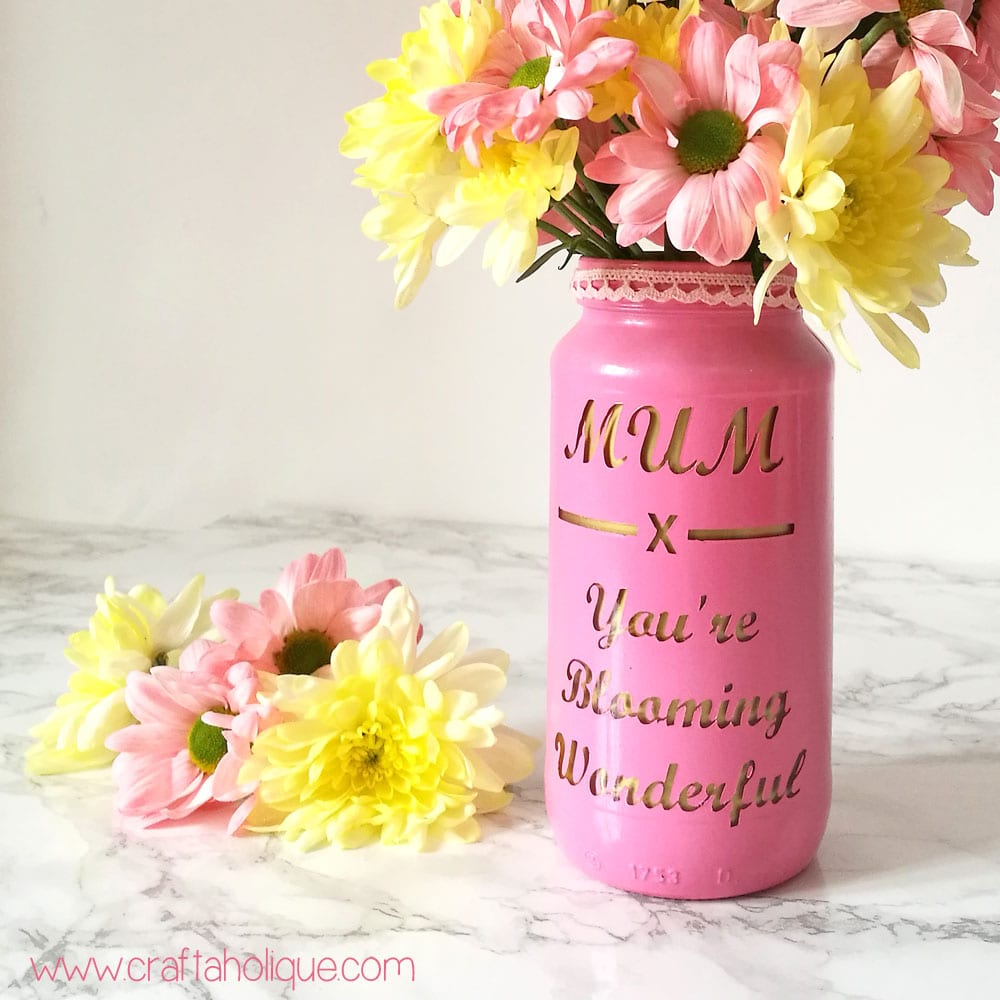
Mother’s Day is looming and I wouldn’t be doing my craft blogger job properly if I didn’t produce a craft tutorial especially for the occasion! I decided to make a beautiful vase using a tall glass jam jar and a new tool I’ve been trying out: my fantastic Silhouette Cameo.

To make this project you’ll need the following materials:

  • Silhouette Cameo (available at Amazon.co.uk and Amazon.com)
  • Silhouette Cameo Studio Software (you should get this with the Silhouette Cameo)
  • Adhesive vinyl sheet
  • Adhestive transfer paper
  • Spray paint in gold and pink that’s compatible with glass (I used SupaDec Gold Spray Paint and Plasti-kote Fast Dry Enamel in Pink)
  • Glass jam / sauce jar
  • Lace ribbon (optional)
  • Glue gun (optional)

What is the Silhouette Cameo?

How to use the Silhouette Cameo - a detailed guide from Craftaholique

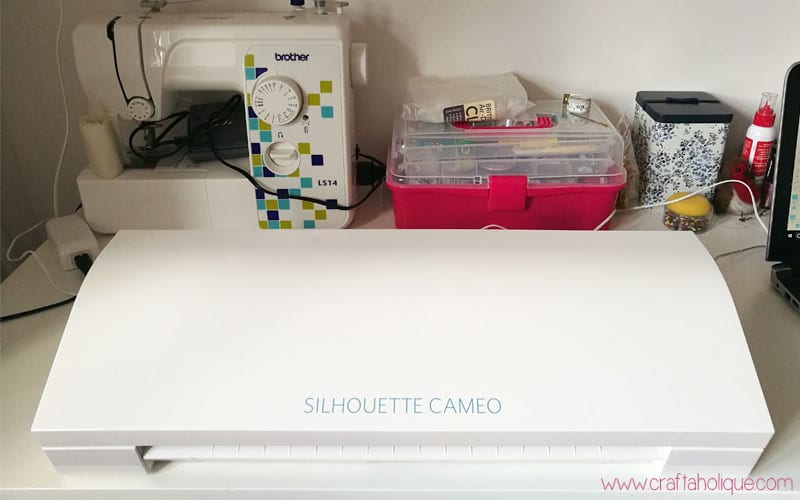
A quick note on the Silhouette Cameo before we begin. The Silhouette Cameo is a very clever electronic cutting machine that you link up to your computer. You can use the Silhouette Cameo Studio Software to create any design you like and then print and cut it out using the Silhouette Cameo. It’s compatible with paper, vinyl or fabric. No more aching scissor-hands, thank you very much!

It’s not the cheapest tool, but it’s a really excellent product and worth getting if you’re a crafter as you can do so many things with it – t-shirt designs, lettering, scrapbooking and much more.

Step 1: Designing with the Silhouette Cameo Studio software

How to use the Silhouette Cameo - a detailed guide from Craftaholique

For this Mother’s Day vase project, I wanted to create some lettering as part of the design: “Mum – You’re Blooming Wonderful” (perfect for a flower holder, right?). I loaded up the Silhouette Cameo Studio Software and created the text that I wanted. You can play around with fonts etc!

See picture above (apologies for the quality of this shot, it was late at night and I had to work with the most awful lighting)!

Step 2: Printing vinyl using the Silhouette Cameo

How to use the Silhouette Cameo - a detailed guide from Craftaholique

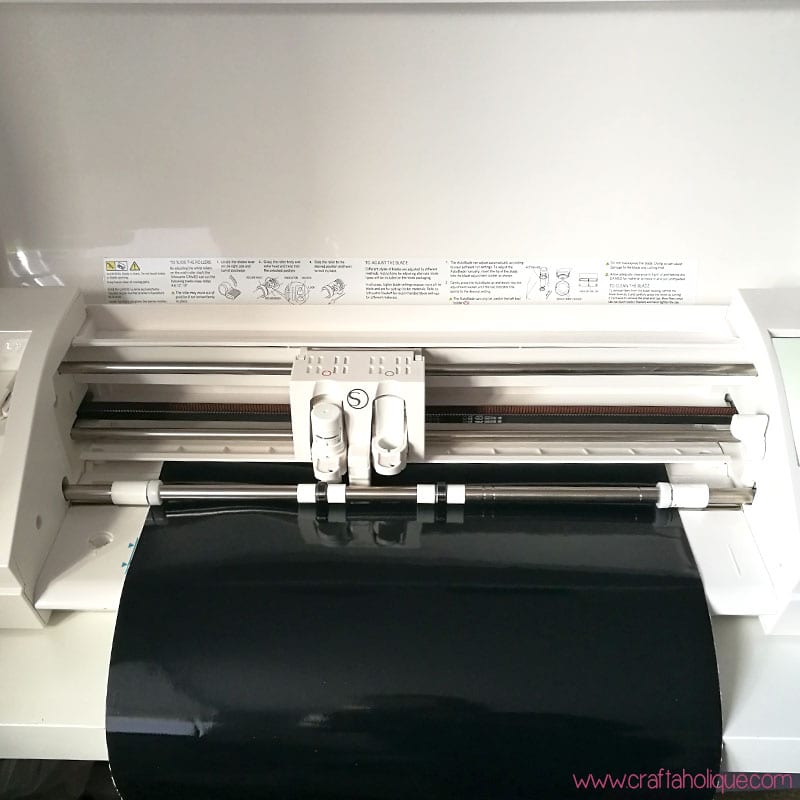
Once the design is created, you then print it out onto a vinyl sheet. I used black vinyl for this, as the colour doesn’t matter when you’re using it to create a reverse design. The Silhouette Cameo cuts out the design at the same time, you can just about see the lettering in the image below, after I’d trimmed the sheet.

How to use the Silhouette Cameo - a detailed guide from Craftaholique

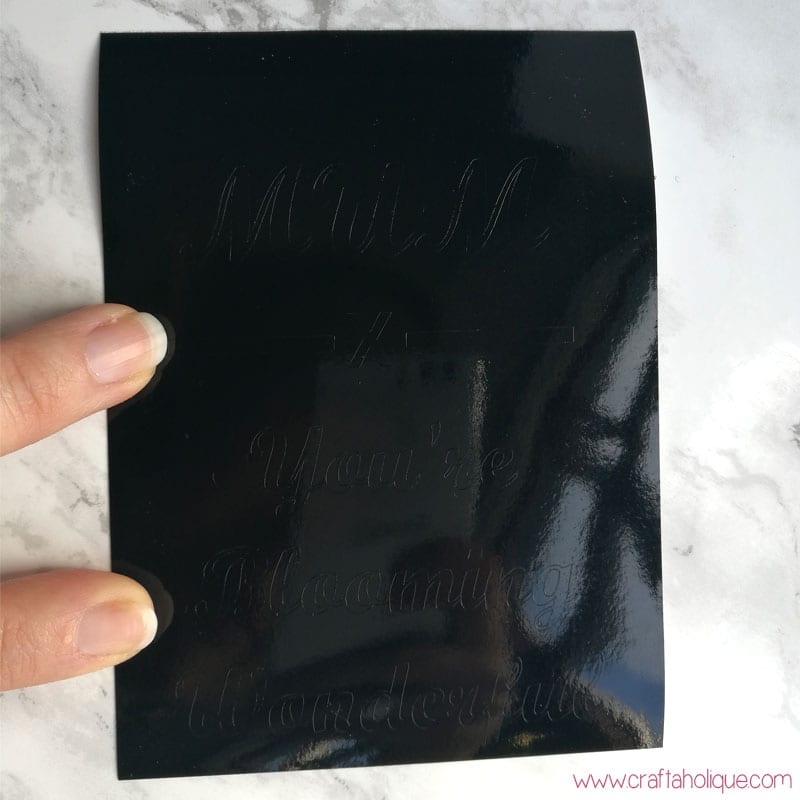
Step 3: Peeling away the lettering

How to use the Silhouette Cameo - a step by step guide from Craftaholique

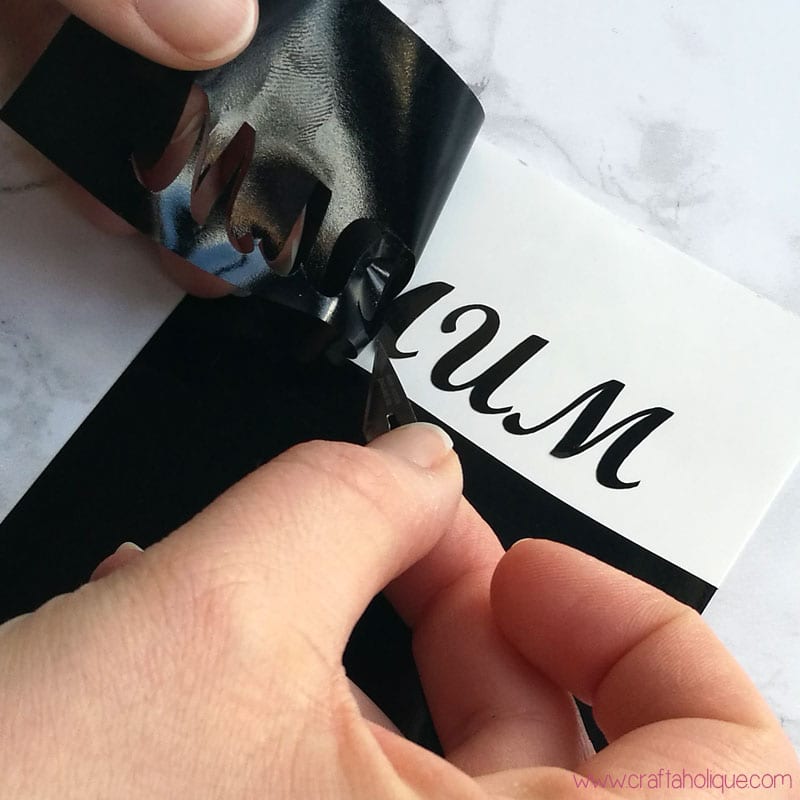
Carefully peel away (this process is called weeding) the surround of the vinyl sheet, leaving the lettering on the background. A sharp blade is useful for this part of the process and it’s a little bit time consuming, just to warn you!

Step 4: Transferring the lettering

How to use the Silhouette Cameo - a step by step guide from Craftaholique

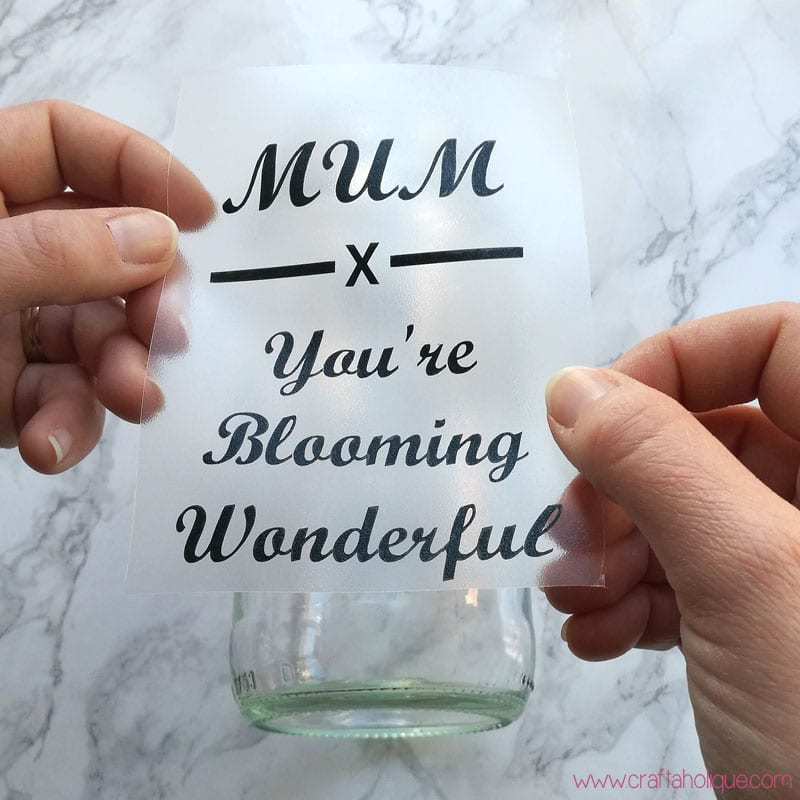
When you’ve done that, you’ll need to overlay a clear transfer sheet on top of your design and press it down firmly over the lettering. When you peel the transfer sheet away from the white vinyl background, the lettering will stay on the transfer sheet, ready for you to place onto the glass jar.

Step 5: Transferring the lettering continued!

Mothers Day Craft Project - Jam Jar Vase

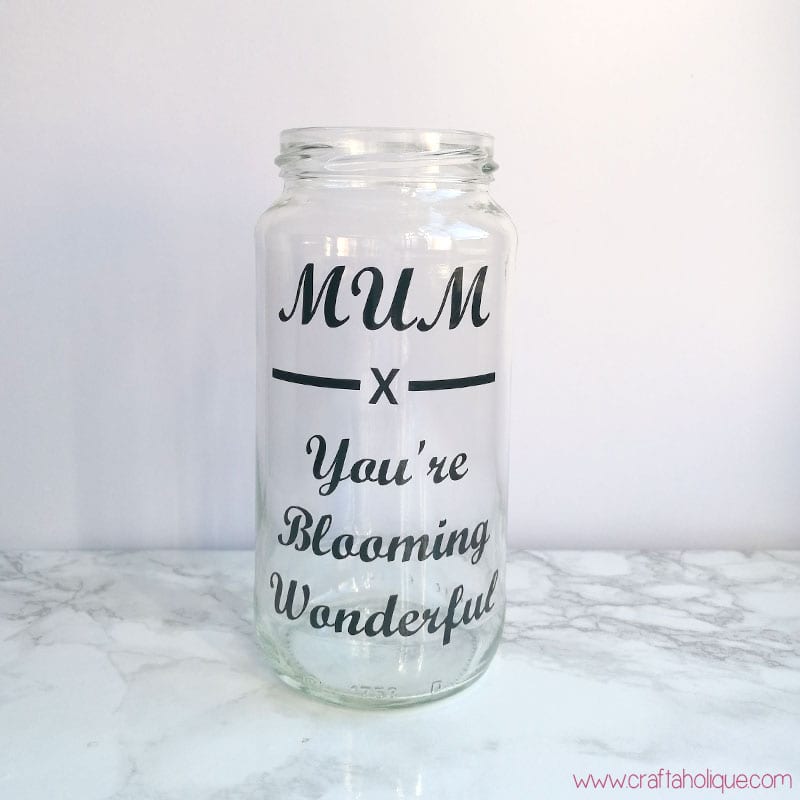
When you’ve transferred the lettering onto the jar, you can peel away the transfer sheet and hopefully, you’ll have something that looks like the above photo!

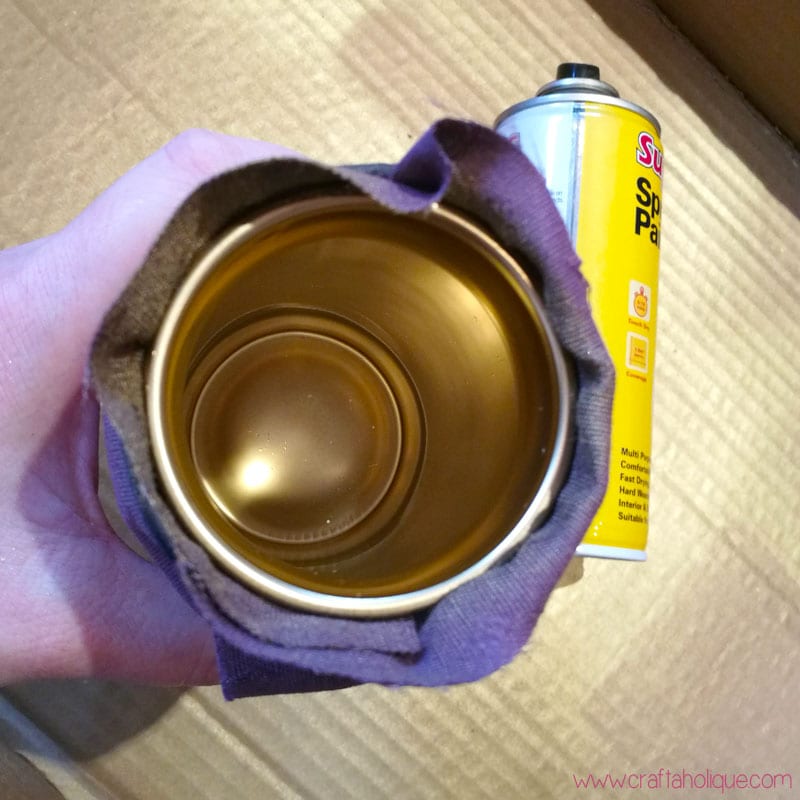
Step 6: Let loose with the spray paint!

Mothers Day Craft Project - Jam Jar Vase

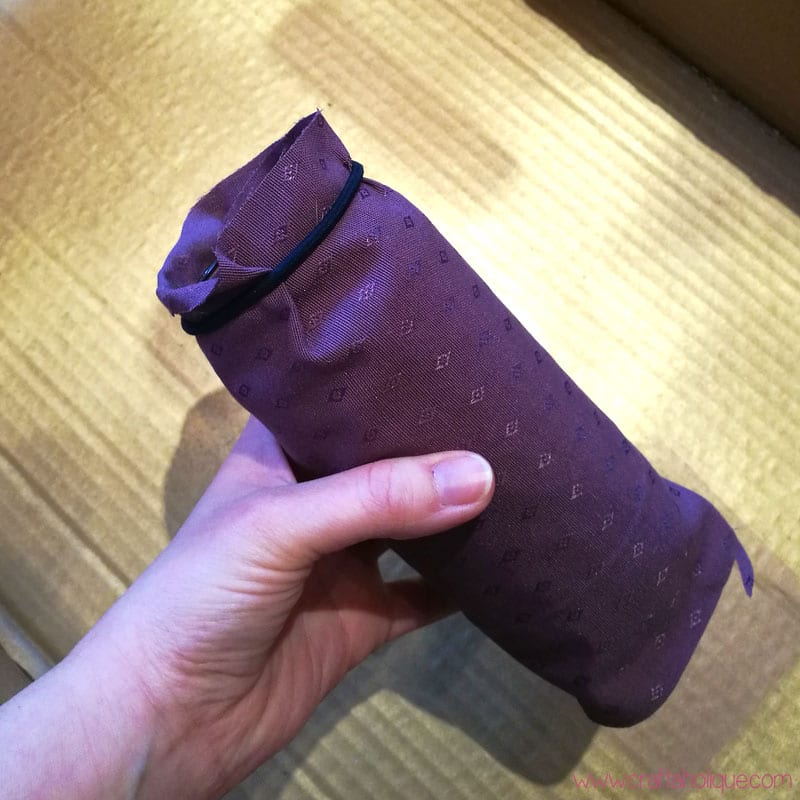
Now for the really fun part, where you can let loose with spray paint. Use gold paint for the inside of the jar and cover the outside with a scrap piece of fabric to make sure you don’t get any gold paint on the outside. I used a hair band to keep the fabric nice and snug against the rim of the jar!

Spray the inside of the jar evenly, using a couple of coats if you need to (wait an hour between coats)!

Mothers Day Craft Project - Spray Paint Jam Jar Vase

Step 7: Spray another colour over the jar and vinyl lettering

Mothers Day Craft Project - Spray Paint Jam Jar Vase

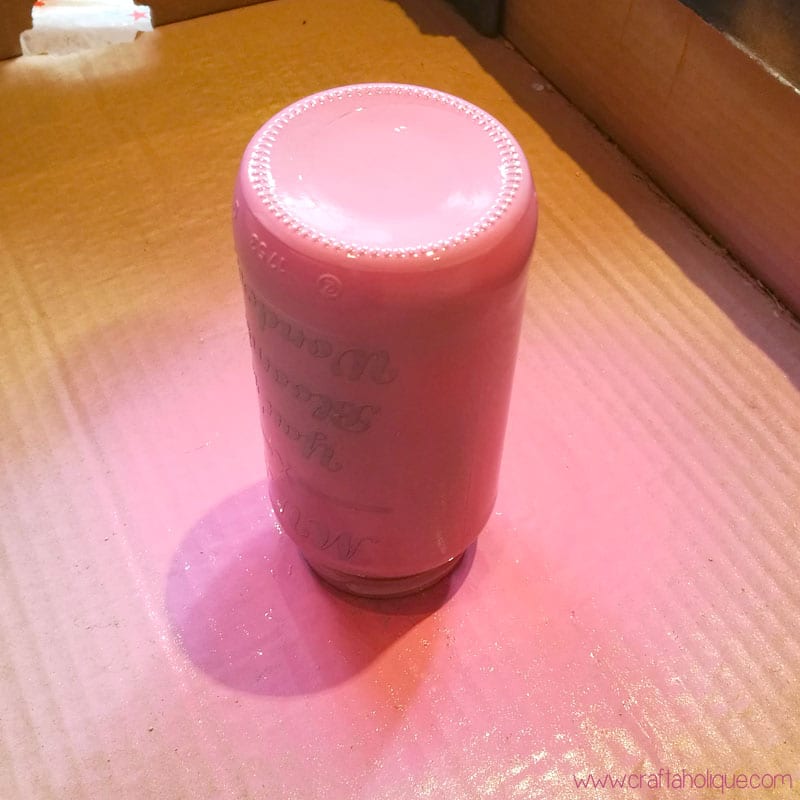
Then spray the outside of the jar with pink spray paint, going over the lettering as you do so. Make sure you cover the jar a few times, using thin even coats. The lettering should be completely pink by the time you’ve finished!

Step 8: Peel away the lettering to reveal the reverse colour

Mothers Day Craft Project - Spray Paint Jam Jar Vase using Silhouette Cameo

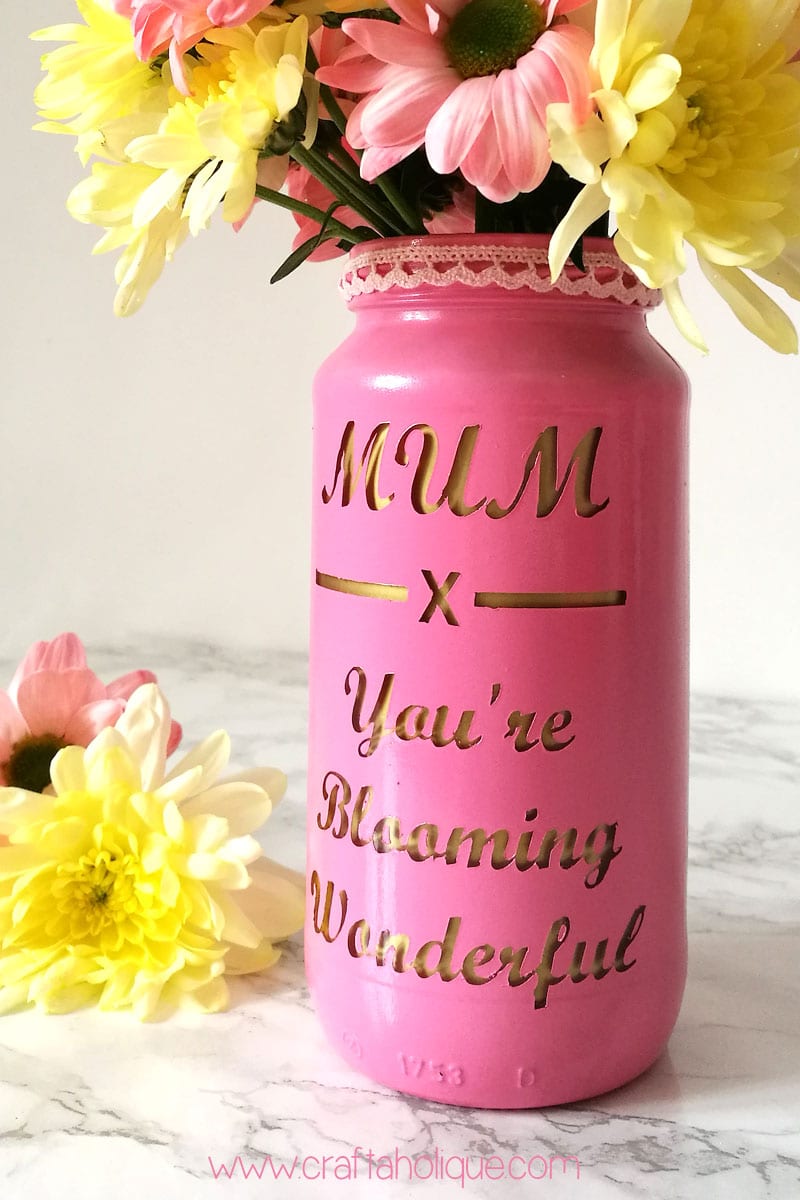
Once the spray paint has dried, you can carefully peel away the lettering – use a sharp blade or sharp tweezers for accuracy. Take care not to peel the surrounding pink spray paint away. You’ll see the gold colour coming through the vase for the lettering, making it look absolutely beautiful!

If you want to, you can cover up the rim with a little ribbon. I used lace ribbon with my hot glue gun to stick this on.

A gift Mum will love!

Another option you can try (if you don’t want to go to all the trouble of peeling off the lettering to create a reverse design) is to just use a colour vinyl that you love and stick the design on after spray painting the outside of the jar.

You can present the upcycled vase to your mum on Mother’s Day just as it is, or fill with pretty flowers beforehand! I hope you enjoyed this Mother’s Day craft tutorial. Please take a minute to share this post online if so.

Before you go, check out these posts!

  • How to Make Beautiful Waterfall Earrings
  • Handmade Showcase – Gorgeous Evening Bags
  • Cute Beaded Ribbon Bracelet

*Affiliate links to Etsy and Amazon are included in this post. This means that if you make a purchase through one of my links, I will earn a small commission at no cost to you. Craftaholique is a participant in the Amazon Services LLC Associates Program, an affiliate advertising program designed to provide a means for sites to earn advertising fees by advertising and linking to www.amazon.co.uk and www.amazon.com. I only ever recommend products that I think are great and any commissions help me to keep this site up and running. Thank you for using my links if you’re able to.

Mothers Day Craft Project - Jam Jar Vase with Spray Paint and Silhouette Cameo

*All images owned by Craftaholique. Please contact me if you’d like to use my images on your own website.

Share this post!
  • save 
  • share 
  • tweet 
  • email 

Filed Under: Crafts, Other, Tutorials Hayley 2 Comments

Reader Interactions

Peyote Stitch Beaded Bracelet Pattern – Scattered Waves
Easter Craft Project! How to Make Easter Egg Fairy Lights

Comments

  1. 1

    Julie Christiansen says

    March 26, 2017 at 7:13 pm

    This is such a fun vase. Mother’s everywhere will love it!
    Thanks for sharing at My Busy Beehive’s #beeparty last week! Hope to see you again!

    Reply
    • 2

      Hayley says

      March 29, 2017 at 7:11 pm

      Thanks Julie, glad you like it! Appreciate you stopping by and commenting!

      Reply

Leave a Reply Cancel reply

Your email address will not be published.

Primary Sidebar

Connect

  • E-mail
  • Facebook
  • Instagram
  • Pinterest
  • Twitter

Advert


Instagram

I finally finished this bead loom bracelet! Starte I finally finished this bead loom bracelet! Started it before the first lockdown... I think I lost my mojo for a while! So this is a flat piece of beadwork, which I then glued onto a cuff bracelet blank.
Started this loom beading project last May... Prou Started this loom beading project last May... Proud to say I finally finished it more than one year later! More photos coming soon! What's your longest ever project? #beads #beadwork #loombeading #crafts #crafting #craftblogger #crafty #longestprojectever
My latest beaded creation! Peyote with a twist. Lo My latest beaded creation! Peyote with a twist. Love the chunkiness of it and how it shimmers with the galvanised silver Miyuki Delica beads. #beads #beadwork #beadweavingpeyote #peyote #flatpeyotestitch #silver #beaded #beadedjewelryofinstagram #beadedring #beadedjewelry #miyukidelica #miyukipeyote #miyuki #miyukibeads #beading #crafts #crafting #craftblogger
My latest tubular peyote bracelet! It's made up of My latest tubular peyote bracelet! It's made up of hundreds of tiny Miyuki Delica beads in vibrant colours of metallic blue, silver, white and pink. The pattern is available in my Etsy shop, Craftaholique Designs. #beads #beadwork #beadweavingpeyote #tubularpeyotestitch #miyukipeyote #beading #beadingpattern #etsyshop #etsysellersofinstagram #etsyseller #etsyshopowner #bracelets #vibrant #tubularpeyote #beadaddict #beadaddiction #miyuki #miyukibeads
My finished bead embroidery - I've used it as an e My finished bead embroidery - I've used it as an embellishment for a beadwork storage case I've just made. I upcycled the case from an old padfolio / conference folder. Inside there's an integrated beading mat where I can do my beadwork - no more beads rolling away! I've posted a tutorial on my blog (link in bio).
My latest project... Bead embroidered flowers! I'm My latest project... Bead embroidered flowers! I'm making this as an embellishment for something. Will post the final project pic soon! #beadwork #beadembroidery #embroidery #embroiderydesign #embroideryart #embroidelicious #flowers #beads #beadedembroidery #beadedembellishment #crafts #crafting #keepcraftingcarryon #keepcraftalive #keepcraftingandcarryon #beaded #beadaddict #beadaddiction #embroideryhoop #craftblogger #crafty
Just finished this set of Miyuki Delica bracelets Just finished this set of Miyuki Delica bracelets in pretty colours of peach, white, pink and gold! I made the two diamond pattern bracelets using a bead loom. The single strand bracelet I just strung together. What do you think to my creation? #beads #beadwork #beadloom #beadloompattern #beadloomingbracelet #beadlooming #beadloombracelets #beadweaving #loombeading #loombead #beadingpattern #beadedjewelryofinstagram #beadaddict #beadaddiction #miyuki #miyukibeads #miyukidelica #crafts #crafting #craftblogger #crafty #bead #craftblogger #beadedbracelets #cuffbracelet #stackingbracelets
Though I've been beading for many years, this is t Though I've been beading for many years, this is the first time I've used a bead loom! It's pretty straightforward and quicker than peyote. #beading #beadloom #beadlooming #beadloomingbracelet #beadloomingnewbie #beadloombracelets #beadloompattern #beadwork #beadingpattern #miyuki #miyukibeads
I had tons of fun over the Easter weekend making t I had tons of fun over the Easter weekend making this rag rug sample with a kit from @raggedlife. This was part of an online workshop on rag rugging, with four other craft bloggers (hosted on Zoom by Elspeth at Ragged Life). It was brilliant! I'd highly recommend it. I've just posted about my experience on the blog - see link in bio.
Tomorrow, I'm taking part in an online rag rug wor Tomorrow, I'm taking part in an online rag rug workshop with @raggedlife! Can't wait, I've been wanting to try out rag rugging for ages. The class is being hosted on Zoom and will be fully interactive. Will post my project when I've done it!
I've needed a bit of colour in my life recently, a I've needed a bit of colour in my life recently, after the last few weeks of darkness. I made this bangle using tubular peyote stitch, with Miyuki Delica beads. Pattern available in my Etsy Shop, Craftaholique Designs!
If you're stuck for what to get your mum this Moth If you're stuck for what to get your mum this Mother's Day, I've put together an Etsy gift guide on my blog that you might like (link in bio). Etsy is my go-to place for gifts as you can find some really creative and unique products, plus it's a great way to support the handmade community! Featuring these amazing Etsy sellers... @pawprintillustration @kustomproductsinc @jemmamarston_design @butterflyandtoadstool @bonnenouvelle_uk @silveristicjewelry @crystalfiligree
Load More… Follow me on Instagram

Popular Posts

Popular Posts

Recent Posts

  • I’m back (with a new bead loom bracelet pattern)
  • Leaf Art Craft Project with Sharpie Pens
  • Chevron Tubular Peyote Bracelet Pattern
  • DIY Beadwork Storage Case (with Beading Mat)
  • Set of Two Bead Loom Bracelet Patterns

Advert


Recent Comments

  • Christina Athanasuleas on I’m back (with a new bead loom bracelet pattern)
  • Hayley on Beadwork Tutorial! Learn Flat Odd and Even Count Peyote Stitch
  • Jasmine on How I Salvaged My Tarnished Silver Pandora Bracelet
  • Lindsey Parry on How I Salvaged My Tarnished Silver Pandora Bracelet
  • Monica Shaw on Beadwork Tutorial! Learn Flat Odd and Even Count Peyote Stitch

Looking for Something?

Footer

My favourite place to shop handmade!

Featured on Feedspot

Disclaimer

Craftaholique is a personal blog. The content you'll find here is for your entertainment purposes only. Craftaholique is a participant in the Amazon Services LLC Associates Program, an affiliate advertising program designed to provide a means for sites to earn advertising fees by advertising and linking to www.amazon.co.uk and www.amazon.com. Read the full site disclaimer here.

Blogroll

  • Free Pretty Things For You
  • Golden Age Beads
  • Off The Beaded Path
  • The Graphics Fairy

© 2020 Craftaholique

We use cookies on our website to give you the most relevant experience by remembering your preferences and repeat visits. By clicking “Accept All”, you consent to the use of ALL the cookies. However, you may visit "Cookie Settings" to provide a controlled consent.
Cookie SettingsAccept All
Manage consent

Privacy Overview

This website uses cookies to improve your experience while you navigate through the website. Out of these, the cookies that are categorized as necessary are stored on your browser as they are essential for the working of basic functionalities of the website. We also use third-party cookies that help us analyze and understand how you use this website. These cookies will be stored in your browser only with your consent. You also have the option to opt-out of these cookies. But opting out of some of these cookies may affect your browsing experience.
Necessary
Always Enabled
Necessary cookies are absolutely essential for the website to function properly. This category only includes cookies that ensures basic functionalities and security features of the website. These cookies do not store any personal information.
Non-necessary
Any cookies that may not be particularly necessary for the website to function and is used specifically to collect user personal data via analytics, ads, other embedded contents are termed as non-necessary cookies. It is mandatory to procure user consent prior to running these cookies on your website.
SAVE & ACCEPT