• Skip to primary navigation
  • Skip to main content
  • Skip to primary sidebar
  • Skip to footer
  • Home
  • Tutorials
  • Crafts
    • Jewellery Making
      • Everything jewellery
      • Beadwork
      • Wire jewellery
      • Book reviews
    • Feltmaking
    • Crochet
    • Knitting
    • Kid’s crafts
    • Book reviews
    • Other
  • Inspiration
    • Everything inspirational
    • Handmade showcase
    • Colours
    • Materials
    • Crafty Links
    • Start a Blog
  • Lifestyle
    • Tips
    • Recipes
  • About
    • Advertise
  • Contact
  • Privacy Policy
    • Cookie Policy
  • Disclaimer / Disclosure

Craftaholique

Embracing The Handmade Life | UK Craft Blog

You are here: Home / Crafts / Valentine’s Day Crafts: Nail Polish Heart Design Champagne Flutes

February 7, 2017

Valentine’s Day Crafts: Nail Polish Heart Design Champagne Flutes

Valentines Day Crafts - Nail Polish DIY Heart Design Glasses

*Affiliate links are included in this post.

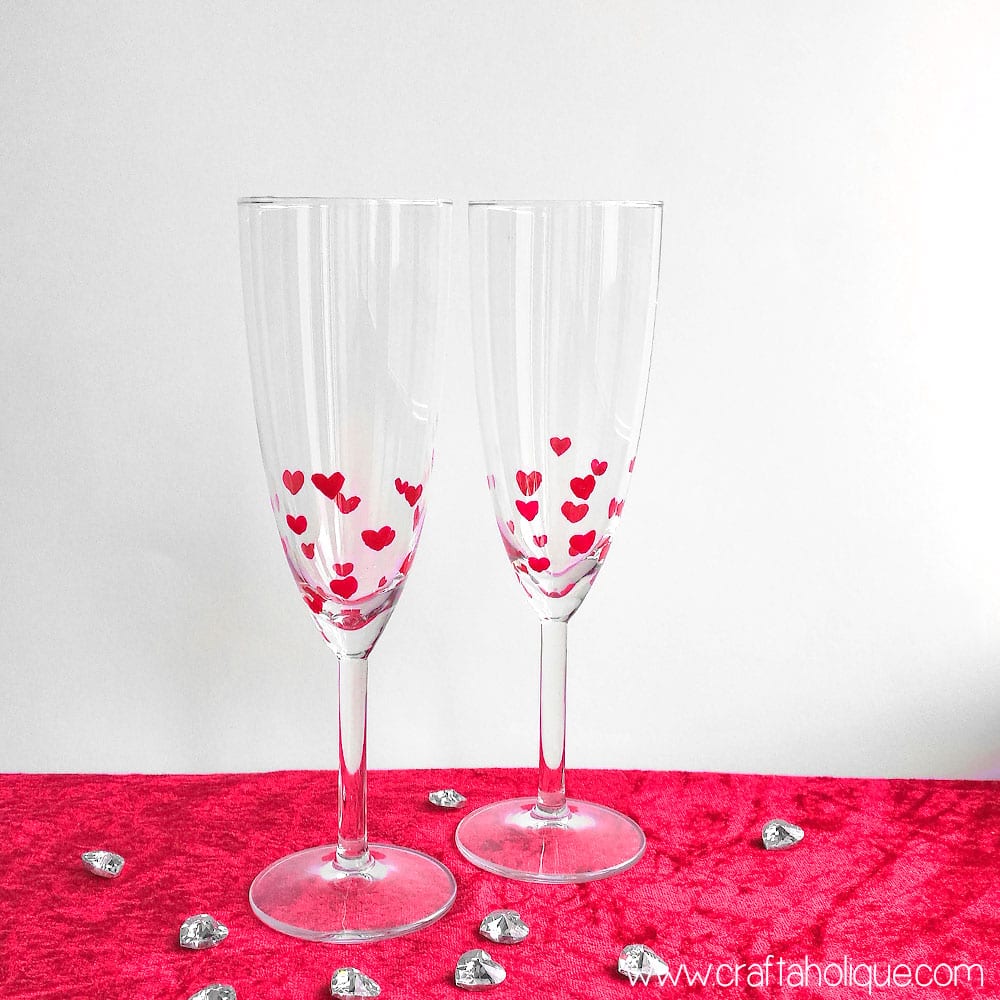
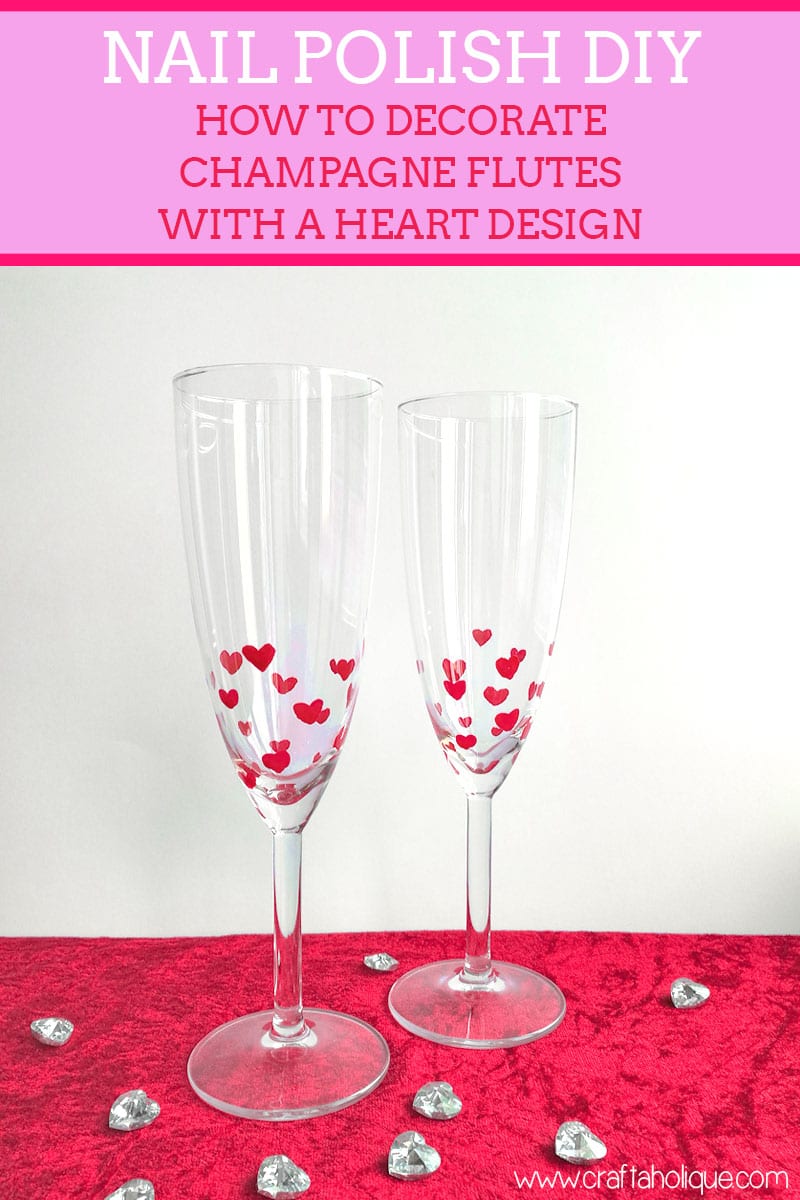
I have a Valentine’s Day Craft project for you today, although the truth is, you could do this for any type of celebration where you might need a champagne flute! This is a super-quick nail polish DIY that can make your table setting look extra special… for that special someone in your life.

Best of all, only four materials are needed (five if you count the Champagne)!

  • Champagne flutes x 2
  • Red or pink nail polish
  • Cotton buds
  • Nail polish remover

You’ve probably guessed by now that you’ll be using the cotton buds to dip into the nail polish to make heart shapes on your champagne flutes! It really is that easy. But let me tell you how to make these heart shapes as there are a few tips I can share with you to hopefully help you achieve actual heart shapes and not red or pink blobs.

Step 1

Ok, first of all, give your champagne flutes a good clean and dry. You don’t want to have to wash them immediately after you’ve decorated them!

Step 2

Valentines Day Crafts - Nail Polish DIY Heart Design Glasses

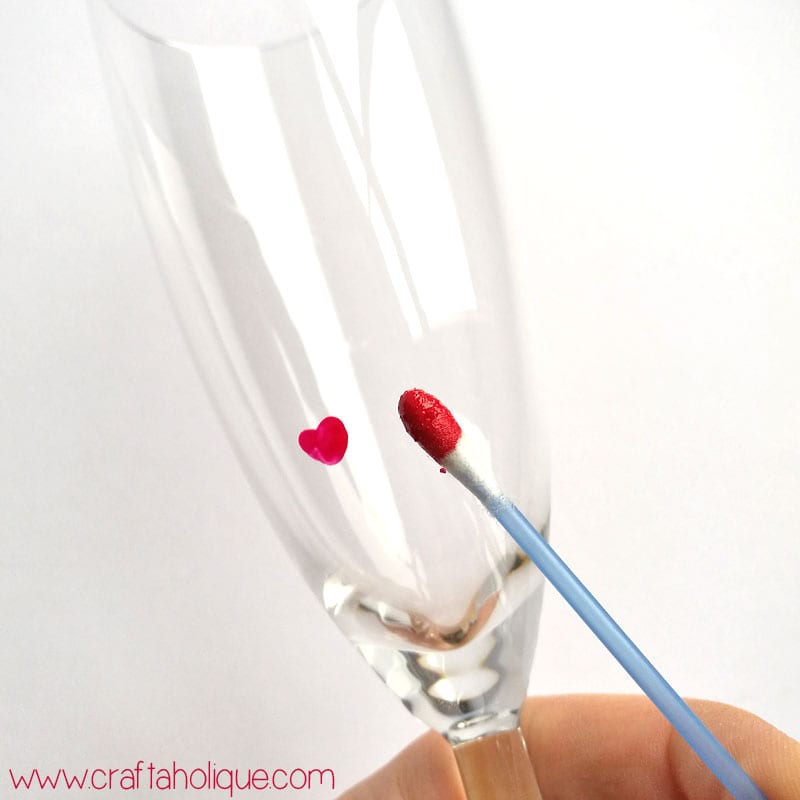
Pour out a little nail polish into a tray (or Tupperware lid). Dip the cotton bud into the nail polish and dab once onto the glass flute at an angle. Then dip into the nail polish and make another dab in the opposite direction, over the nail polish you did the first time. In a sort of X motion.

That may be enough to get the heart shape just right for you, but if not, just dab over the heart again to elongate the sides if you need to. If you make a mistake, fear not! Simply wipe it away with nail polish remover!

Step 3

Work your way around the glass flute dabbing on little hearts wherever you want to place them. For this tutorial, I decorated the bottom third of the glass as I thought this looked really pretty. But if you want to decorate the whole flute all the way around, go right ahead!

Step 4

Leave to dry for at least an hour before doing anything with them. If you need to wash the champagne flutes, you can do so gently with warm soapy water. But don’t scrub too vigorously as you don’t want all of your hard work to go to waste before you have time to try them out for a Valentine’s Day toast!

I hope you enjoyed this tutorial and that your heart design champagne flutes turn out brilliantly! Why not subscribe to my blog for more craft tutorials like this?

*Affiliate links are contained in this post. This means that I will receive a small commission should you decide to purchase anything through one of my links, at no cost to you. I only ever recommend products that I think are great and any commissions received help me to keep this site up and running! Thanks for using my links if you are able to!

Valentines Day Crafts - Nail Polish DIY Heart Design Glasses

*All images © Craftaholique.

Share this post!
  • save 
  • share 
  • tweet 
  • email 

Filed Under: Crafts, Other, Tutorials Hayley 2 Comments

Reader Interactions

Handmade Showcase: Wedding Accessories
How to Make a Beautiful Cascading Beaded Fringe Bracelet

Comments

  1. 1

    Julie Christiansen says

    February 9, 2017 at 9:24 pm

    These are adorable! Pinned!

    Reply
    • 2

      Hayley says

      February 16, 2017 at 9:47 am

      Thank you ever so much Julie! 🙂

      Reply

Leave a Reply Cancel reply

Your email address will not be published.

Primary Sidebar

Connect

  • E-mail
  • Facebook
  • Instagram
  • Pinterest
  • Twitter

Advert


Instagram

I finally finished this bead loom bracelet! Starte I finally finished this bead loom bracelet! Started it before the first lockdown... I think I lost my mojo for a while! So this is a flat piece of beadwork, which I then glued onto a cuff bracelet blank.
Started this loom beading project last May... Prou Started this loom beading project last May... Proud to say I finally finished it more than one year later! More photos coming soon! What's your longest ever project? #beads #beadwork #loombeading #crafts #crafting #craftblogger #crafty #longestprojectever
My latest beaded creation! Peyote with a twist. Lo My latest beaded creation! Peyote with a twist. Love the chunkiness of it and how it shimmers with the galvanised silver Miyuki Delica beads. #beads #beadwork #beadweavingpeyote #peyote #flatpeyotestitch #silver #beaded #beadedjewelryofinstagram #beadedring #beadedjewelry #miyukidelica #miyukipeyote #miyuki #miyukibeads #beading #crafts #crafting #craftblogger
My latest tubular peyote bracelet! It's made up of My latest tubular peyote bracelet! It's made up of hundreds of tiny Miyuki Delica beads in vibrant colours of metallic blue, silver, white and pink. The pattern is available in my Etsy shop, Craftaholique Designs. #beads #beadwork #beadweavingpeyote #tubularpeyotestitch #miyukipeyote #beading #beadingpattern #etsyshop #etsysellersofinstagram #etsyseller #etsyshopowner #bracelets #vibrant #tubularpeyote #beadaddict #beadaddiction #miyuki #miyukibeads
My finished bead embroidery - I've used it as an e My finished bead embroidery - I've used it as an embellishment for a beadwork storage case I've just made. I upcycled the case from an old padfolio / conference folder. Inside there's an integrated beading mat where I can do my beadwork - no more beads rolling away! I've posted a tutorial on my blog (link in bio).
My latest project... Bead embroidered flowers! I'm My latest project... Bead embroidered flowers! I'm making this as an embellishment for something. Will post the final project pic soon! #beadwork #beadembroidery #embroidery #embroiderydesign #embroideryart #embroidelicious #flowers #beads #beadedembroidery #beadedembellishment #crafts #crafting #keepcraftingcarryon #keepcraftalive #keepcraftingandcarryon #beaded #beadaddict #beadaddiction #embroideryhoop #craftblogger #crafty
Just finished this set of Miyuki Delica bracelets Just finished this set of Miyuki Delica bracelets in pretty colours of peach, white, pink and gold! I made the two diamond pattern bracelets using a bead loom. The single strand bracelet I just strung together. What do you think to my creation? #beads #beadwork #beadloom #beadloompattern #beadloomingbracelet #beadlooming #beadloombracelets #beadweaving #loombeading #loombead #beadingpattern #beadedjewelryofinstagram #beadaddict #beadaddiction #miyuki #miyukibeads #miyukidelica #crafts #crafting #craftblogger #crafty #bead #craftblogger #beadedbracelets #cuffbracelet #stackingbracelets
Though I've been beading for many years, this is t Though I've been beading for many years, this is the first time I've used a bead loom! It's pretty straightforward and quicker than peyote. #beading #beadloom #beadlooming #beadloomingbracelet #beadloomingnewbie #beadloombracelets #beadloompattern #beadwork #beadingpattern #miyuki #miyukibeads
I had tons of fun over the Easter weekend making t I had tons of fun over the Easter weekend making this rag rug sample with a kit from @raggedlife. This was part of an online workshop on rag rugging, with four other craft bloggers (hosted on Zoom by Elspeth at Ragged Life). It was brilliant! I'd highly recommend it. I've just posted about my experience on the blog - see link in bio.
Tomorrow, I'm taking part in an online rag rug wor Tomorrow, I'm taking part in an online rag rug workshop with @raggedlife! Can't wait, I've been wanting to try out rag rugging for ages. The class is being hosted on Zoom and will be fully interactive. Will post my project when I've done it!
I've needed a bit of colour in my life recently, a I've needed a bit of colour in my life recently, after the last few weeks of darkness. I made this bangle using tubular peyote stitch, with Miyuki Delica beads. Pattern available in my Etsy Shop, Craftaholique Designs!
If you're stuck for what to get your mum this Moth If you're stuck for what to get your mum this Mother's Day, I've put together an Etsy gift guide on my blog that you might like (link in bio). Etsy is my go-to place for gifts as you can find some really creative and unique products, plus it's a great way to support the handmade community! Featuring these amazing Etsy sellers... @pawprintillustration @kustomproductsinc @jemmamarston_design @butterflyandtoadstool @bonnenouvelle_uk @silveristicjewelry @crystalfiligree
Load More… Follow me on Instagram

Popular Posts

Popular Posts

Recent Posts

  • I’m back (with a new bead loom bracelet pattern)
  • Leaf Art Craft Project with Sharpie Pens
  • Chevron Tubular Peyote Bracelet Pattern
  • DIY Beadwork Storage Case (with Beading Mat)
  • Set of Two Bead Loom Bracelet Patterns

Advert


Recent Comments

  • Christina Athanasuleas on I’m back (with a new bead loom bracelet pattern)
  • Hayley on Beadwork Tutorial! Learn Flat Odd and Even Count Peyote Stitch
  • Jasmine on How I Salvaged My Tarnished Silver Pandora Bracelet
  • Lindsey Parry on How I Salvaged My Tarnished Silver Pandora Bracelet
  • Monica Shaw on Beadwork Tutorial! Learn Flat Odd and Even Count Peyote Stitch

Looking for Something?

Footer

My favourite place to shop handmade!

Featured on Feedspot

Disclaimer

Craftaholique is a personal blog. The content you'll find here is for your entertainment purposes only. Craftaholique is a participant in the Amazon Services LLC Associates Program, an affiliate advertising program designed to provide a means for sites to earn advertising fees by advertising and linking to www.amazon.co.uk and www.amazon.com. Read the full site disclaimer here.

Blogroll

  • Free Pretty Things For You
  • Golden Age Beads
  • Off The Beaded Path
  • The Graphics Fairy

© 2020 Craftaholique

We use cookies on our website to give you the most relevant experience by remembering your preferences and repeat visits. By clicking “Accept All”, you consent to the use of ALL the cookies. However, you may visit "Cookie Settings" to provide a controlled consent.
Cookie SettingsAccept All
Manage consent

Privacy Overview

This website uses cookies to improve your experience while you navigate through the website. Out of these, the cookies that are categorized as necessary are stored on your browser as they are essential for the working of basic functionalities of the website. We also use third-party cookies that help us analyze and understand how you use this website. These cookies will be stored in your browser only with your consent. You also have the option to opt-out of these cookies. But opting out of some of these cookies may affect your browsing experience.
Necessary
Always Enabled
Necessary cookies are absolutely essential for the website to function properly. This category only includes cookies that ensures basic functionalities and security features of the website. These cookies do not store any personal information.
Non-necessary
Any cookies that may not be particularly necessary for the website to function and is used specifically to collect user personal data via analytics, ads, other embedded contents are termed as non-necessary cookies. It is mandatory to procure user consent prior to running these cookies on your website.
SAVE & ACCEPT