
*Affiliate links are included in this post.
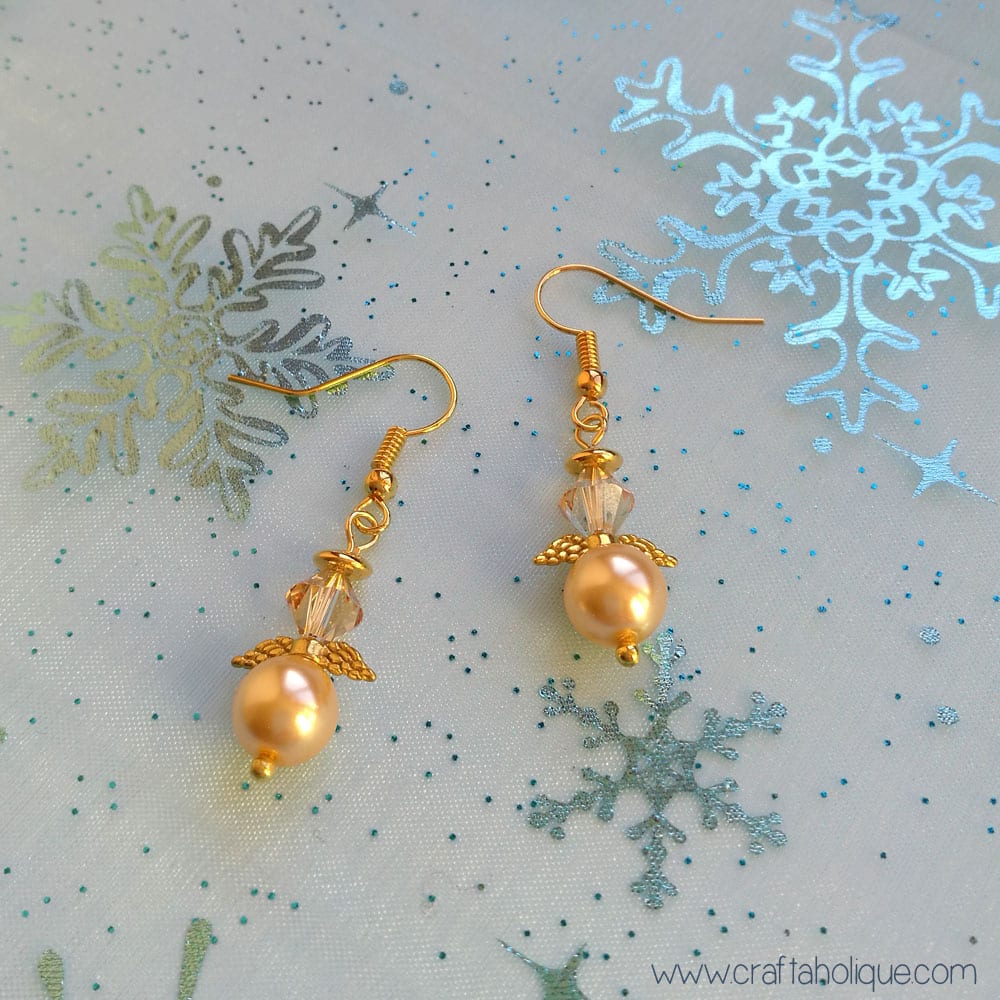
I’ve been wanting to make a pair of beaded angel earrings for ages now, and thought this would be the perfect time of year to do it! This little jewellery-making project is super-quick – you can whip these earrings up in around 5 minutes, once you have your materials ready! Check out the tutorial below…
Materials needed for beaded angel earrings:
- 2 x gold tone round ball tip pins
- 2 x gold tone disc shaped spacer beads
- 2 x gold tone earwires
- 2 x gold tone angel wing beads
- 2 x gold glass pearls (8mm)
- 2 x Golden Shadow Swarovski bicones (6mm)
- Jewellery pliers and wire cutters

Step 1
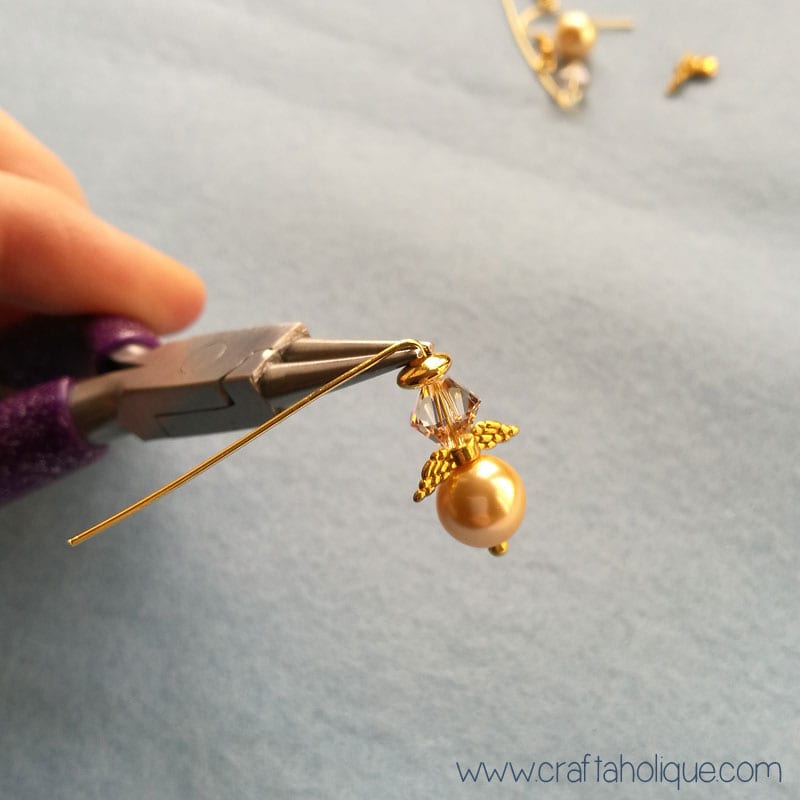
Thread a gold glass pearl (angel’s body), one of the angel wing beads, a Swarovski bicone bead (angel’s head) and a disc shaped spacer bead (halo) onto one of the ball tip pins. Make a bend in the wire, by holding your round nose pliers right above the disc bead and then pull the wire over to one side.
Step 2
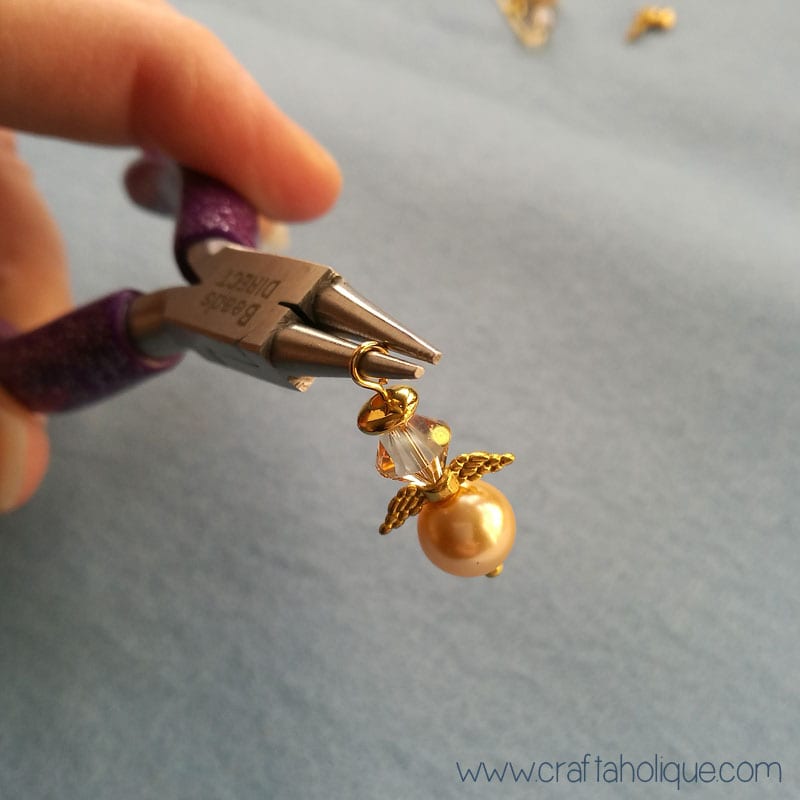
Leave around 1cm length of wire and trim off the rest with your wire cutters. Use your round nose pliers to make a loop in the wire as shown in the above photo. Place the tip of your pliers at the end of the wire and curl inwards, back towards the disc shaped spacer bead. Make sure the gap is closed up, so that you have a nice tidy loop!
Step 3
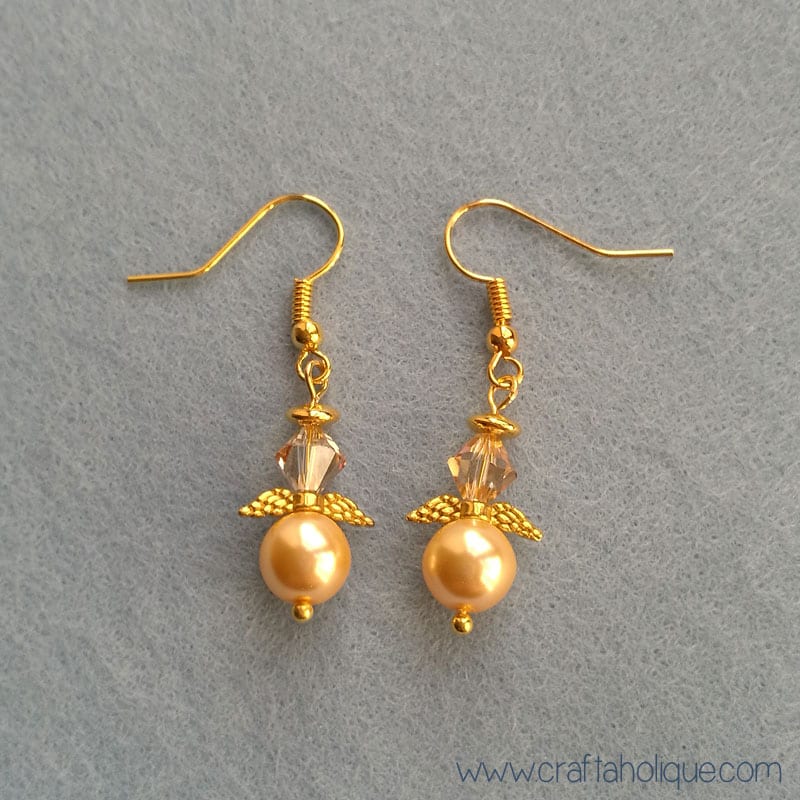
To finish, simply attach your earwire to the loop you’ve just made with your pliers. Then repeat steps 1 to 3 to make the other earring!
I hope you enjoyed this quick jewellery-making tutorial on how to make a beautiful pair of beaded angel earrings! Will you be wearing yours on Christmas Day?
Why not subscribe to be kept updated of future posts like this? If you enjoyed this post, please take a moment to share this online.
Not ready to go yet? Check out these posts below!
- How to make a multi-strand bling bracelet
- Diamante & tassel fringe earrings
- How to make a snowman cutlery holder
*Affiliate links to Etsy are contained in this post. This means that I will receive a small commission should you decide to purchase anything through one of my links, at no cost to you. I only ever recommend products that I think are great and any commissions received help me to keep this site up and running! Thanks for using my links if you are able to!

*All the above images are the copyright of Craftaholique. Get in touch if you’d like to use my images for your own blog or website.
I’m going to start doing with these they r cute and look easy
Thanks for your comment, I hope you do decide to try them out! 🙂