
*Affiliate links are included in this needle felted robin tutorial.
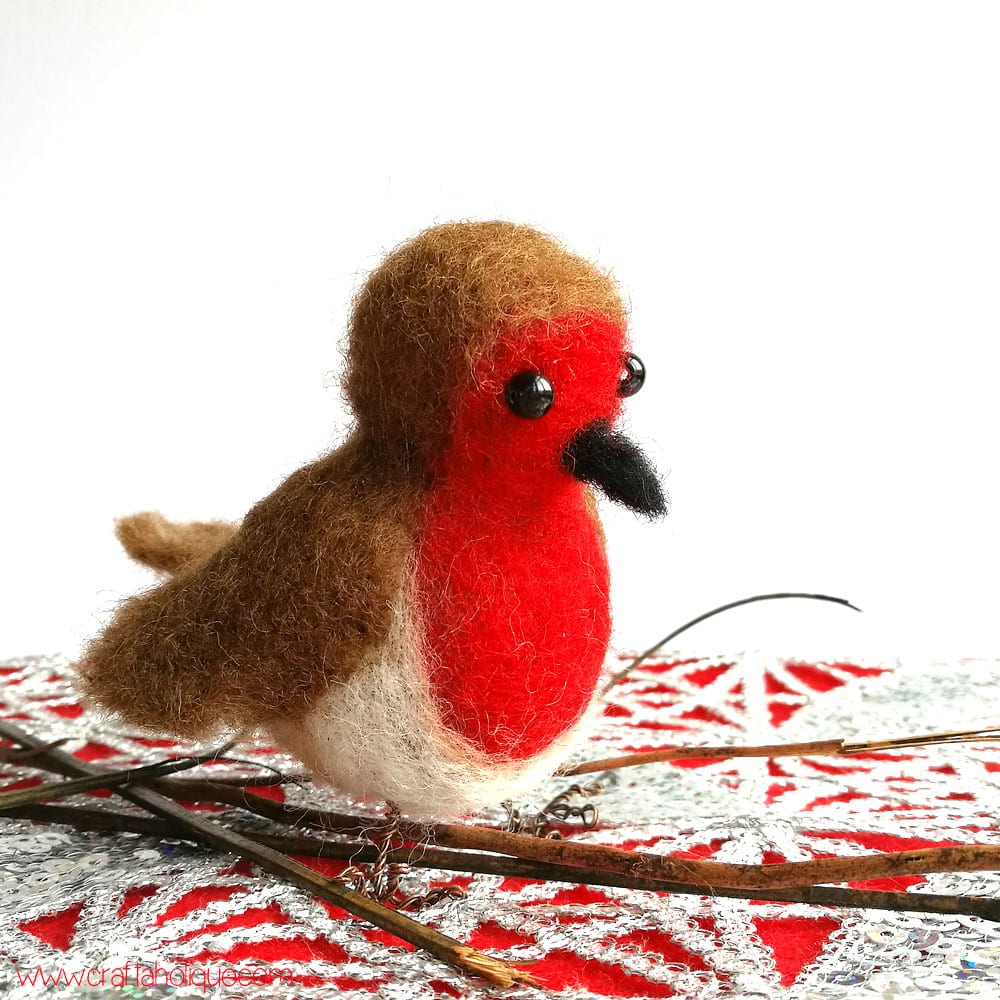
Guess what I got for Christmas? A stash of wool roving and a felting needle! Whilst wool roving might not be everyone’s cup of tea when it comes to a Christmas present, it was definitely mine! Needle felting has been on my list of crafts to try for several years now and so making this little fella with some of the supplies I received was a lot of fun.
In this post, I’ll explain the basics of needle felting and how I made my needle felted robin step by step. Here we go!
What is needle felting?
In a nutshell, needle felting is one method you can use to make amazing shapes and forms out of natural wool roving (unspun wool). Barbed needles are used to “stab” into the wool, which then work to interlock the wool fibers together to create a dense felt fabric. The barbs on the needles catch the scales in the wool and entangle them together.
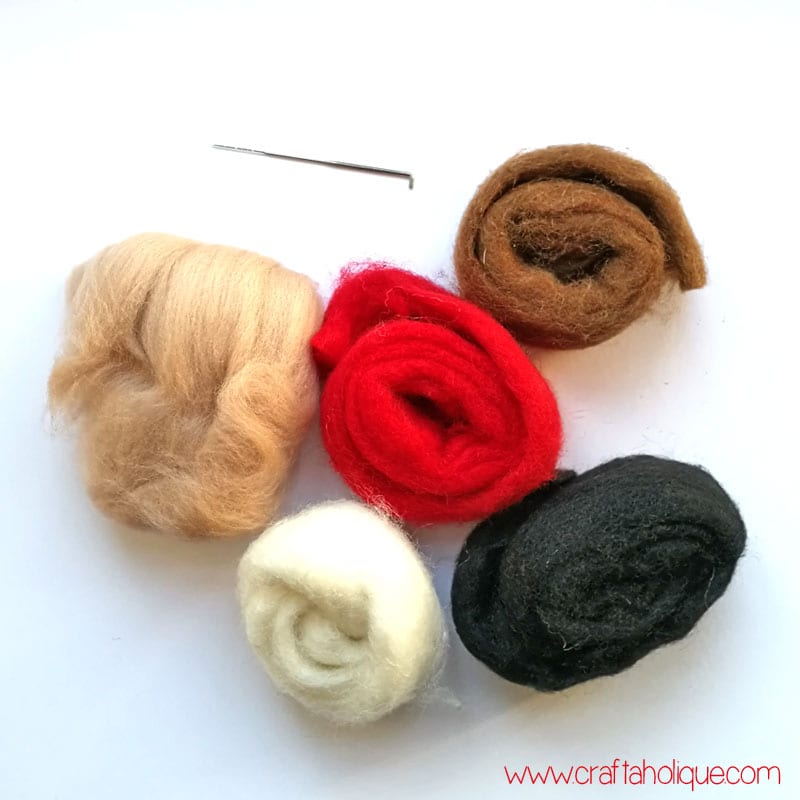
Materials needed for needle felt robin project:
- Selection of wool roving dyed into the following colours – red, brown, caramel, black and white.
- Felting needle
- One ball of spun yarn in brown (any size)
- e6000 glue
- 2 x black round beads 4mm
- Antique bronze coated copper wire
- Sponge (or felting mat)
- Scissors
Step 1
[one-half-first]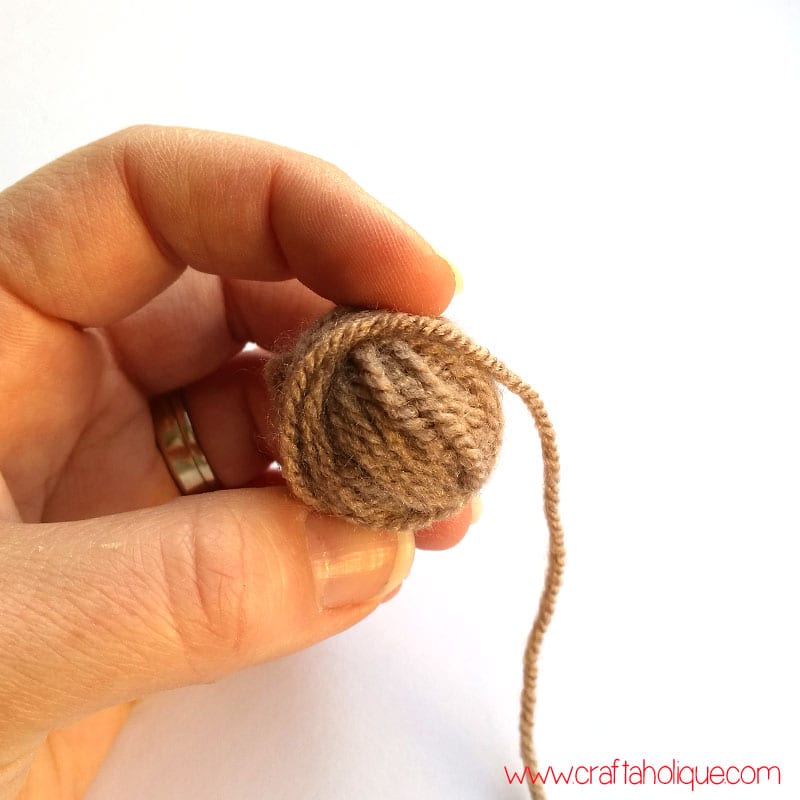 [/one-half-first][one-half]
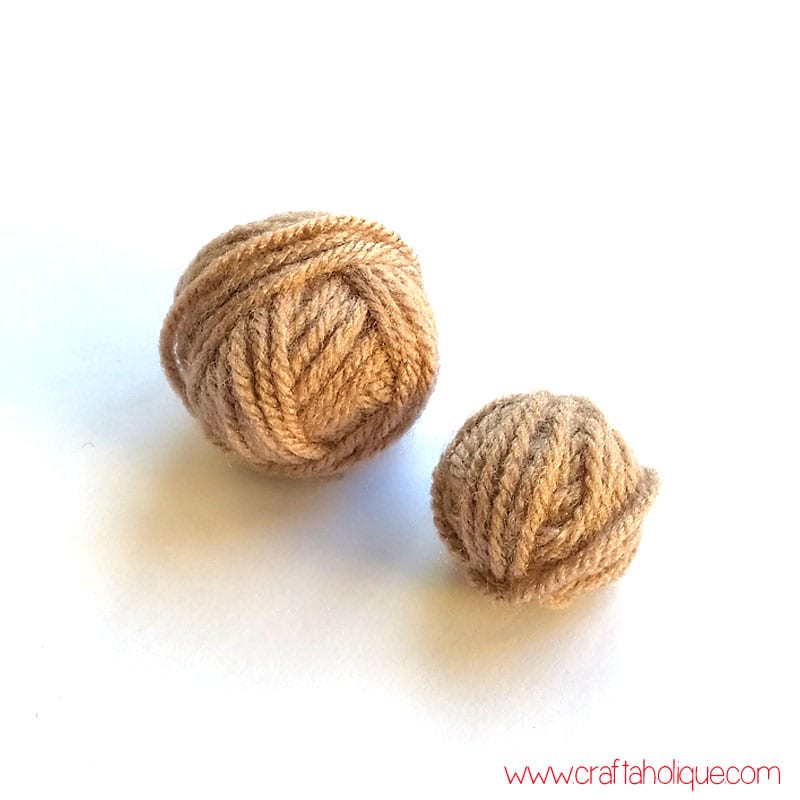 [/one-half]
The first thing I did to make my needle felted robin was to create the main body and head shape that I could felt around. Rather than waste my wool roving for this, I simply created two little balls of wall in different sizes, from a ball of spun yarn. See pics above.
Step 2
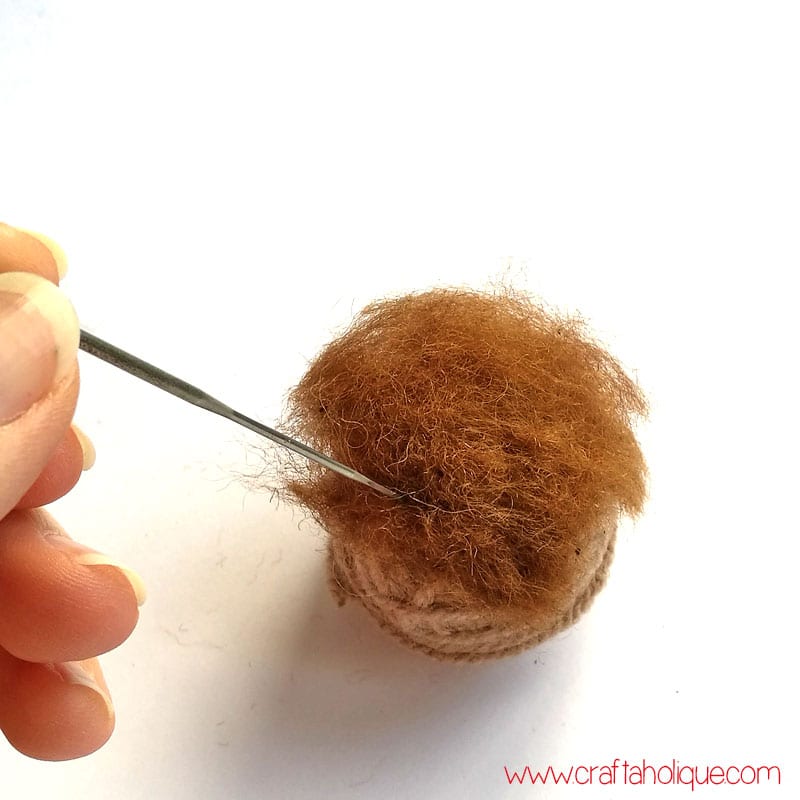
I started felting around the larger ball of wool first as I was making the robin’s body. I cut off a little of the brown wool roving around 2 inches square, stretched it out and spread it over the wool ball. And then I basically stabbed the felting needle through the wool roving into the ball of yarn – repeatedly for a few minutes! The wool roving sort of tacked itself to the wool ball as a covering.
Step 3

I continued to cover half of the “body” wool ball in the brown wool roving in this way by cutting off little pieces of the roving and needle felting them on. Then I decided to attach the robin’s head, also by using the brown wool roving. If you wanted to, you could glue the head and body wool balls together first, but I found I was able to attach the head to the body simply by using the barbed felting needle.
Step 4
Once the head was attached and covered in brown wool roving, I cut out some of the red wool roving in an oval shape. I laid this over the breast part of the robin’s body and also the face. Then I proceeded to attach the head by using the felting needle, stabbing it into the wool balls over and over until it took shape.
Step 5
I used white wool roving for the underside of the robin and I also interspersed a few strands of the caramel wool roving around the bottom of the red breast just to break up the white and give the robin some natural speckled colouring! I found that you can add new layers quite easily to change the colour slightly.
Step 6
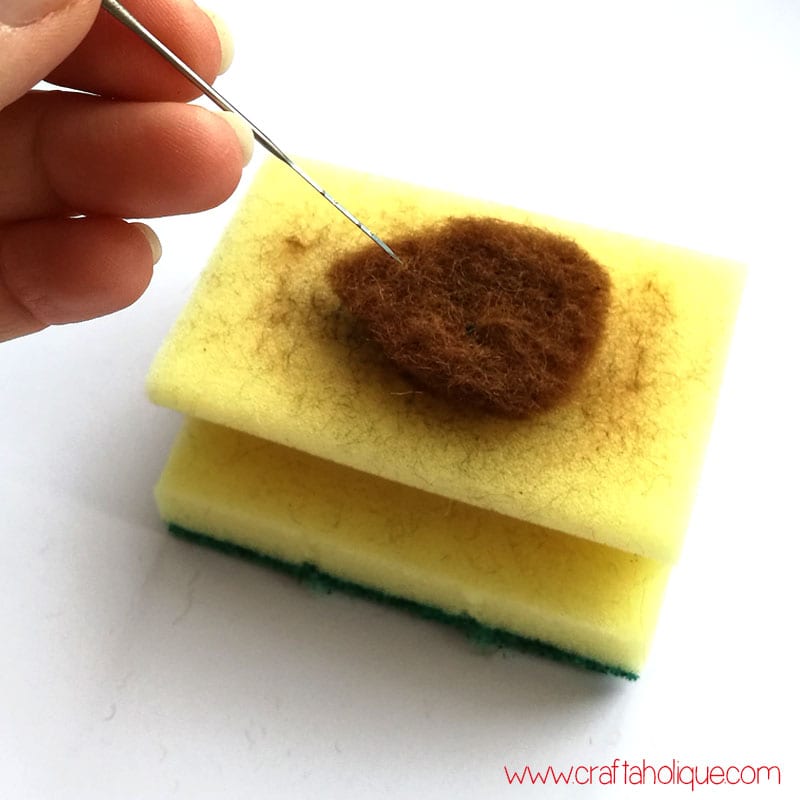
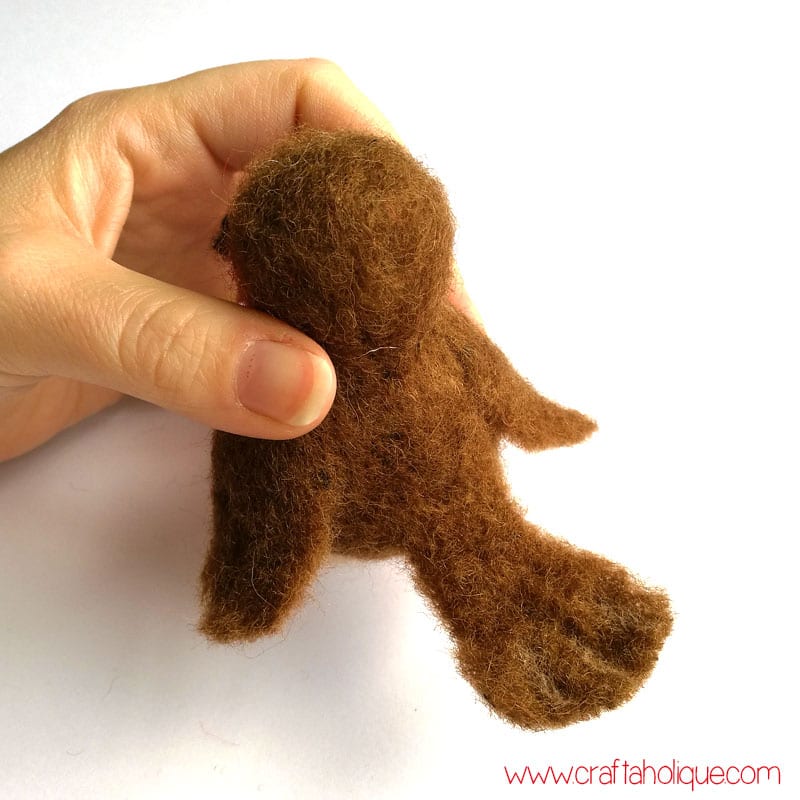
Once I was satisfied with the robin’s body and head, it was time to make the wings. To do this, I cut out two teardrop shapes of the brown wool roving and needle felted them individually against a sponge to make them into a dense shape.
Then I attached them to the robin by using some small pieces of brown wool roving. I just felted them on with the needle, no glue required! I followed the same process with the tail, after cutting out a sort of thin, long fan shape first.
Step 7
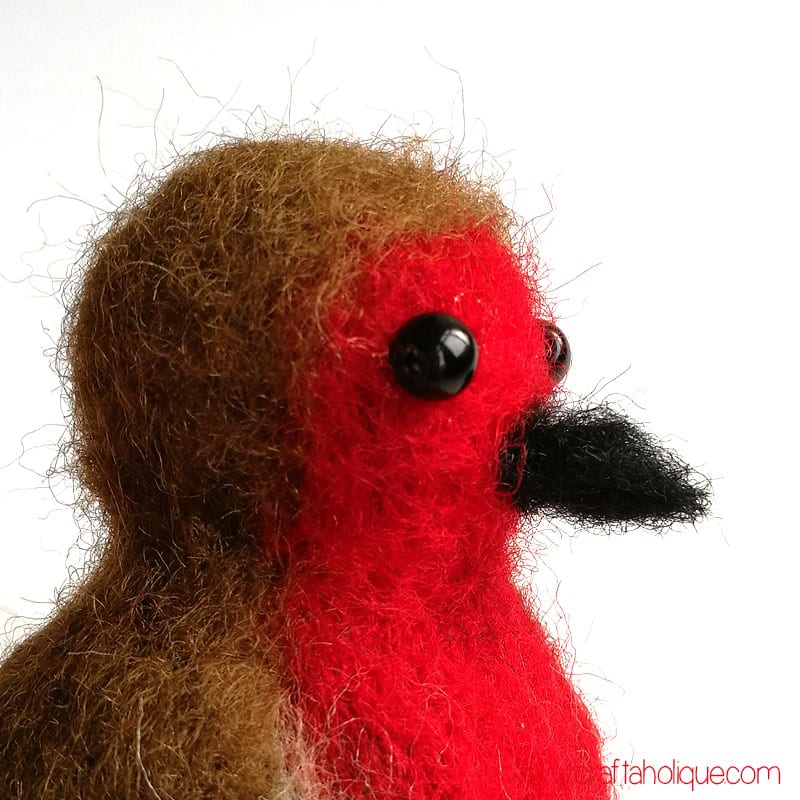
I made the beak from black wool roving. I simply cut out a small triangle and rolled it between my fingers until it was quite dense. It took a few attempts to get the size right, but in the end I was happy with it! I used the felting needle to attach it to the robin’s face. Then I glued on two round black beads for the eyes!
Step 8
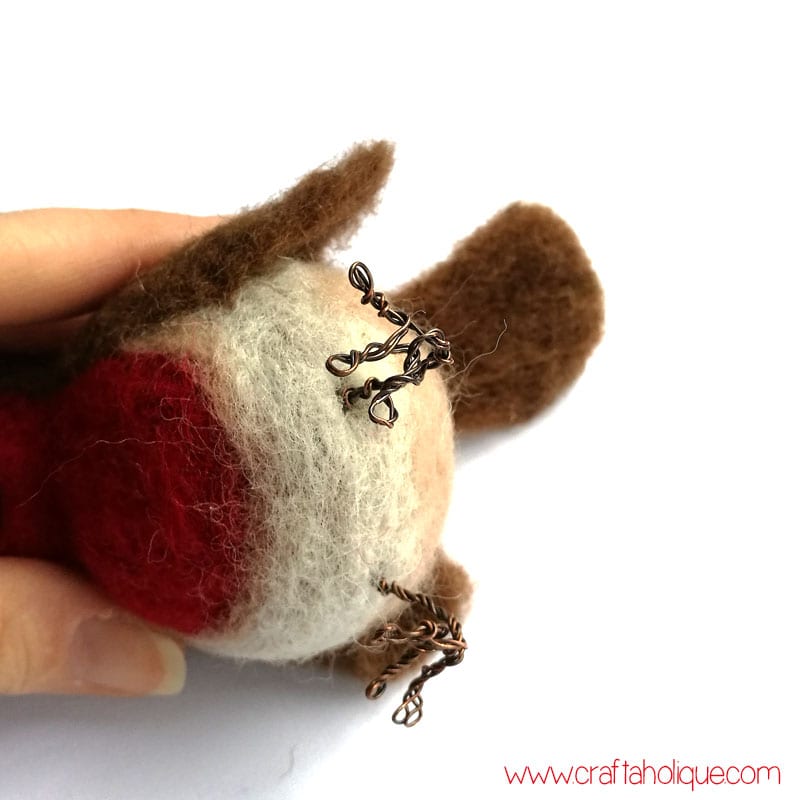
The feet were by far the most difficult part of the whole project… To make them, I used twisted wire to make the toes and ankle, but getting them to stick in the right places in the underside of the robin was really tricky! In the end, I used a little glue to help them stay put (jewellery glue worked really well). I wanted my robin to be able to perch on his feet – and he does – but it was a little fiddly getting the shape right!
Final thoughts…
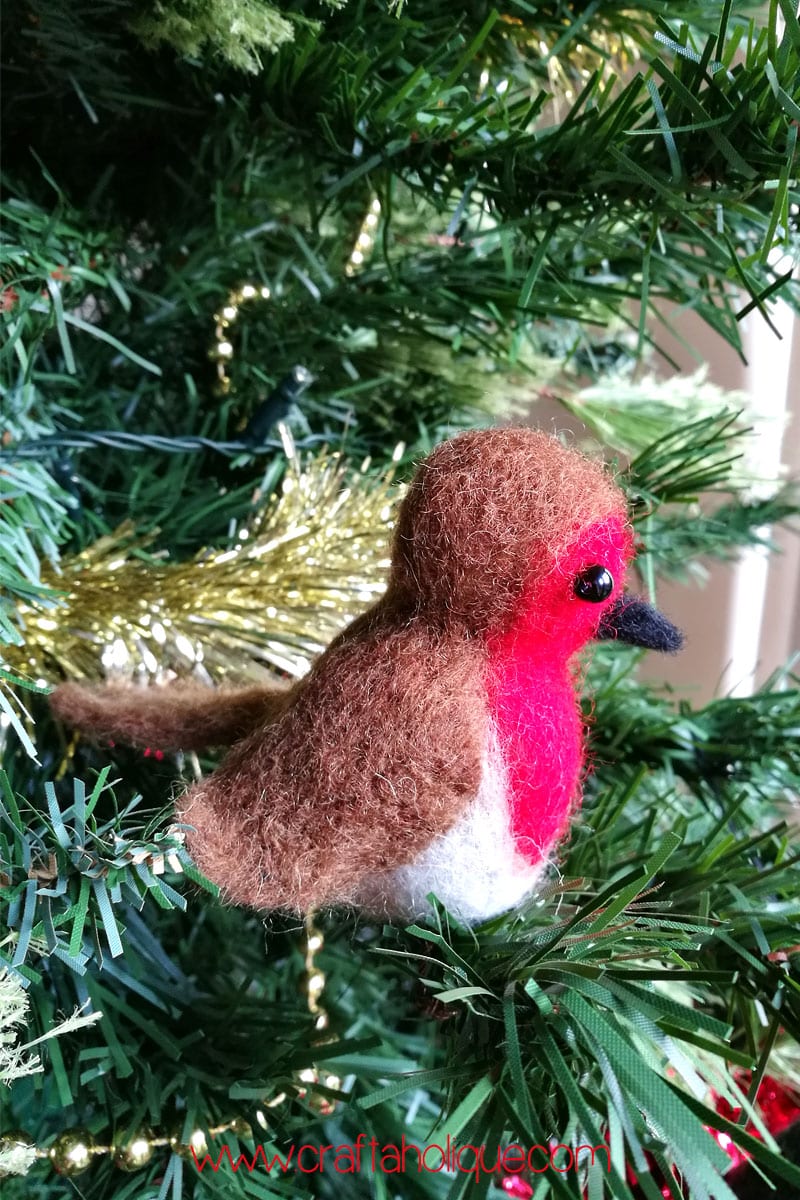
I’m really happy with the finished result, especially since this is my first attempt at needle felting. And I have to say that needle felting is a very therapeutic hobby, just stabbing fabric over and over again until it finally morphs into the shape that you want!
I hope you’ll try my little needle felted robin project out – let me know how you get on if you do!
Did you like this post? Please take a minute to share this online if so.
*Affiliate links are contained in this post. This means that I will receive a small commission should you decide to purchase anything through one of my links, at no cost to you. I only ever recommend products that I think are great and any commissions received help me to keep this site up and running! Thanks for using my links if you are able to!
Other posts you might like!
- Rudolph Reindeer Peyote Cuff Bracelet Pattern
- How to Make Beaded Angel Earrings
- How to Make a Felt Owl Mobile Phone Case
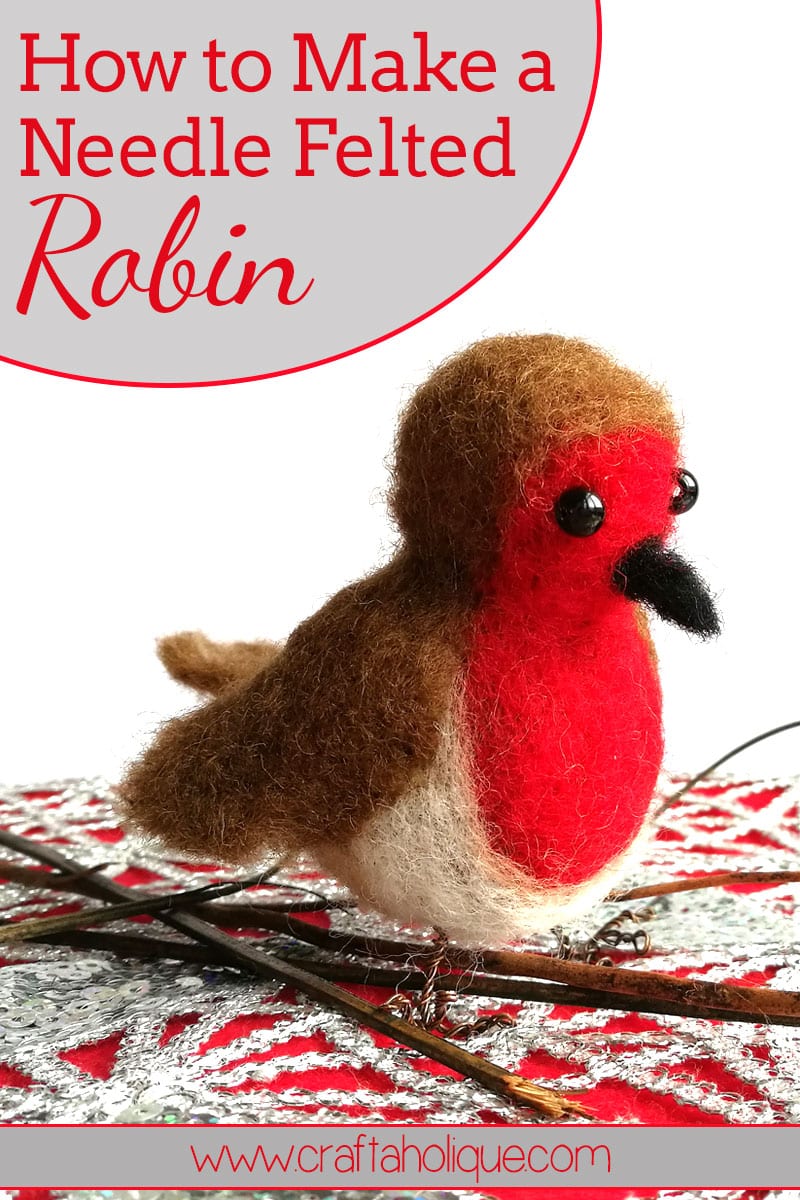
**Image source – all images are my own and are copyrighted. Please ask if you’d like to use my images on your own website!
Leave a Reply