
*Affiliate links are contained in this post.
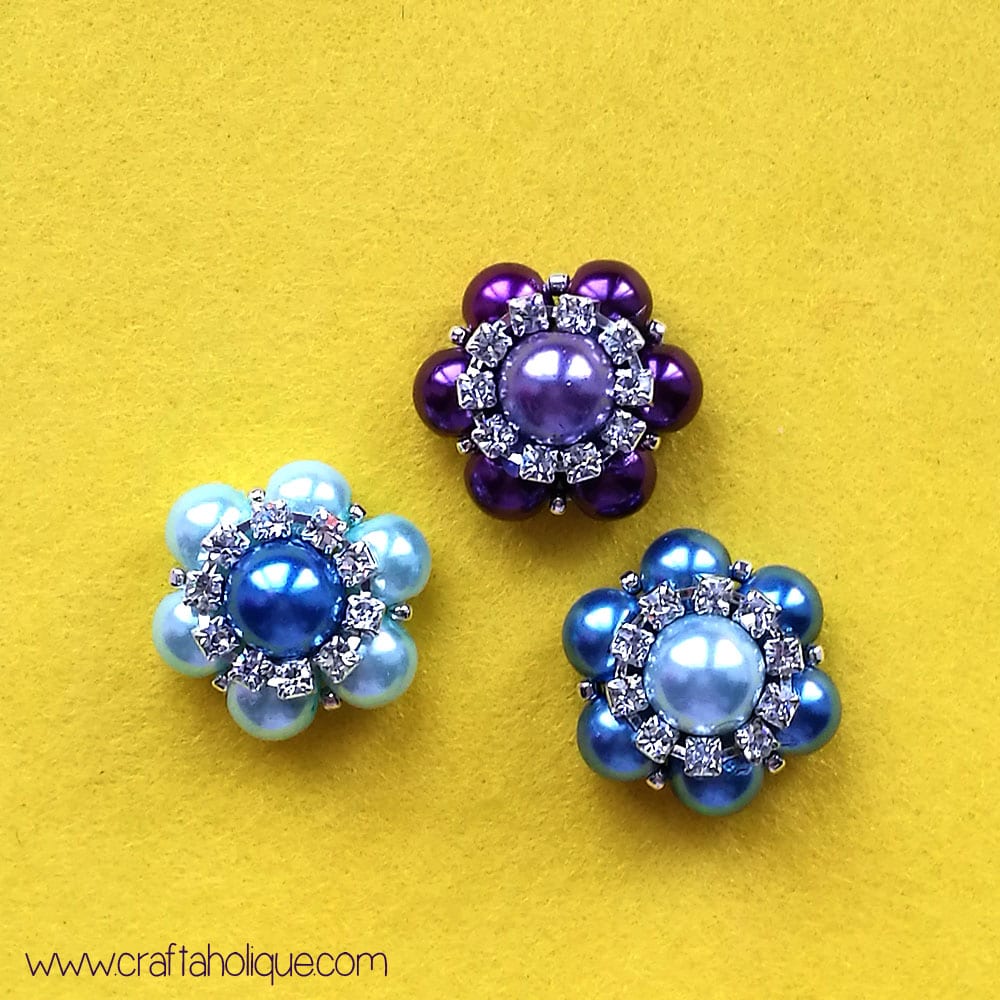
I have an easy tutorial for you today on how to make these beautiful beaded flower components! These are made from round glass pearl beads, seed beads and sparkly rhinestone cupchain. It’s such a quick project this one and you can use the finished beaded flowers for all sorts of crafts, including jewellery-making, shoe clips, purse accessories and other creative displays.
To make these sparkly beaded flowers, you’ll need the following materials:
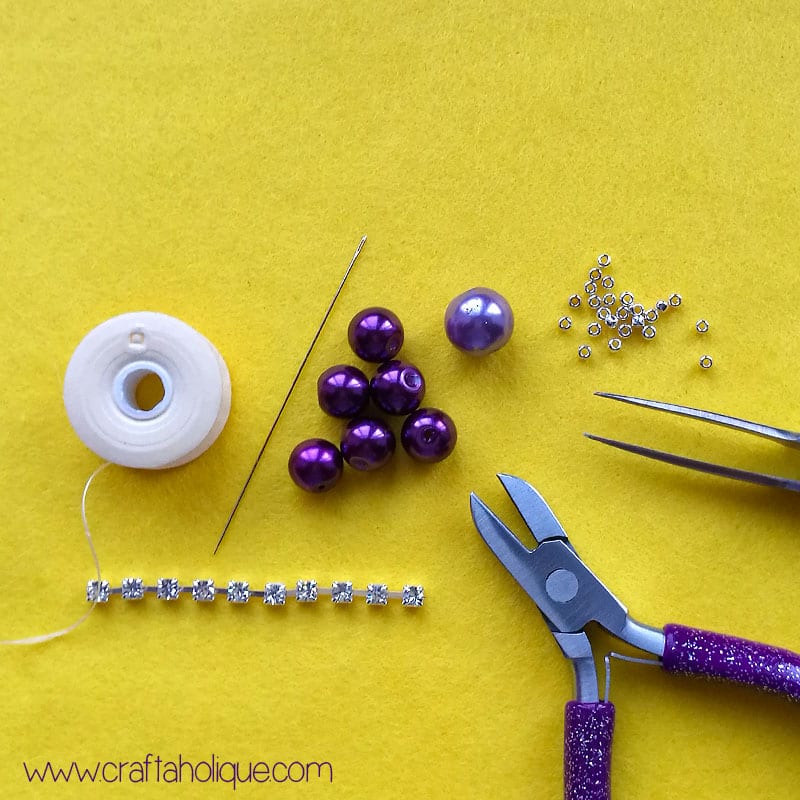
- 6 x round glass pearl beads (8mm)
- 1 x round glass pearl bead (12mm)
- Selection of Toho round seed beads size 11/0
- Rhinestone cupchain
- Nymo beading thread
- Beading needle size 10 or 12
- Wire cutters, tweezers and scissors
- Jewellery / gemstone glue such as e6000
Step 1
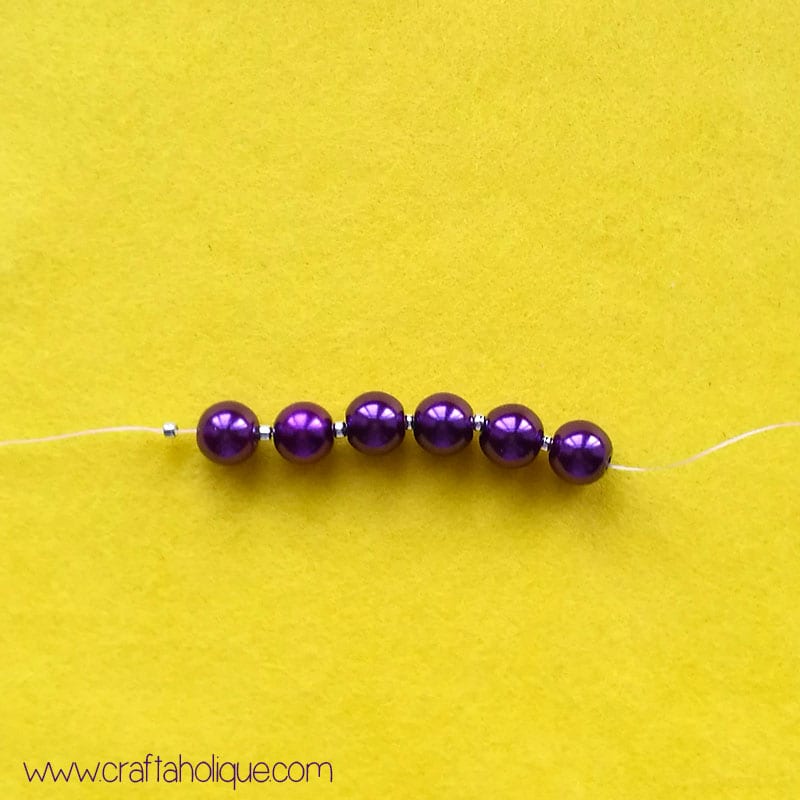
Trim off a length of beading thread (around 16 inches should be fine) and thread the needle. Pick up 1 x seed bead and 1 x 8mm glass pearl bead and repeat the process 6 times. See above picture – you should have 12 beads on the thread in total!
Step 2
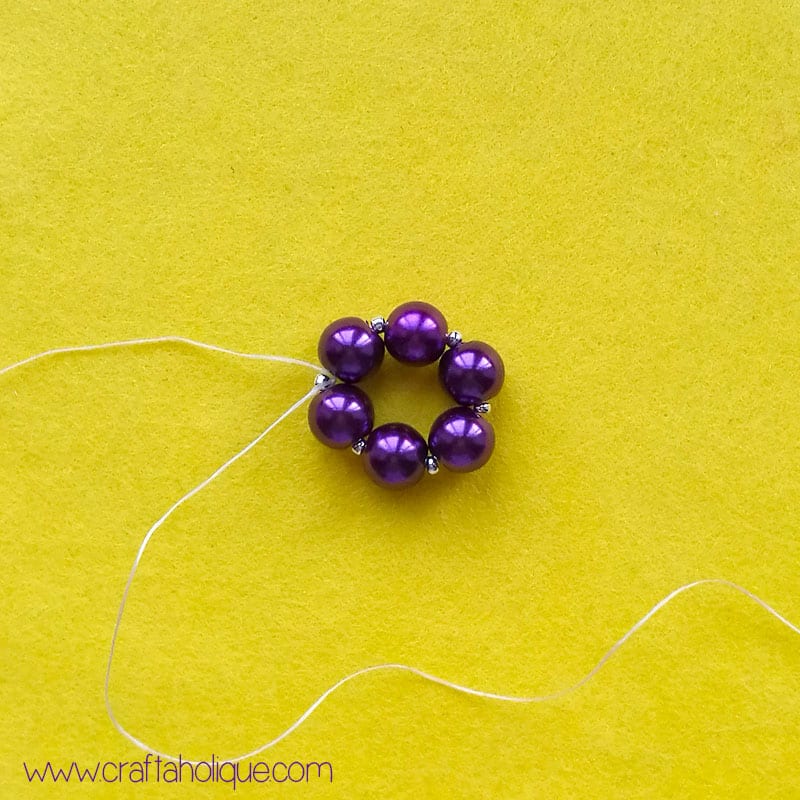
Tie the ends of the thread together so that the beads come around to form a circle. Make sure that you make a firm overhand knot, so that the beads sit together tightly. I made a single knot first, then a double knot to make sure it wouldn’t come undone.
Step 3
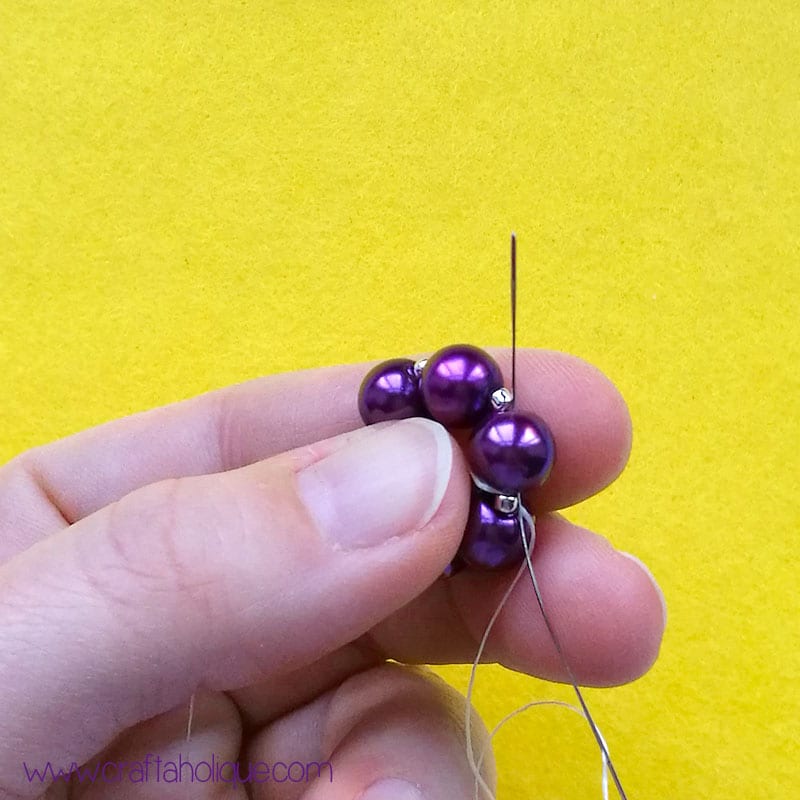
Pass the needle and thread through the bead closest to the knot and work your way around again to reinforce the circle. Then trim your thread as close as possible to one of the beads so that you can’t see it. Thread the tail end of the beading thread through the needle and work in the opposite direction to reinforce again and hide the tail.
Step 4
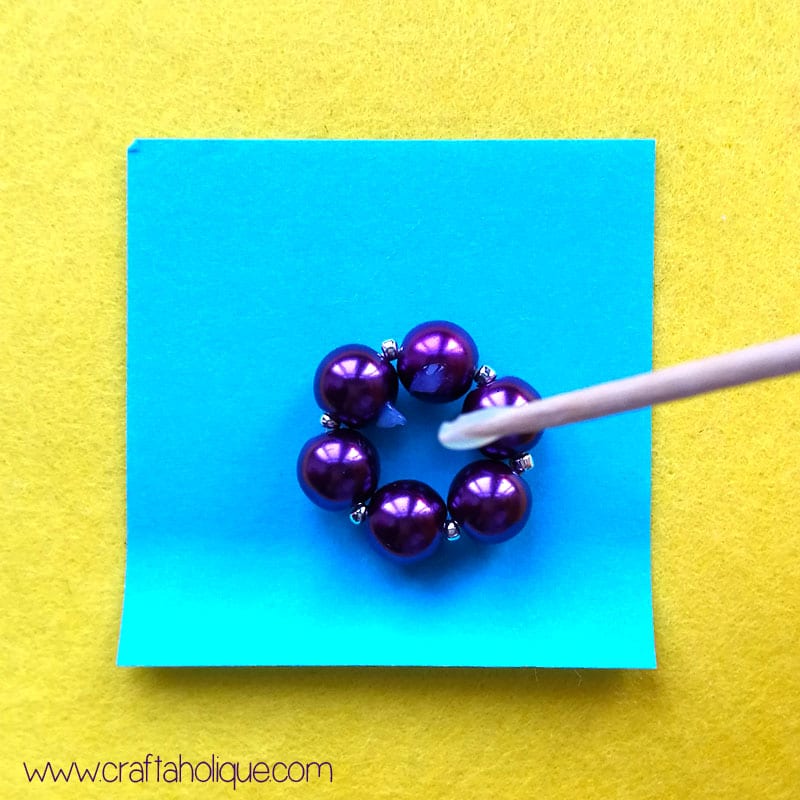
Next, dab a little jewellery glue onto each of the beads along the inner edge as shown in the above picture. The glue will dry clear but it’s best not to use too much as it can get a little messy. You might want to put your beaded circle onto a piece of card (or post-it note!) to avoid glue going where it shouldn’t. Jewellery glue is really strong and bonds very well. 🙂
Step 5

Once you’ve dabbed the glue onto the beads, position the larger 12mm bead into the centre as shown above.
Step 6
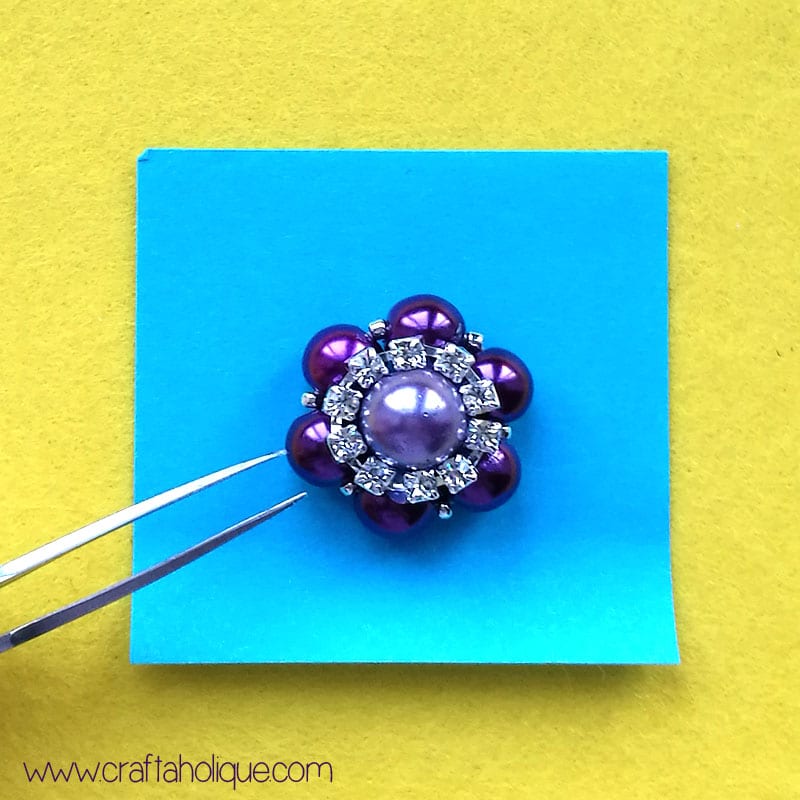
Before the glue has chance to dry, wrap a length of rhinestone cupchain around the larger centre bead. I found that a length of 10 rhinestones fit really well around the 12mm bead. Make sure you have your rhinestone cupchain trimmed to the right size before attempting the steps of this project where glue is required!
When you’ve done that, leave your beaded flower to dry for around 30 mins. Don’t be tempted to move it before then, otherwise you may end up dislodging the rhinestone cupchain!
Finally…
Once you’ve made one sparkly beaded flower, you may not be able to stop! These beaded flower components are so wonderfully chunky and heavy that you’ll probably want to make a few more. Later this week, I’ll be posting again to show you what I made with mine… so watch this space!
Did you like this post? Please take a minute to share it online if so!
Before you go, why not check out some more craft tutorials:
- How to Make a Multistrand Sparkly Rhinestone Bracelet
- Diamante Tassel and Fringe Earrings
- How to Make a Beaded Squirrel using the Brick Stitch Technique
*Affiliate links are contained in this post. This means that I will receive a small commission should you decide to purchase anything through one of my links, at no cost to you. I only ever recommend products that I think are great and any commissions received help me to keep this site up and running! Thanks for using my links if you are able to!
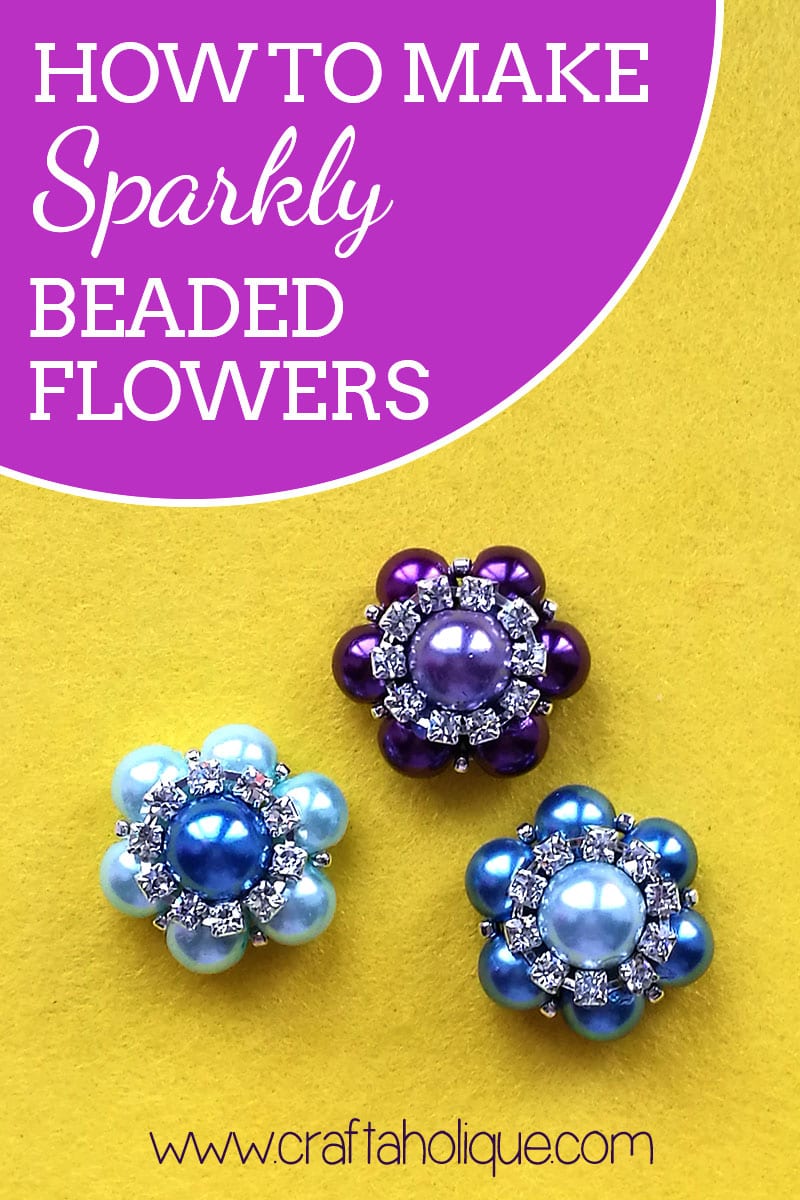
*Image source – all images are owned by Craftaholique. Please ask if you’d like to use my images on your own website.
This post was linked up at The Pin Junkie.
[…] Beaded flowers – this is another project that can be turned into a brooch or another piece of jewellery, like a necklace! […]