• Skip to primary navigation
  • Skip to main content
  • Skip to primary sidebar
  • Skip to footer
  • Home
  • Tutorials
  • Crafts
    • Jewellery Making
      • Everything jewellery
      • Beadwork
      • Wire jewellery
      • Book reviews
    • Feltmaking
    • Crochet
    • Knitting
    • Kid’s crafts
    • Book reviews
    • Other
  • Inspiration
    • Everything inspirational
    • Handmade showcase
    • Colours
    • Materials
    • Crafty Links
    • Start a Blog
  • Lifestyle
    • Tips
    • Recipes
  • About
    • Advertise
  • Contact
  • Privacy Policy
    • Cookie Policy
  • Disclaimer / Disclosure

Craftaholique

Embracing The Handmade Life | UK Craft Blog

You are here: Home / Crafts / How to Make Christmas Crackers

December 1, 2017

How to Make Christmas Crackers

How to make Christmas crackers - Silhouette tutorial from Craftaholique

Affiliate links are included in this post.

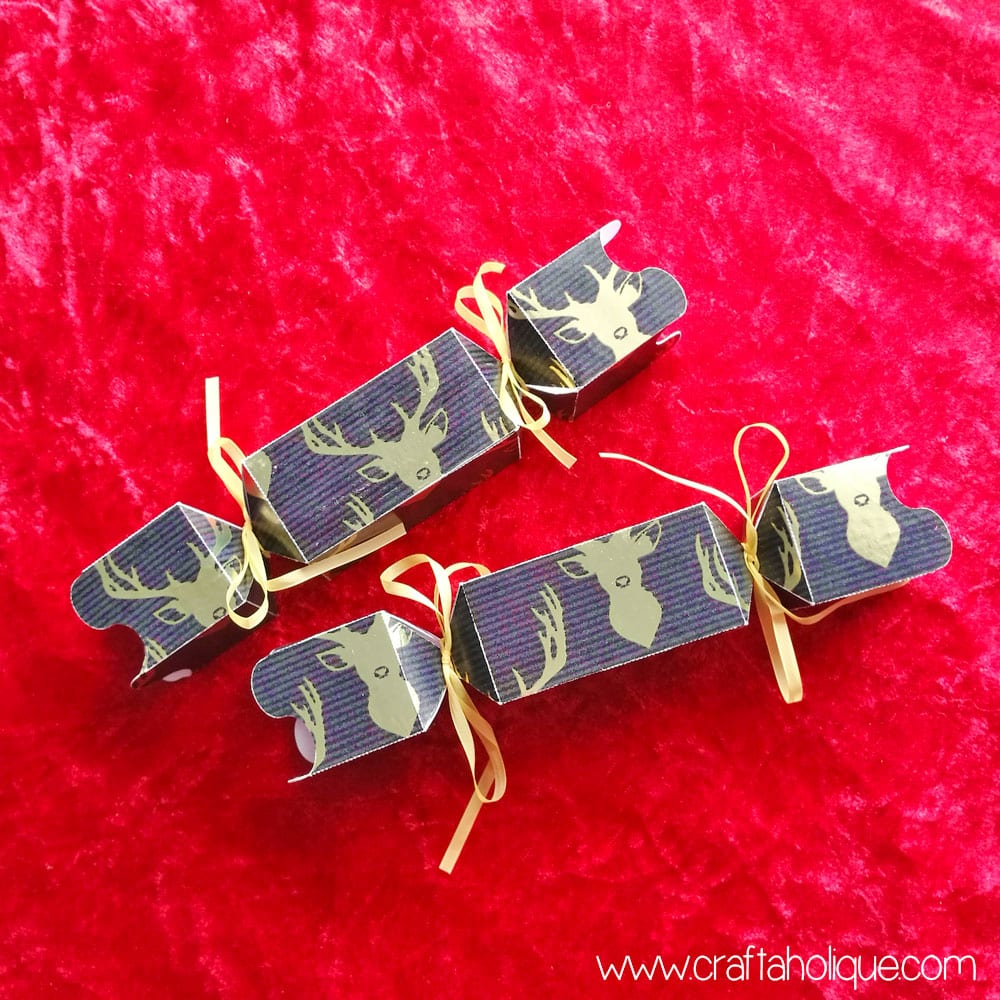
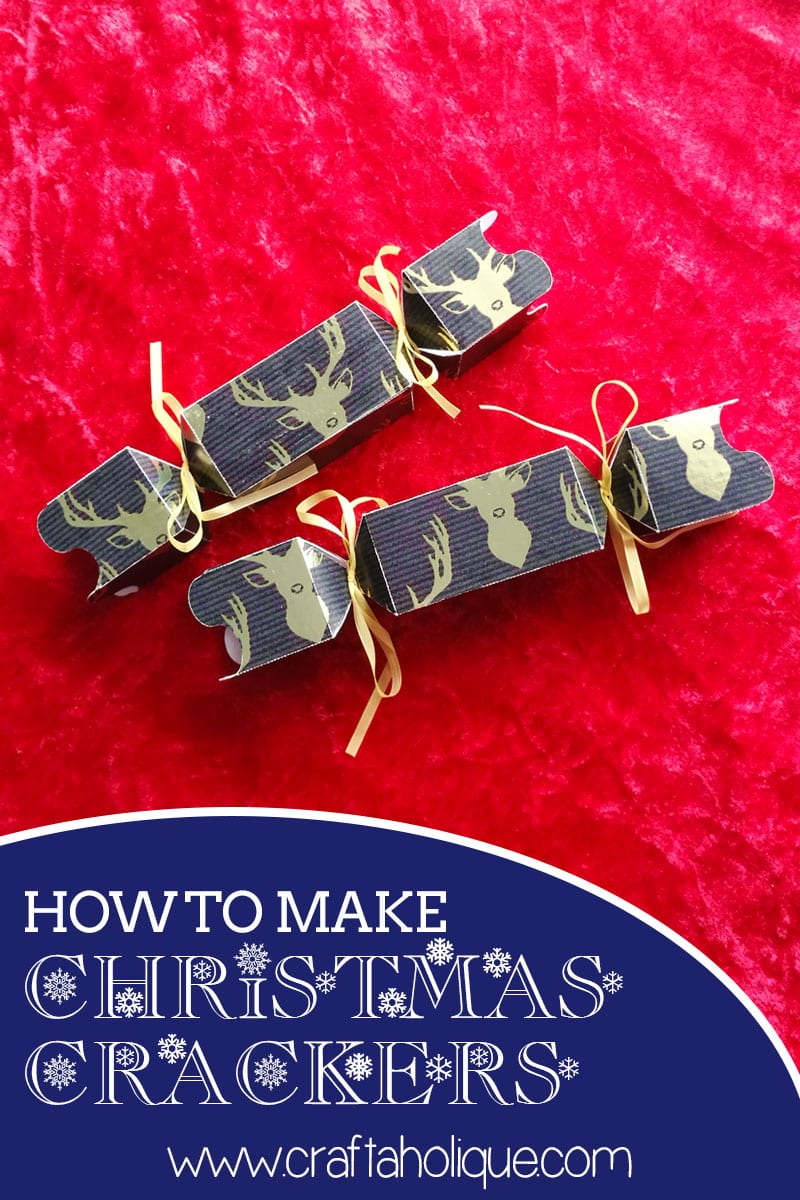
I have a fun tutorial for you today on how to make your own Christmas crackers using the Silhouette Cameo!

The great thing about making your own crackers for your Christmas table decor is that you can fill them with really unique token gifts as well as funny jokes that your dinner guests will love (let’s face it; shop-bought crackers can be a bit lame).

You’ll need the following materials if you’d like to make these:

  • Silhouette Cameo (available from Amazon UK or Amazon USA with Studio software and cutting mat included)
  • My Christmas crackers free cutting file
  • A4 card (it can be any colour)
  • Christmas wrapping paper
  • Glue stick
  • Thin ribbon
  • Cracker snaps (optional)
  • Craft knife or Silhouette hook for weeding vinyl
  • Scissors

Step 1: Use wrapping paper to create a design for your Christmas crackers

Christmas crackers tutorial with Silhouette Cameo

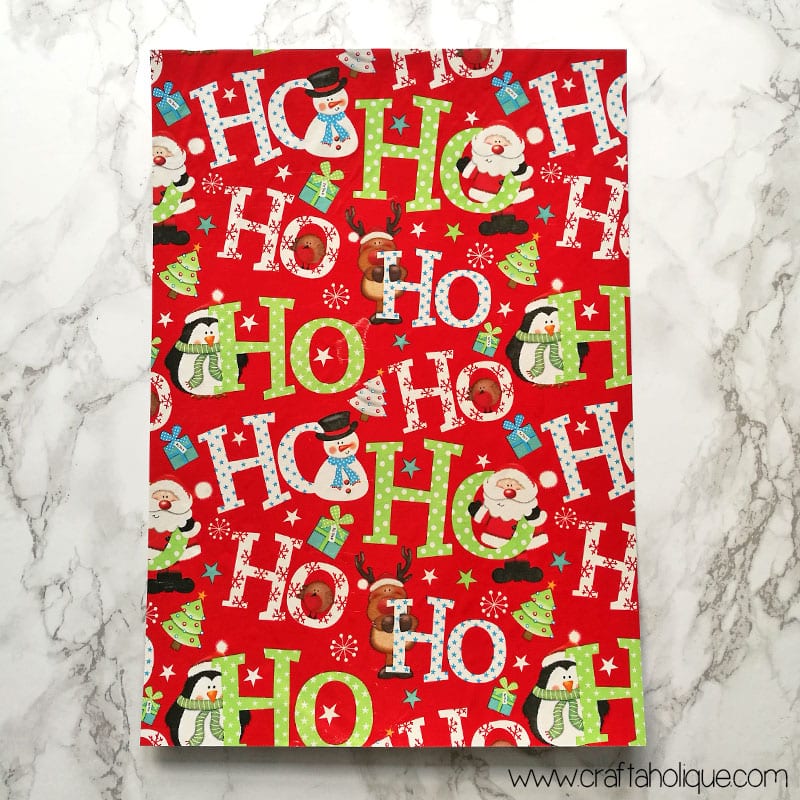
Cut out enough Christmas wrapping paper to stick to one piece of A4 card. The wrapping paper you choose will be the basis for the cracker design, so make sure it’s nice and festive! Cover all of the card with the glue so that the wrapping paper sticks down everywhere. Trim the edges with scissors when you’re done, so that there is no wrapping paper overlapping the card.

Step 2: Load the card into the Silhouette Cameo

How to make christmas crackers - paper craft tutorial with Silhouette Cameo

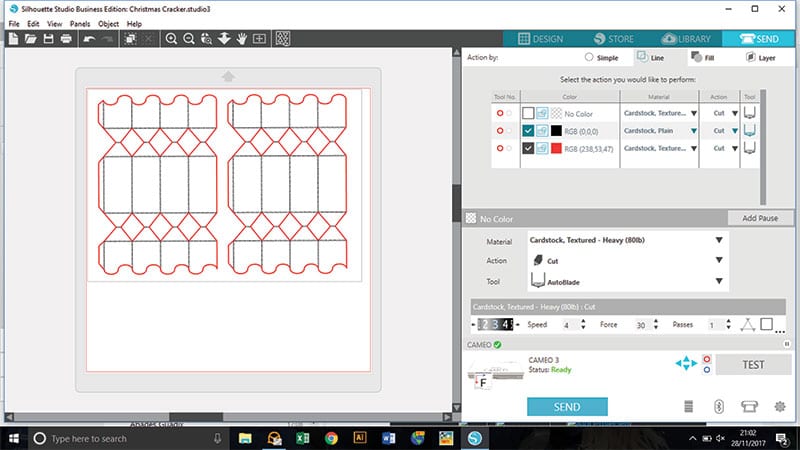
Line up the card in the top corner of the Silhouette cutting mat. The cutting mat is sticky, so the card will stick into place. Then load the cutting mat with the card on top into the Silhouette Cameo. Open up the Silhouette Cameo Studio software onto your PC or Mac and then open this cutting file that I’ve designed. Hopefully, your screen should look something like the above screenshot at this point!

Within the design, you’ll see two cracker shapes with black lines and red lines. The black lines will be perforated and the red lines scored.

Access the “SEND” menu, click on the “Action by” line and make sure your settings are like those in the screenshot, with the boxes selected next to the red and black squares. The click the blue “SEND” button at the bottom.

Step 3: Weed off excess around the cracker shapes

How to make christmas crackers - paper craft tutorial with Silhouette Cameo

How to make christmas crackers - paper craft tutorial with Silhouette Cameo

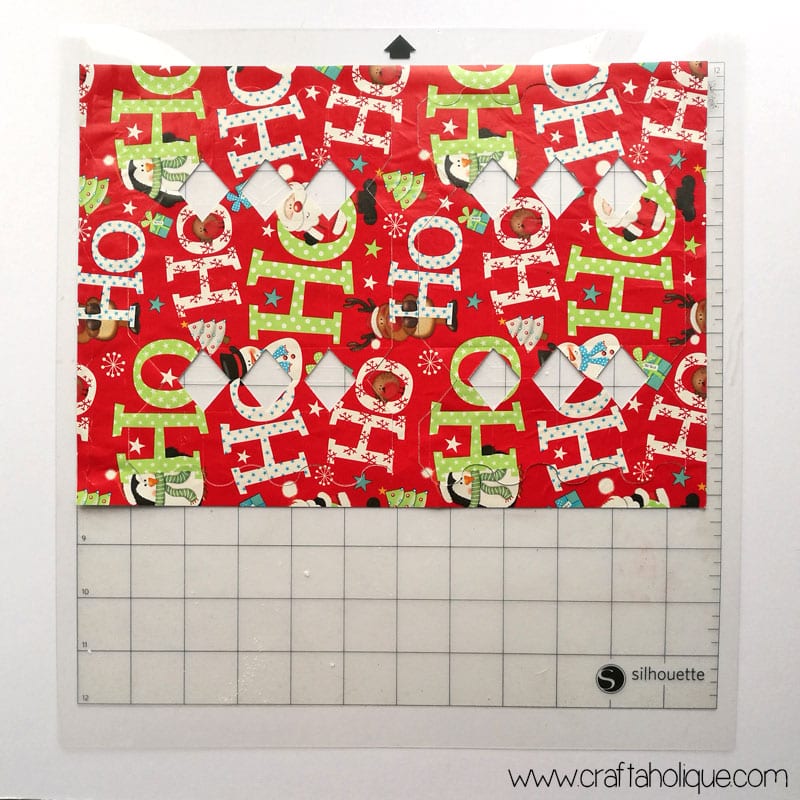
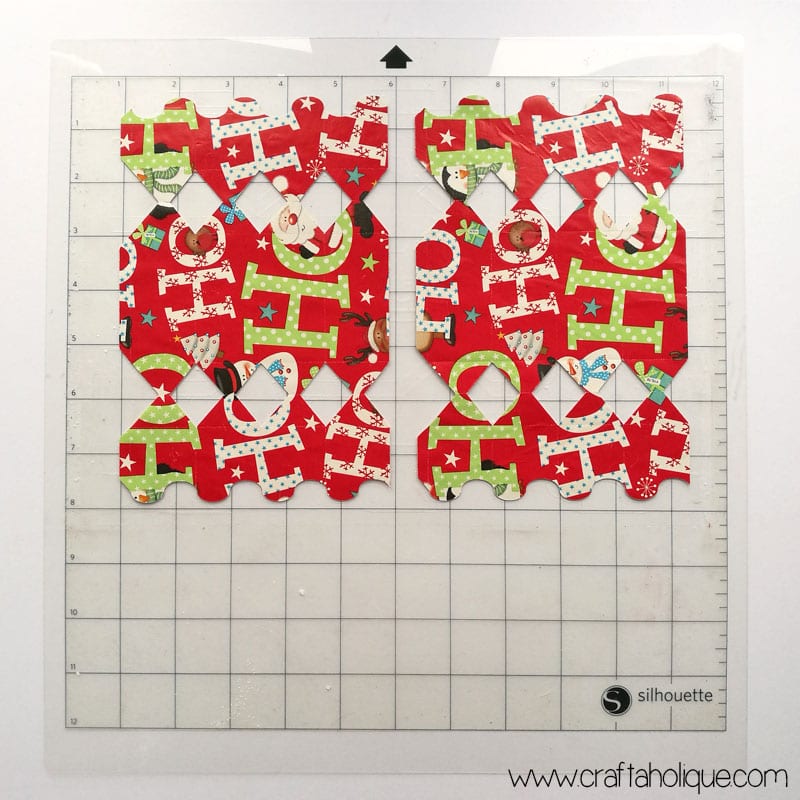
When the cracker shapes have been cut, you can then weed away the excess around the edge and the little diamond shapes in between the crackers. See photos above. You can use a craft knife or Silhouette weeding tool for this.

Once you’ve weeded away the excess, remove the main cracker shapes from the cutting mat. The easiest way to do this is to turn the mat over and peel the mat away from the shapes. Take care around the small dotted lines near those diamond shapes as they are very delicate!

Step 4: Fold your crackers!

How to make christmas crackers - paper craft tutorial with Silhouette Cameo

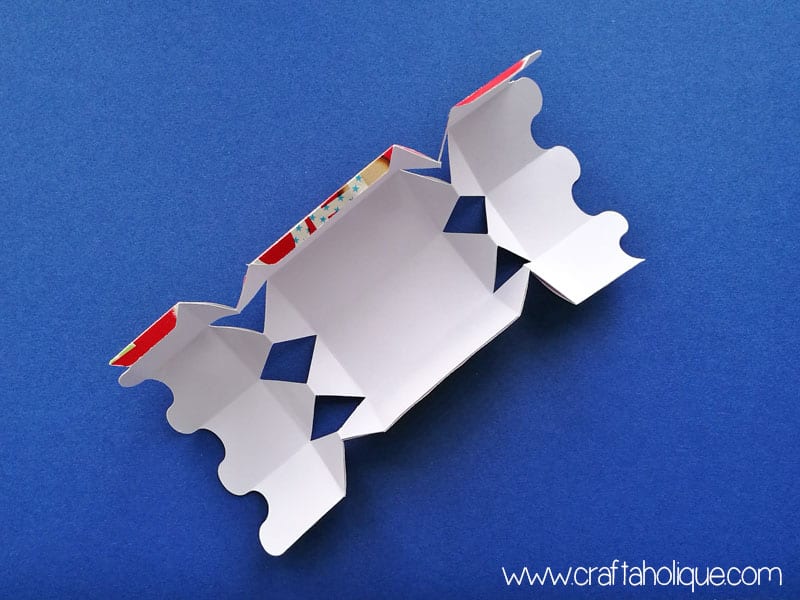
Make sure all the wrapping paper edges are stuck down before you begin folding. Then fold the dotted lines first, at both ends of the cracker, to create the concertina effect. Then fold the cracker along the score lines afterwards.

Glue the edges together on the folded tabs and stick! You may want to glue cracker snaps into place at this point too, so that the cracker “pops” open when pulled.

When the cracker is dry, you’ll be able to pull on the handles to open up the middle and slot in a little gift or joke. To finish, tie a little ribbon around the handles to pull the cracker closed and to make them look pretty!

I hope you enjoyed this tutorial – let me know if you decide to make some!

Before you go, why not check out some of my other Christmas crafts below:

  • Snowflakes Peyote Stitch Beading Pattern
  • How to Make Beaded Angel Earrings
  • How to Make a Snowman Cutlery Holder

*Affiliate links to Etsy and Amazon are included in this post. This means that if you make a purchase through one of my links, I will earn a small commission at no cost to you. Craftaholique is a participant in the Amazon Services LLC Associates Program, an affiliate advertising program designed to provide a means for sites to earn advertising fees by advertising and linking to www.amazon.co.uk and www.amazon.com. I only ever recommend products that I think are great and any commissions help me to keep this site up and running. Thank you for using my links if you’re able to.

How to make christmas crackers - paper craft tutorial with Silhouette Cameo

**All images © Craftaholique.

Share this post!
  • save 
  • share 
  • tweet 
  • email 

Filed Under: Crafts, Other, Tutorials Hayley 1 Comment

Reader Interactions

Snowflakes Peyote Stitch Beading Pattern
How to Make Brick Stitch Star Earrings

Comments

  1. 1

    Julie says

    December 11, 2017 at 1:09 am

    As a kid I always made crackers, with old toilet roll tubes and my poor mum had to find gifts that would fit inside. It was always lots of fun though. Yours are a very classy looking upgrade. The square shape is lovely, makes them a little bit different.

    Reply

Leave a Reply Cancel reply

Your email address will not be published.

Primary Sidebar

Connect

  • E-mail
  • Facebook
  • Instagram
  • Pinterest
  • Twitter

Advert


Instagram

I finally finished this bead loom bracelet! Starte I finally finished this bead loom bracelet! Started it before the first lockdown... I think I lost my mojo for a while! So this is a flat piece of beadwork, which I then glued onto a cuff bracelet blank.
Started this loom beading project last May... Prou Started this loom beading project last May... Proud to say I finally finished it more than one year later! More photos coming soon! What's your longest ever project? #beads #beadwork #loombeading #crafts #crafting #craftblogger #crafty #longestprojectever
My latest beaded creation! Peyote with a twist. Lo My latest beaded creation! Peyote with a twist. Love the chunkiness of it and how it shimmers with the galvanised silver Miyuki Delica beads. #beads #beadwork #beadweavingpeyote #peyote #flatpeyotestitch #silver #beaded #beadedjewelryofinstagram #beadedring #beadedjewelry #miyukidelica #miyukipeyote #miyuki #miyukibeads #beading #crafts #crafting #craftblogger
My latest tubular peyote bracelet! It's made up of My latest tubular peyote bracelet! It's made up of hundreds of tiny Miyuki Delica beads in vibrant colours of metallic blue, silver, white and pink. The pattern is available in my Etsy shop, Craftaholique Designs. #beads #beadwork #beadweavingpeyote #tubularpeyotestitch #miyukipeyote #beading #beadingpattern #etsyshop #etsysellersofinstagram #etsyseller #etsyshopowner #bracelets #vibrant #tubularpeyote #beadaddict #beadaddiction #miyuki #miyukibeads
My finished bead embroidery - I've used it as an e My finished bead embroidery - I've used it as an embellishment for a beadwork storage case I've just made. I upcycled the case from an old padfolio / conference folder. Inside there's an integrated beading mat where I can do my beadwork - no more beads rolling away! I've posted a tutorial on my blog (link in bio).
My latest project... Bead embroidered flowers! I'm My latest project... Bead embroidered flowers! I'm making this as an embellishment for something. Will post the final project pic soon! #beadwork #beadembroidery #embroidery #embroiderydesign #embroideryart #embroidelicious #flowers #beads #beadedembroidery #beadedembellishment #crafts #crafting #keepcraftingcarryon #keepcraftalive #keepcraftingandcarryon #beaded #beadaddict #beadaddiction #embroideryhoop #craftblogger #crafty
Just finished this set of Miyuki Delica bracelets Just finished this set of Miyuki Delica bracelets in pretty colours of peach, white, pink and gold! I made the two diamond pattern bracelets using a bead loom. The single strand bracelet I just strung together. What do you think to my creation? #beads #beadwork #beadloom #beadloompattern #beadloomingbracelet #beadlooming #beadloombracelets #beadweaving #loombeading #loombead #beadingpattern #beadedjewelryofinstagram #beadaddict #beadaddiction #miyuki #miyukibeads #miyukidelica #crafts #crafting #craftblogger #crafty #bead #craftblogger #beadedbracelets #cuffbracelet #stackingbracelets
Though I've been beading for many years, this is t Though I've been beading for many years, this is the first time I've used a bead loom! It's pretty straightforward and quicker than peyote. #beading #beadloom #beadlooming #beadloomingbracelet #beadloomingnewbie #beadloombracelets #beadloompattern #beadwork #beadingpattern #miyuki #miyukibeads
I had tons of fun over the Easter weekend making t I had tons of fun over the Easter weekend making this rag rug sample with a kit from @raggedlife. This was part of an online workshop on rag rugging, with four other craft bloggers (hosted on Zoom by Elspeth at Ragged Life). It was brilliant! I'd highly recommend it. I've just posted about my experience on the blog - see link in bio.
Tomorrow, I'm taking part in an online rag rug wor Tomorrow, I'm taking part in an online rag rug workshop with @raggedlife! Can't wait, I've been wanting to try out rag rugging for ages. The class is being hosted on Zoom and will be fully interactive. Will post my project when I've done it!
I've needed a bit of colour in my life recently, a I've needed a bit of colour in my life recently, after the last few weeks of darkness. I made this bangle using tubular peyote stitch, with Miyuki Delica beads. Pattern available in my Etsy Shop, Craftaholique Designs!
If you're stuck for what to get your mum this Moth If you're stuck for what to get your mum this Mother's Day, I've put together an Etsy gift guide on my blog that you might like (link in bio). Etsy is my go-to place for gifts as you can find some really creative and unique products, plus it's a great way to support the handmade community! Featuring these amazing Etsy sellers... @pawprintillustration @kustomproductsinc @jemmamarston_design @butterflyandtoadstool @bonnenouvelle_uk @silveristicjewelry @crystalfiligree
Load More… Follow me on Instagram

Popular Posts

Popular Posts

Recent Posts

  • I’m back (with a new bead loom bracelet pattern)
  • Leaf Art Craft Project with Sharpie Pens
  • Chevron Tubular Peyote Bracelet Pattern
  • DIY Beadwork Storage Case (with Beading Mat)
  • Set of Two Bead Loom Bracelet Patterns

Advert


Recent Comments

  • Christina Athanasuleas on I’m back (with a new bead loom bracelet pattern)
  • Hayley on Beadwork Tutorial! Learn Flat Odd and Even Count Peyote Stitch
  • Jasmine on How I Salvaged My Tarnished Silver Pandora Bracelet
  • Lindsey Parry on How I Salvaged My Tarnished Silver Pandora Bracelet
  • Monica Shaw on Beadwork Tutorial! Learn Flat Odd and Even Count Peyote Stitch

Looking for Something?

Footer

My favourite place to shop handmade!

Featured on Feedspot

Disclaimer

Craftaholique is a personal blog. The content you'll find here is for your entertainment purposes only. Craftaholique is a participant in the Amazon Services LLC Associates Program, an affiliate advertising program designed to provide a means for sites to earn advertising fees by advertising and linking to www.amazon.co.uk and www.amazon.com. Read the full site disclaimer here.

Blogroll

  • Free Pretty Things For You
  • Golden Age Beads
  • Off The Beaded Path
  • The Graphics Fairy

© 2020 Craftaholique

We use cookies on our website to give you the most relevant experience by remembering your preferences and repeat visits. By clicking “Accept All”, you consent to the use of ALL the cookies. However, you may visit "Cookie Settings" to provide a controlled consent.
Cookie SettingsAccept All
Manage consent

Privacy Overview

This website uses cookies to improve your experience while you navigate through the website. Out of these, the cookies that are categorized as necessary are stored on your browser as they are essential for the working of basic functionalities of the website. We also use third-party cookies that help us analyze and understand how you use this website. These cookies will be stored in your browser only with your consent. You also have the option to opt-out of these cookies. But opting out of some of these cookies may affect your browsing experience.
Necessary
Always Enabled
Necessary cookies are absolutely essential for the website to function properly. This category only includes cookies that ensures basic functionalities and security features of the website. These cookies do not store any personal information.
Non-necessary
Any cookies that may not be particularly necessary for the website to function and is used specifically to collect user personal data via analytics, ads, other embedded contents are termed as non-necessary cookies. It is mandatory to procure user consent prior to running these cookies on your website.
SAVE & ACCEPT