• Skip to primary navigation
  • Skip to main content
  • Skip to primary sidebar
  • Skip to footer
  • Home
  • Tutorials
  • Crafts
    • Jewellery Making
      • Everything jewellery
      • Beadwork
      • Wire jewellery
      • Book reviews
    • Feltmaking
    • Crochet
    • Knitting
    • Kid’s crafts
    • Book reviews
    • Other
  • Inspiration
    • Everything inspirational
    • Handmade showcase
    • Colours
    • Materials
    • Crafty Links
    • Start a Blog
  • Lifestyle
    • Tips
    • Recipes
  • About
    • Advertise
  • Contact
  • Privacy Policy
    • Cookie Policy
  • Disclaimer / Disclosure

Craftaholique

Embracing The Handmade Life | UK Craft Blog

You are here: Home / Jewellery making / How to Make Brick Stitch Star Earrings

December 7, 2017

How to Make Brick Stitch Star Earrings

Brick Stitch Star Earrings Pattern and Tutorial by Craftaholique

*Affiliate links are included in this post.

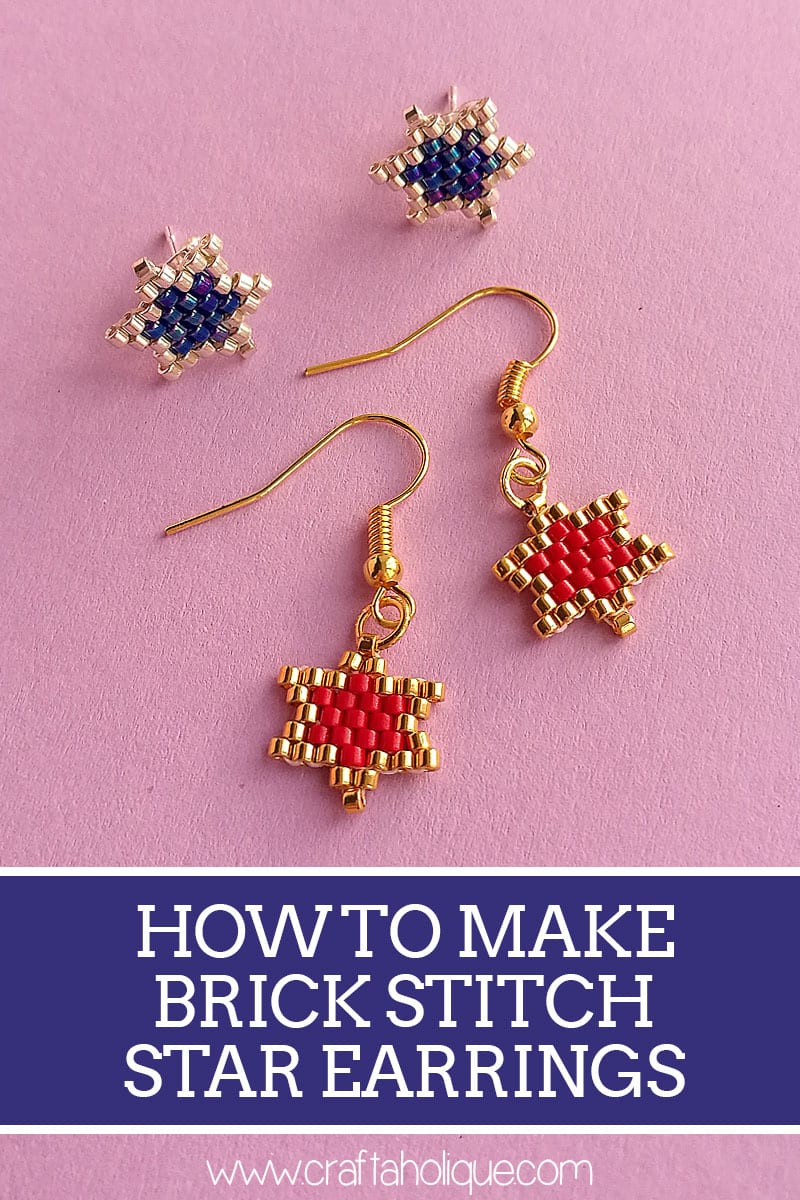
In this tutorial, find out how to make some pretty star-shaped earrings out of Miyuki Delicas!

In the steps below, I’ll be covering how to do the beadweaving technique “Brick Stitch”, including how to decrease and increase rows in order to form a star shape. Included in this post is a free pattern to guide you.

Once you’ve made your star shapes, you can easily turn them into earrings, either studs or dangly ones!

You’ll need the following materials (these are affiliate links) if you want to follow along:

  • Miyuki Delicas size 11/0 in two different colours.
  • Beading thread (such as Miyuki or Nymo).
  • Earring findings of your choice e.g. earwires or stud posts and backs.
  • Jump rings and jewellery-making pliers (if you’re making dangle earrings).
  • Jewellery glue such as e6000 (if you’re making studs).
  • Scissors

Free brick stitch pattern for star earring by CraftaholiqueBefore I go into the step by step instructions for this tutorial, take a look at this bead chart above, as this is the pattern that you’ll need to follow when you’re making your own earrings. Allocate whatever colours you’re using to A and B in the pattern.

In this particular pattern, it’s easiest to start from the 3rd row up from the bottom, so the row with 3 x A beads and 1 x B. I’ll explain why imminently!

Step 1: Start with a row of ladder stitch

Brick Stitch Star Earrings Tutorial

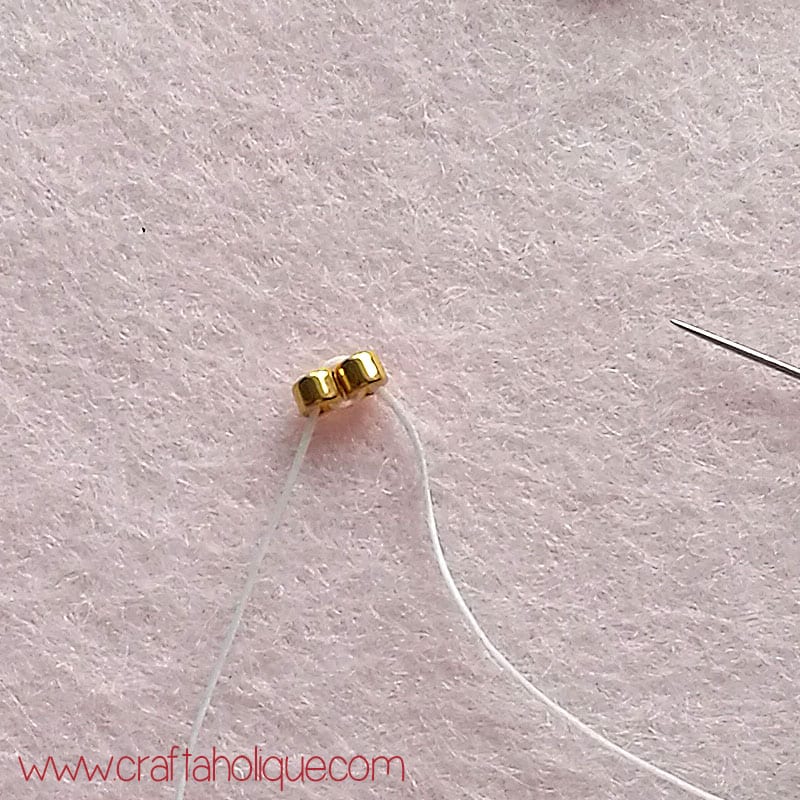
Pick up two beads to begin with (working from the 3rd row up from the bottom in the bead chart). Take your needle and thread back through the first bead and then through the second bead, so that the beads sit side by side, as shown in the above photo.

Brick Stitch starting with Ladder Stitch

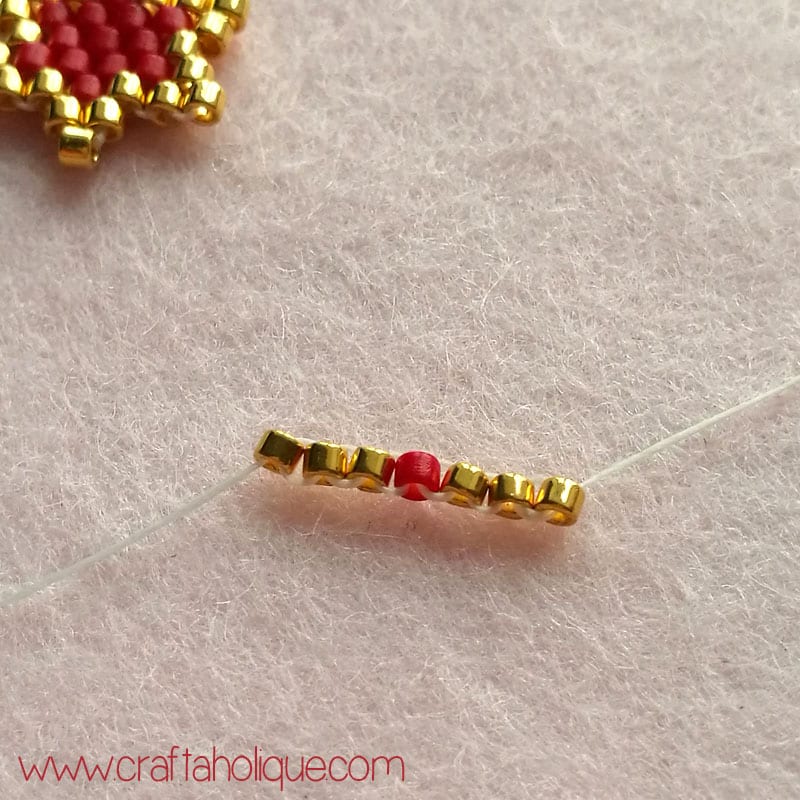
Keep picking up beads for the rest of the row, working in a sort of figure of 8 shape with your needle and thread to make the beads sit side by side. It will look like a little ladder of beads by the time you get to the end of the row, hence the name ladder stitch!

The reason we’re starting with this row is so that the beads above it will have a good base to be stitched to when we move onto brick stitch in the next step.

Step 2: Decreasing brick stitch

Decreasing brick stitch - star earrings tutorial

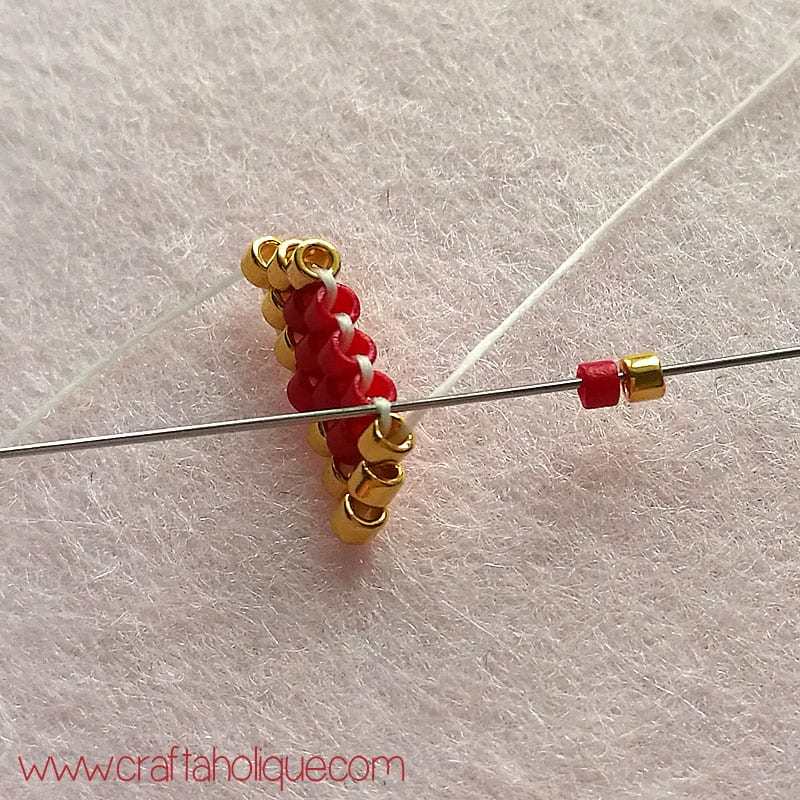
To begin a new row (and every time you begin a new row in brick stitch), pick up two beads in colours according to the pattern, so gold and red in my case.

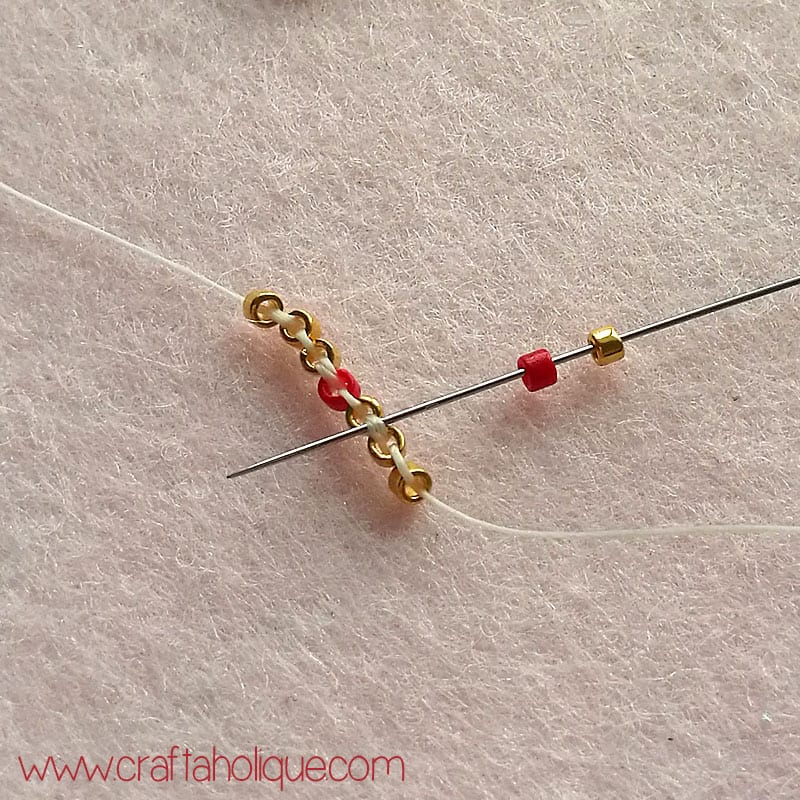
The beads need to indent slightly for this row, so you’ll need to work in a decreasing stitch. To do this, pass the needle and thread under the second “bridge” of thread away from the last bead, as shown above.

When you’ve done that, pass your needle back up through the red bead only. This will allow your beads to sit nicely on top of the row of ladder stitch that you did before.

Decreasing brick stitch - star earrings tutorial

Continue following the pattern, picking up one bead at a time, until you reach the end of the row. Pass your needle and thread under the next “bridge” along from now on. When you do the next row, you’ll need to decrease again, so just follow the steps above.

Step 3: Increasing brick stitch

How to increase in brick stitch beadweaving technique

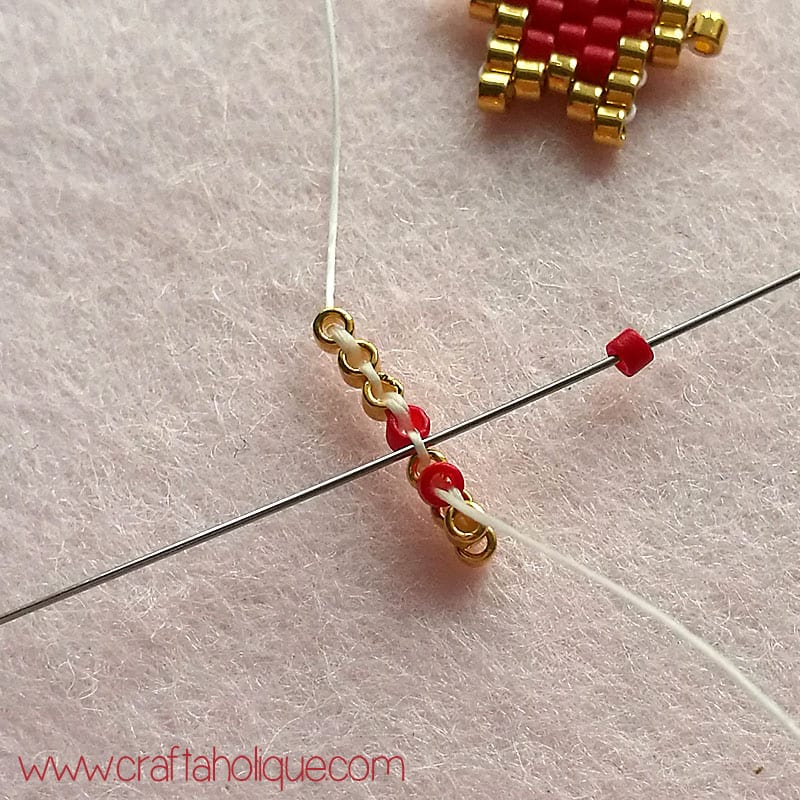
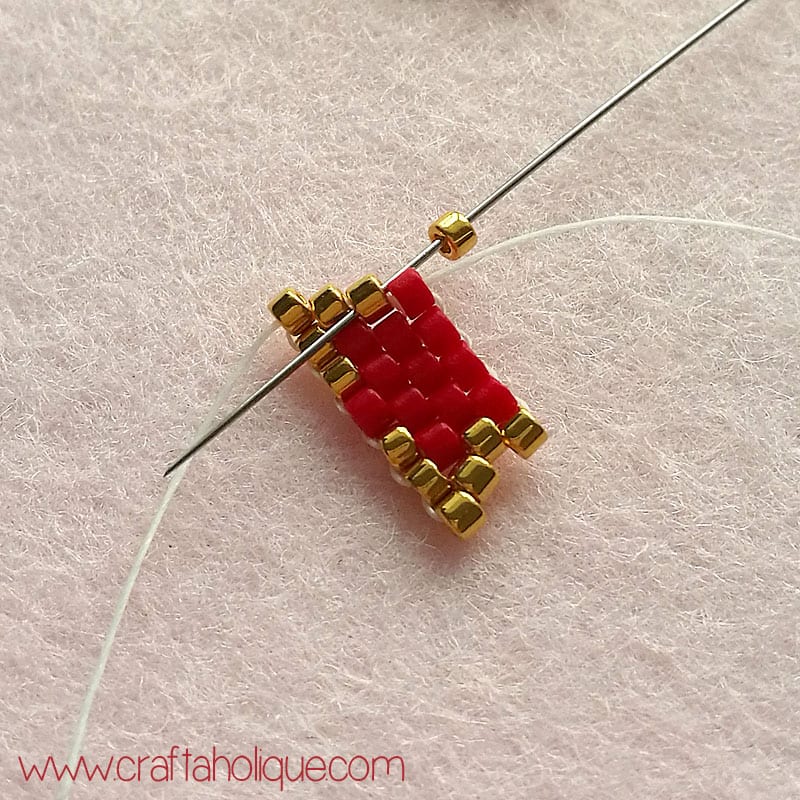
On your fourth row, you’ll need to increase the number of beads during the row to form the star shape. Pick up two beads to start the new row, just like before. But instead of going under the second “bridge” from the last bead, go under the first “bridge” instead. See the above pic as an example. Then go back up through the red bead.

How to increase in brick stitch beadweaving technique

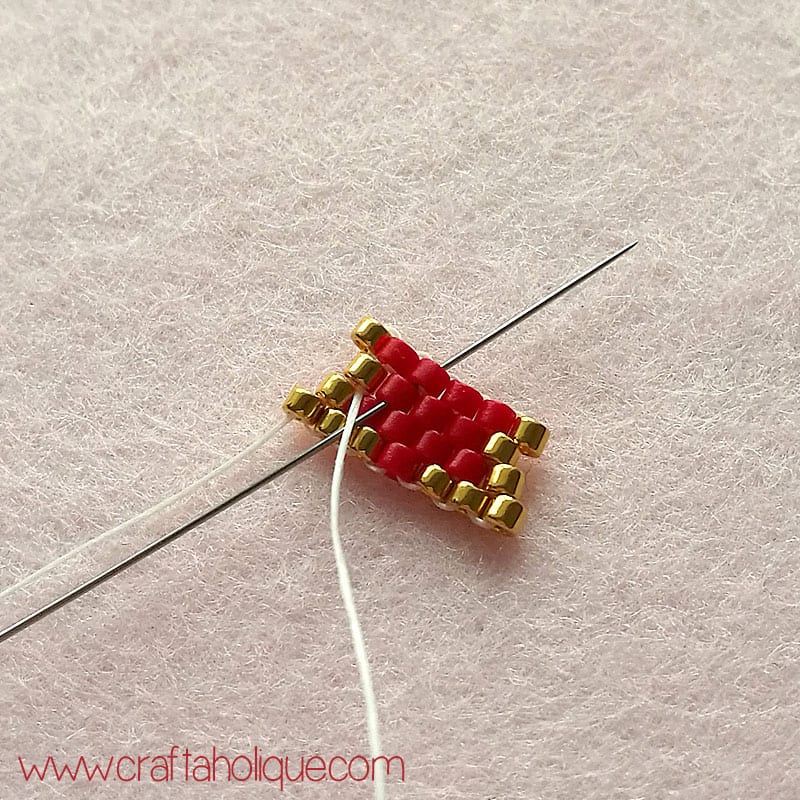
When you get to the end of this row, you’ll need to increase by a bead there also. To do this, pick up the last bead in the row and go down through the gold bead directly under where this one will sit (see pic above).

Then, pass your needle and thread through the red bead right next to that one and back up into the top row. Your thread should be exiting at this point in the third bead away from the gold bead that you just threaded on.

You’ll need to get back to that top gold bead on the end, so weave your thread down into the red bead on the left and then up through that original gold bead. See photos below.

How to increase in brick stitch beadweaving technique

How to increase in brick stitch beadweaving technique

Follow the steps above to increase your beads again for the next row. But this time, leave your thread exiting out of the third bead away from the end as this is where you’ll need to be to create the “pointy” bit of the star shape!

Step 4: Create the pointy bits!

How to make brick stitch star earrings - tutorial by Craftaholique

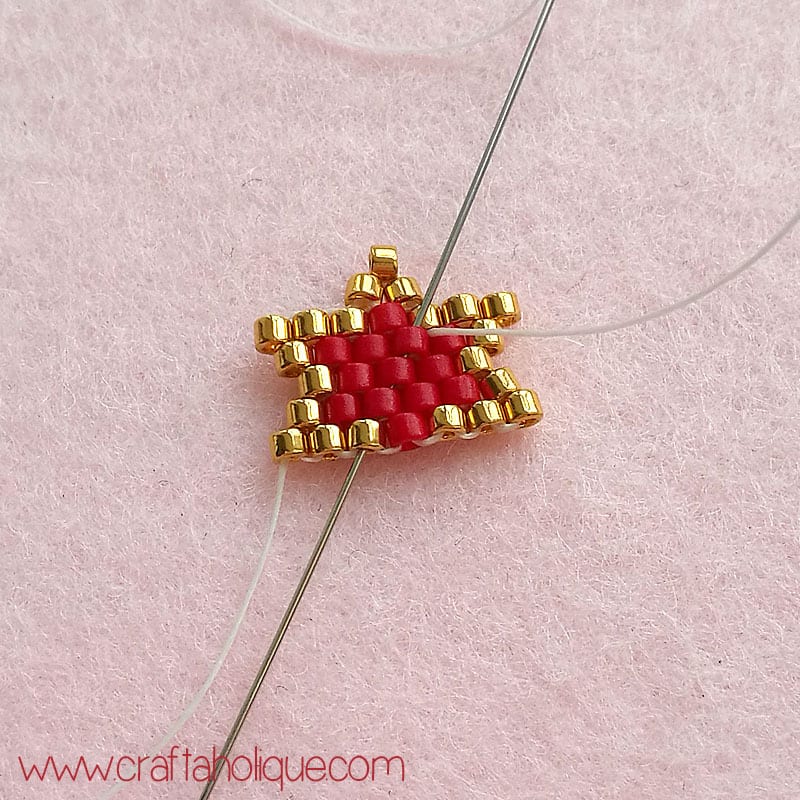
With your thread exiting out of the third gold bead along the last row (or the third gold bead from the end), pick up two beads for the next row. As you’re decreasing the shape, skip the first “bridge” of thread and go under the second “bridge”. Go back up the last gold bead so your thread is coming out of the top of it.

You’ll find that the beads won’t sit very well. All you need to do is pass your needle and thread down through the first of the new beads and then back up into the last bead. Think ladder stitch again, where you’re working in a figure of 8 with the thread.

Your thread will still be exiting out of one of the gold beads at the top. For the last bead, which will create the point, pick up one bead and go down through the other gold bead.

Weave your thread down to the other end of the star shape, making sure that your thread exits out of the third bead away from the end. Repeat the process there to create the other point of your star!

Finally…

Repeat all the steps to make another star shape. You can then create stud earrings with them by dabbing a little glue onto an ear post and sticking them on. Make sure to let the glue dry properly (at least one hour) before you wear them.

Alternatively, attach jump rings to the top pointy beads and then connect earwires to them to make a pair of dangly earrings!

I hope you liked this tutorial and that I’ve explained increasing and decreasing brick stitch well enough! I’m hoping to do some video tutorials next year, which may be easier to follow, so watch this space!

If you liked this post, please take a moment to share this online with your social media followers. Thank you!

Before you go, you might like to check out some of my other beadwork tutorials below:

  • Pretty Chevron Beaded Earrings Tutorial
  • How to Make a Brick Stitch Squirrel
  • How to Make Sparkly Beaded Flowers

*Affiliate links to Etsy are contained in this post. This means that I will receive a small commission should you decide to purchase anything through one of my links, at no cost to you. I only ever recommend products that I think are great and any commissions received help me to keep this site up and running! Thanks for using my links if you are able to!

How to make brick stitch star earrings by Craftaholique

**All images © Craftaholique.

Share this post!
  • save 
  • share 
  • tweet 
  • email 

Filed Under: Beadwork, Jewellery making, Patterns, Tutorials Hayley 3 Comments

Reader Interactions

How to Make Christmas Crackers
Blog Love: Christmas / Winter Crafts Edition

Trackbacks

  1. ❤ Earring Cute ❤ - DIY Earrings – 101 DIY Earring Concepts To Strive Your Palms At - Lily Ideas says:
    November 11, 2019 at 4:10 am

    […] The choices are many when you determine to make your personal ear rings and jazz up your type assertion with it. Listed here are these colourful and cute form of star formed ear rings that might swimsuit greatest the little ladies and would make an ideal handmade present out of your aspect on their special occasion.SO seize some beads, ear ring hooks and get this began with directions given right here craftaholique […]

    Reply
  2. DIY Earrings - 101 DIY Earring Ideas To Try Your Hands At ⋆ DIY Crafts says:
    May 19, 2020 at 9:51 pm

    […] The options are many once you decide to make your own ear rings and jazz up your style statement with it. Here are these colorful and cute kind of star shaped ear rings that would suit best the little girls and would make a perfect handmade gift from your side on their special day.SO grab some beads, ear ring hooks and get this started with instructions given here craftaholique […]

    Reply
  3. DIY Earrings - 101 DIY Earring Ideas To Try Your Hands At ⋆ DIY Crafts says:
    May 19, 2020 at 9:51 pm

    […] The options are many once you decide to make your own ear rings and jazz up your style statement with it. Here are these colorful and cute kind of star shaped ear rings that would suit best the little girls and would make a perfect handmade gift from your side on their special day.SO grab some beads, ear ring hooks and get this started with instructions given here craftaholique […]

    Reply

Leave a Reply Cancel reply

Your email address will not be published. Required fields are marked *

Primary Sidebar

Welcome!

Welcome!

Hi, I'm Hayley! Thanks for visiting Craftaholique, my little corner of the internet where I blog about crafts, beading, handmade products and lots of other stuff relating to creativity. Stay a while and have a browse!

Connect

  • E-mail
  • Facebook
  • Instagram
  • Pinterest
  • Twitter

Advert


Instagram

Work in progress! A new pattern I'm working on. Lo Work in progress! A new pattern I'm working on. Loving the metallic green colour. 😍 #beads #beadwork #peyote #bracelets #braceletpattern #peyotestitch #jewellerymaking #crafts #crafting
Hi all! It's been a very long time since I've post Hi all! It's been a very long time since I've posted here. I've been working on a new venture - surface pattern design. This is my first attempt at a seamless pattern. It's part of a collection I'm working on called 'Mum's Garden'. Mum loved hedgehogs, and they always frequented her garden to enjoy the food she put out for them. 😍 Honest opinions! What do you think? Could this work for wrapping paper, notebook covers, etc? Thanks for looking! #surfacepatterndesign #creativebusiness #creativeentrepreneur #graphicdesign #digitalart #hedgehogs #patterns #seamlesspattern
I finally finished this bead loom bracelet! Starte I finally finished this bead loom bracelet! Started it before the first lockdown... I think I lost my mojo for a while! So this is a flat piece of beadwork, which I then glued onto a cuff bracelet blank.
Started this loom beading project last May... Prou Started this loom beading project last May... Proud to say I finally finished it more than one year later! More photos coming soon! What's your longest ever project? #beads #beadwork #loombeading #crafts #crafting #craftblogger #crafty #longestprojectever
My latest beaded creation! Peyote with a twist. Lo My latest beaded creation! Peyote with a twist. Love the chunkiness of it and how it shimmers with the galvanised silver Miyuki Delica beads. #beads #beadwork #beadweavingpeyote #peyote #flatpeyotestitch #silver #beaded #beadedjewelryofinstagram #beadedring #beadedjewelry #miyukidelica #miyukipeyote #miyuki #miyukibeads #beading #crafts #crafting #craftblogger
My latest tubular peyote bracelet! It's made up of My latest tubular peyote bracelet! It's made up of hundreds of tiny Miyuki Delica beads in vibrant colours of metallic blue, silver, white and pink. The pattern is available in my Etsy shop, Craftaholique Designs. #beads #beadwork #beadweavingpeyote #tubularpeyotestitch #miyukipeyote #beading #beadingpattern #etsyshop #etsysellersofinstagram #etsyseller #etsyshopowner #bracelets #vibrant #tubularpeyote #beadaddict #beadaddiction #miyuki #miyukibeads
My finished bead embroidery - I've used it as an e My finished bead embroidery - I've used it as an embellishment for a beadwork storage case I've just made. I upcycled the case from an old padfolio / conference folder. Inside there's an integrated beading mat where I can do my beadwork - no more beads rolling away! I've posted a tutorial on my blog (link in bio).
My latest project... Bead embroidered flowers! I'm My latest project... Bead embroidered flowers! I'm making this as an embellishment for something. Will post the final project pic soon! #beadwork #beadembroidery #embroidery #embroiderydesign #embroideryart #embroidelicious #flowers #beads #beadedembroidery #beadedembellishment #crafts #crafting #keepcraftingcarryon #keepcraftalive #keepcraftingandcarryon #beaded #beadaddict #beadaddiction #embroideryhoop #craftblogger #crafty
Just finished this set of Miyuki Delica bracelets Just finished this set of Miyuki Delica bracelets in pretty colours of peach, white, pink and gold! I made the two diamond pattern bracelets using a bead loom. The single strand bracelet I just strung together. What do you think to my creation? #beads #beadwork #beadloom #beadloompattern #beadloomingbracelet #beadlooming #beadloombracelets #beadweaving #loombeading #loombead #beadingpattern #beadedjewelryofinstagram #beadaddict #beadaddiction #miyuki #miyukibeads #miyukidelica #crafts #crafting #craftblogger #crafty #bead #craftblogger #beadedbracelets #cuffbracelet #stackingbracelets
Though I've been beading for many years, this is t Though I've been beading for many years, this is the first time I've used a bead loom! It's pretty straightforward and quicker than peyote. #beading #beadloom #beadlooming #beadloomingbracelet #beadloomingnewbie #beadloombracelets #beadloompattern #beadwork #beadingpattern #miyuki #miyukibeads
I had tons of fun over the Easter weekend making t I had tons of fun over the Easter weekend making this rag rug sample with a kit from @raggedlife. This was part of an online workshop on rag rugging, with four other craft bloggers (hosted on Zoom by Elspeth at Ragged Life). It was brilliant! I'd highly recommend it. I've just posted about my experience on the blog - see link in bio.
Tomorrow, I'm taking part in an online rag rug wor Tomorrow, I'm taking part in an online rag rug workshop with @raggedlife! Can't wait, I've been wanting to try out rag rugging for ages. The class is being hosted on Zoom and will be fully interactive. Will post my project when I've done it!
Load More… Follow me on Instagram

Popular Posts

Popular Posts

Recent Posts

  • Craftaholique is being revived!
  • I’m back (with a new bead loom bracelet pattern)
  • Leaf Art Craft Project with Sharpie Pens
  • Chevron Tubular Peyote Bracelet Pattern
  • DIY Beadwork Storage Case (with Beading Mat)

Advert


Recent Comments

  • Hayley on BeadTool 4 Review – Make Your Own Beading Patterns
  • Susan Nicholas on BeadTool 4 Review – Make Your Own Beading Patterns
  • Heather on How I Salvaged My Tarnished Silver Pandora Bracelet
  • Hayley on DIY Beadwork Storage Case (with Beading Mat)
  • Hayley on How to Use Pinterest to Significantly Boost Your Etsy Sales

Looking for Something?

Footer

My favourite place to shop handmade!

Featured on Feedspot

Disclaimer

Craftaholique is a personal blog. The content you'll find here is for your entertainment purposes only. Craftaholique is a participant in the Amazon Services LLC Associates Program, an affiliate advertising program designed to provide a means for sites to earn advertising fees by advertising and linking to www.amazon.co.uk and www.amazon.com. Read the full site disclaimer here.

Blogroll

  • Free Pretty Things For You
  • Golden Age Beads
  • Off The Beaded Path
  • The Graphics Fairy

© 2020 Craftaholique