• Skip to primary navigation
  • Skip to main content
  • Skip to primary sidebar
  • Skip to footer
  • Home
  • Tutorials
  • Crafts
    • Jewellery Making
      • Everything jewellery
      • Beadwork
      • Wire jewellery
      • Book reviews
    • Feltmaking
    • Crochet
    • Knitting
    • Kid’s crafts
    • Book reviews
    • Other
  • Inspiration
    • Everything inspirational
    • Handmade showcase
    • Colours
    • Materials
    • Crafty Links
    • Start a Blog
  • Lifestyle
    • Tips
    • Recipes
  • About
    • Advertise
  • Contact
  • Privacy Policy
    • Cookie Policy
  • Disclaimer / Disclosure

Craftaholique

Embracing The Handmade Life | UK Craft Blog

You are here: Home / Crafts / Reversible Mermaid Sequin Fabric Notebook Tutorial

February 21, 2018

Reversible Mermaid Sequin Fabric Notebook Tutorial

Reversible mermaid sequin fabric notebook tutorial from Craftaholique

Follow my blog with Bloglovin

*Affiliate links are included in this post.

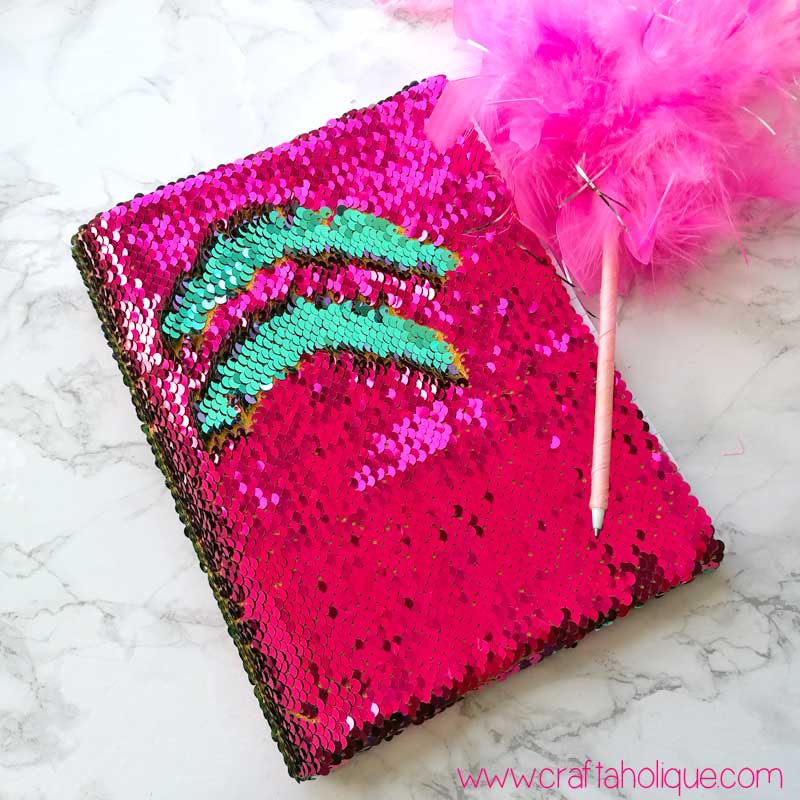
Reversible mermaid sequin fabric seems to be everywhere at the moment.

I’ve seen this material on notebooks, mobile phone cases, cushion covers, pencil cases, keyrings and even made into bracelets!

I actually bought my daughter a reversible mermaid sequin notebook from Smiggle last year. She loves it, but at £13.50 a pop, I thought I’d have a go at making my own before buying her another one.

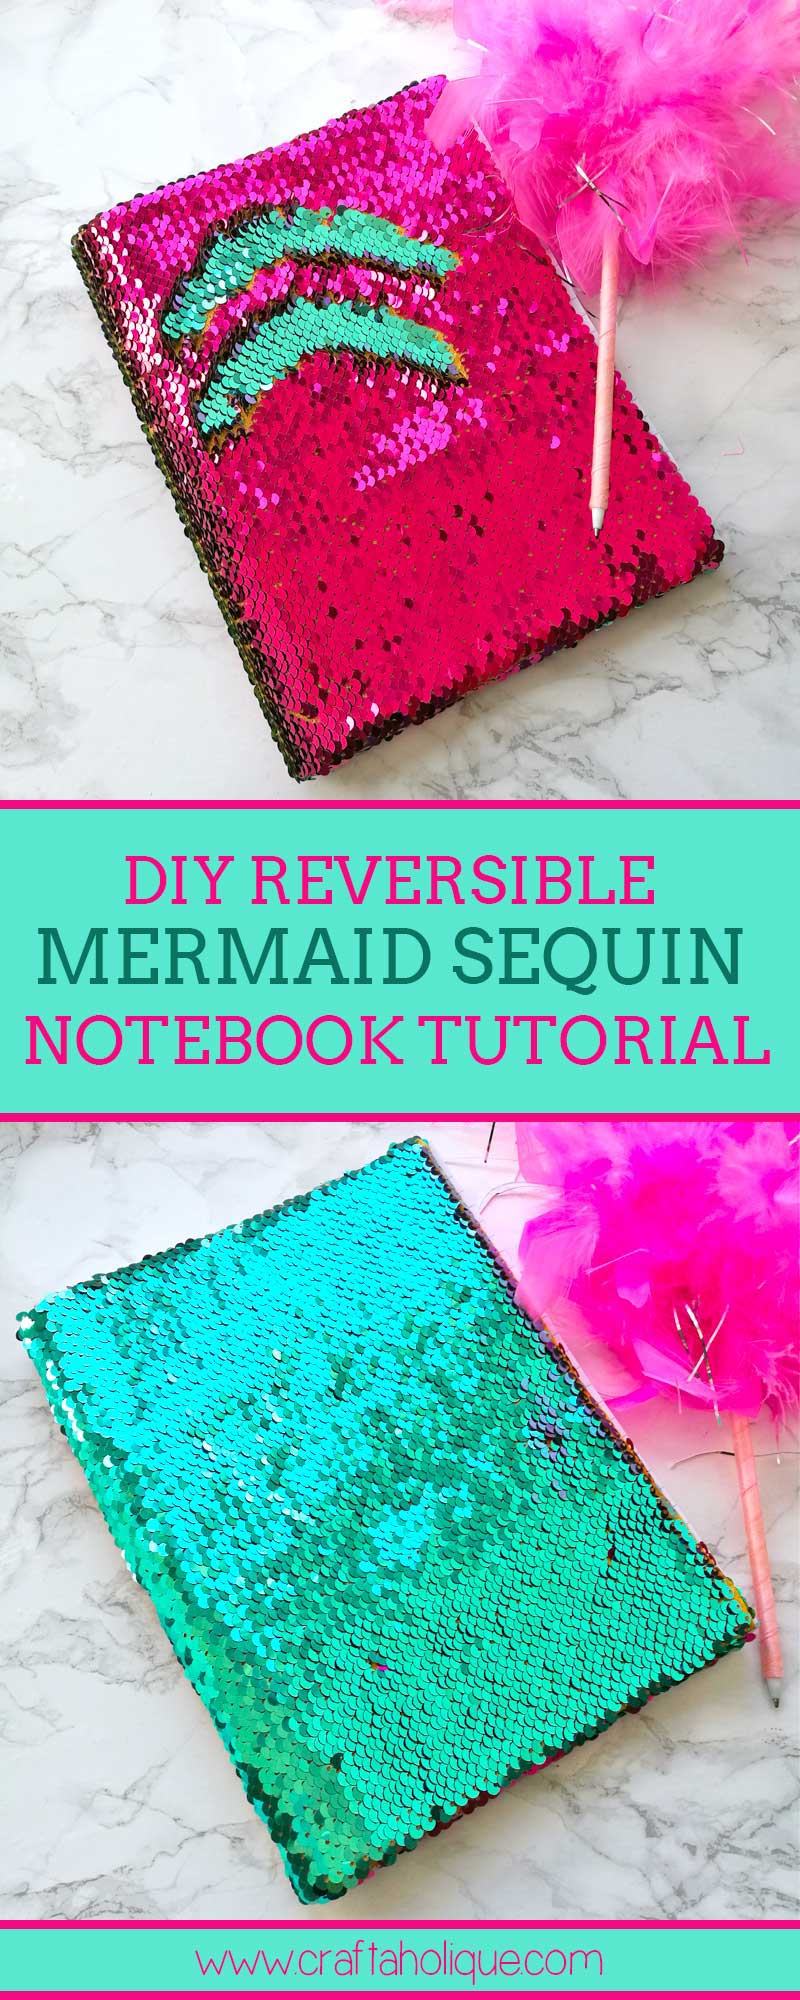
What do you think to my efforts?

Making this was easier than I thought! I’ve detailed a step by step tutorial below in case you’d like to make one too.

You’ll need the following materials:

Reversible mermaid sequin fabric notebook tutorial from CraftaholiqueReversible mermaid sequin fabric notebook tutorial from Craftaholique

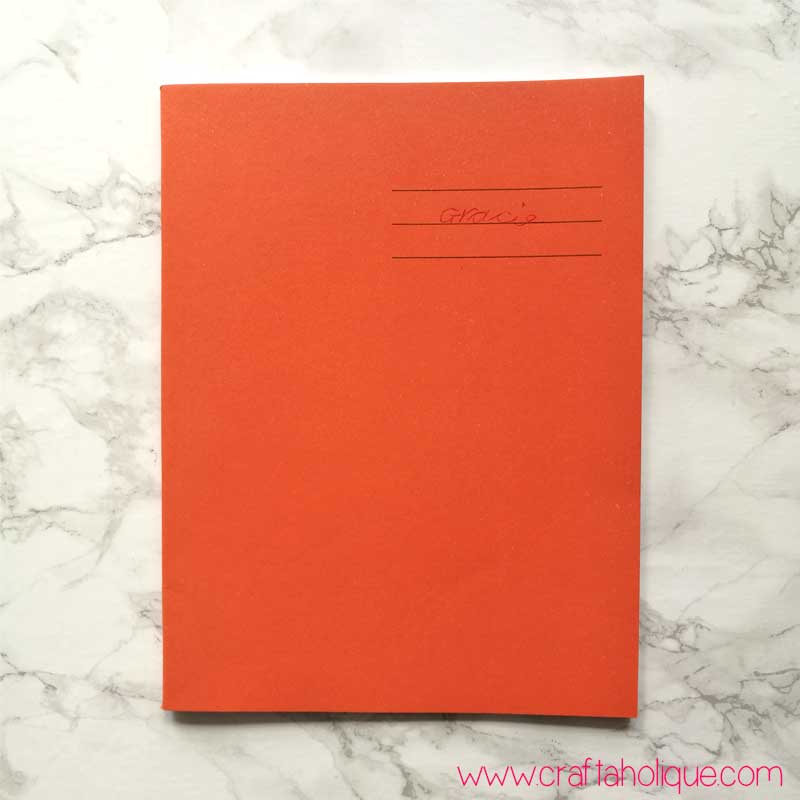
  • Plain notebook with a cardboard cover that’s just crying out to be jazzed up.
  • Reversible mermaid sequin fabric (I used a fat quarter from this supplier).
  • 2 x sheets of felt or card in a complementary colour.
  • Scissors.
  • PVA glue and a glue spreader.
  • Pen or pencil.

Step 1: Measure/cut the reversible mermaid sequin fabric to size

Things to make with reversible mermaid sequin fabric

Lay out your notebook on the back of the fabric so that the existing cover is open and flat. Use a pen to mark out a border around your notebook cover (approx. 1.5 to 2 inches). Cut around the area you’ve marked out with some scissors.

Note: be prepared for the mess! Little half cut sequins will go everywhere!

Step 2: Glue the fabric to the notebook

Reversible Mermaid Sequin Fabric crafts

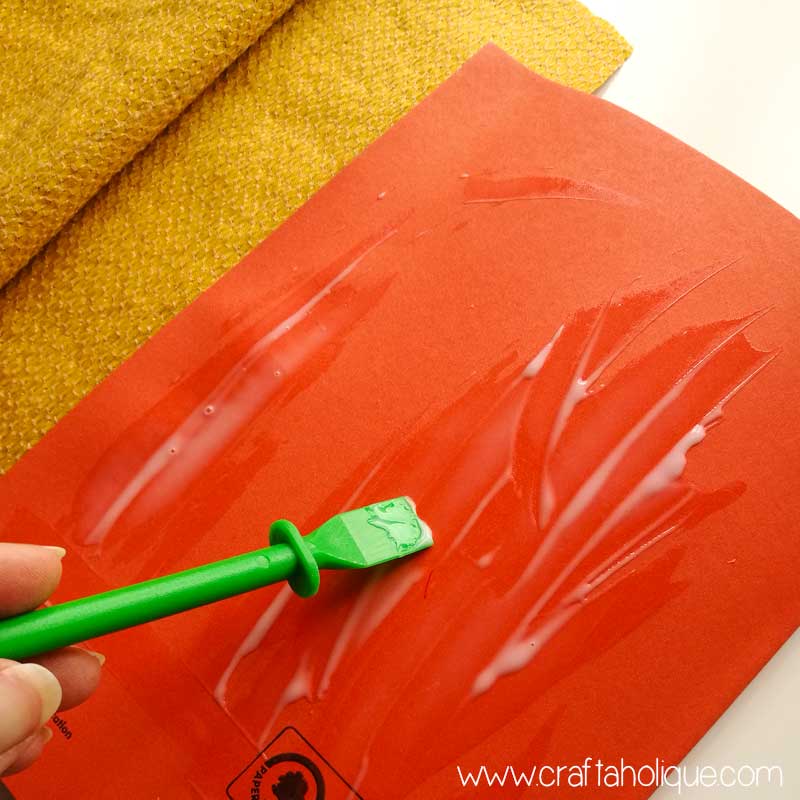
Spread a little glue all over the outer cover of the notebook then lay it over the fabric backing to stick it into place.

Reversible Mermaid Sequin Fabric crafts

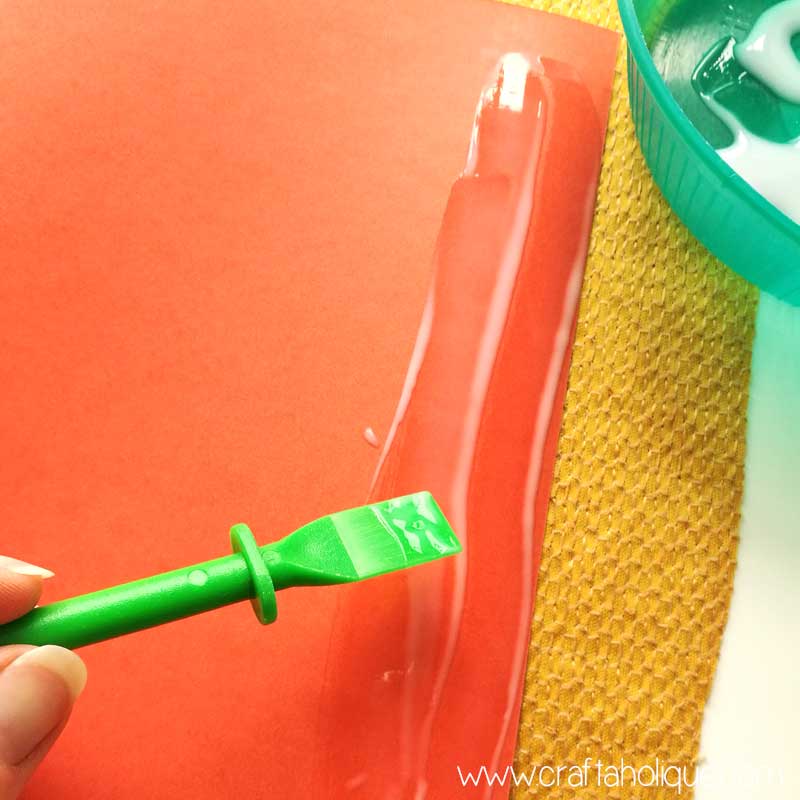
Then start with one side of the cover – fold the fabric over it and hold down for a few minutes. PVA glue is fine for sticking down this particular type of fabric onto card; it just takes longer to dry as opposed to if you were sticking paper to card.

Reversible Mermaid Sequin Fabric crafts

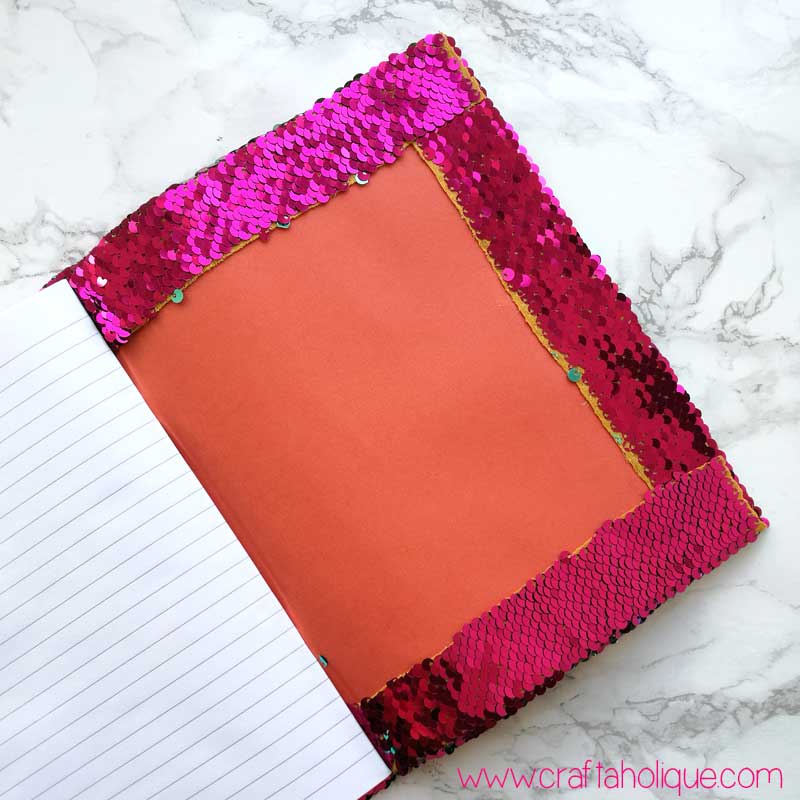
Repeat on the other side of the cover, taking care to allow for a little room for the cover to open and close before you stick the side edge down.

Reversible Mermaid Sequin Fabric crafts

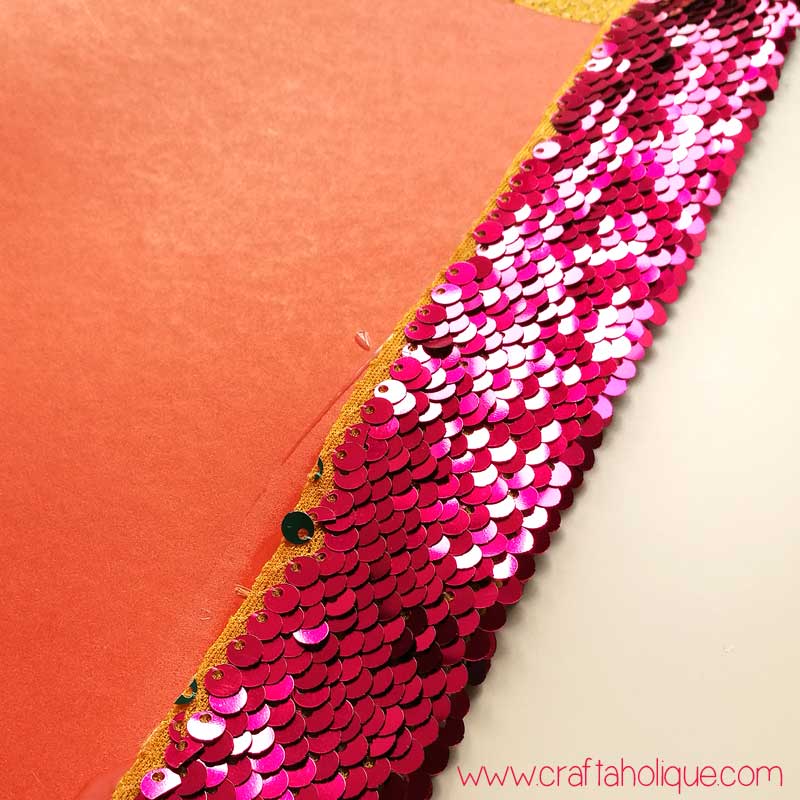
When you get to the corners, you’ll need to cut a little square of fabric out, so that you can fold the adjacent edge over neatly, see pic above.

Tuck the fabric into the spine of the notebook, by slotting it under the bound pages at the top and bottom.

Let your new cover dry completely before attempting to pick up!

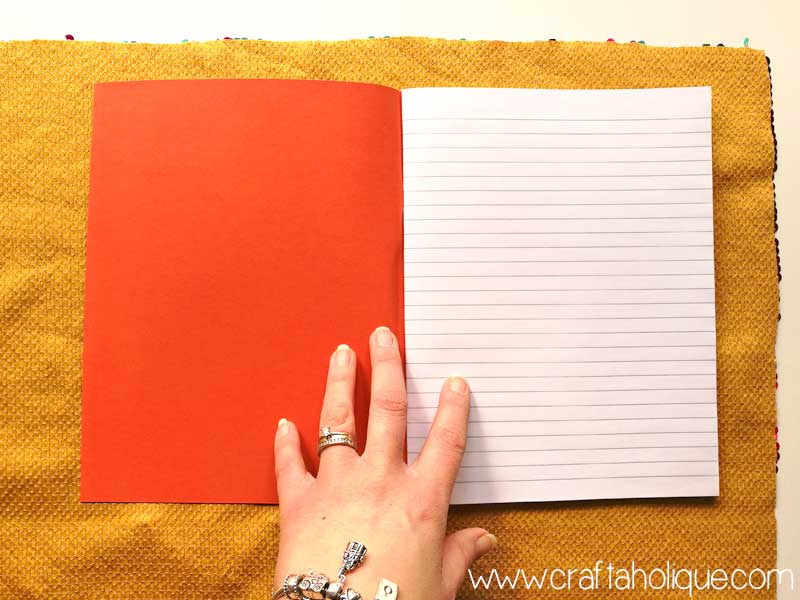
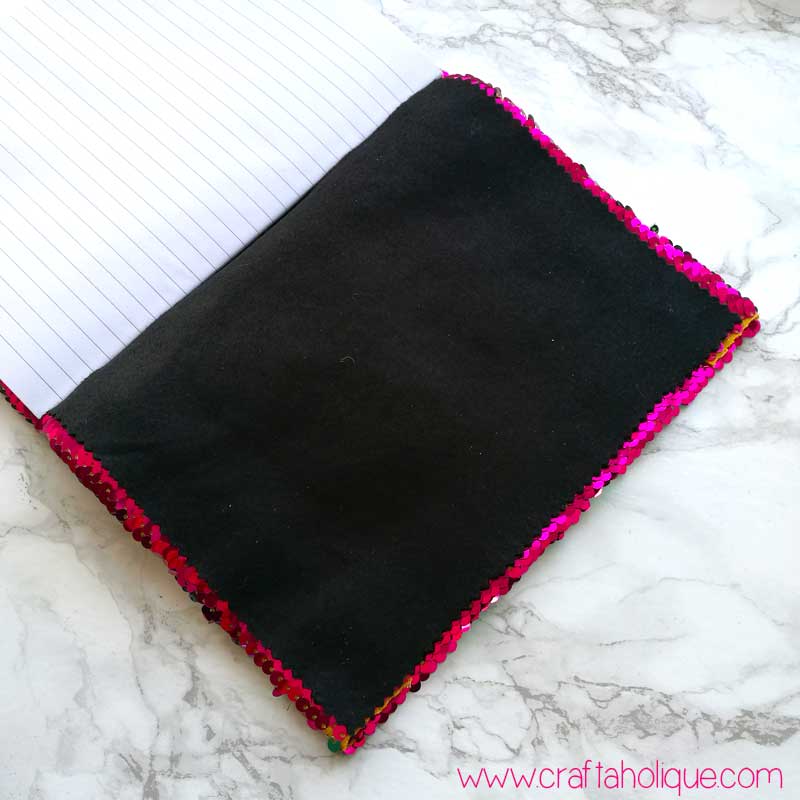
Step 3: Tidy up the insides of your cover

Mermaid Sequin Notebook Tutorial

Hide those scraggy edges with either a piece of cardboard or felt. Simply cut out two rectangles to fit over the edges and glue them into place. I’ve used felt because I thought it looked nicer and also because it’s soft enough to tuck into the centre of the notebook.

Mermaid Sequin Notebook Tutorial

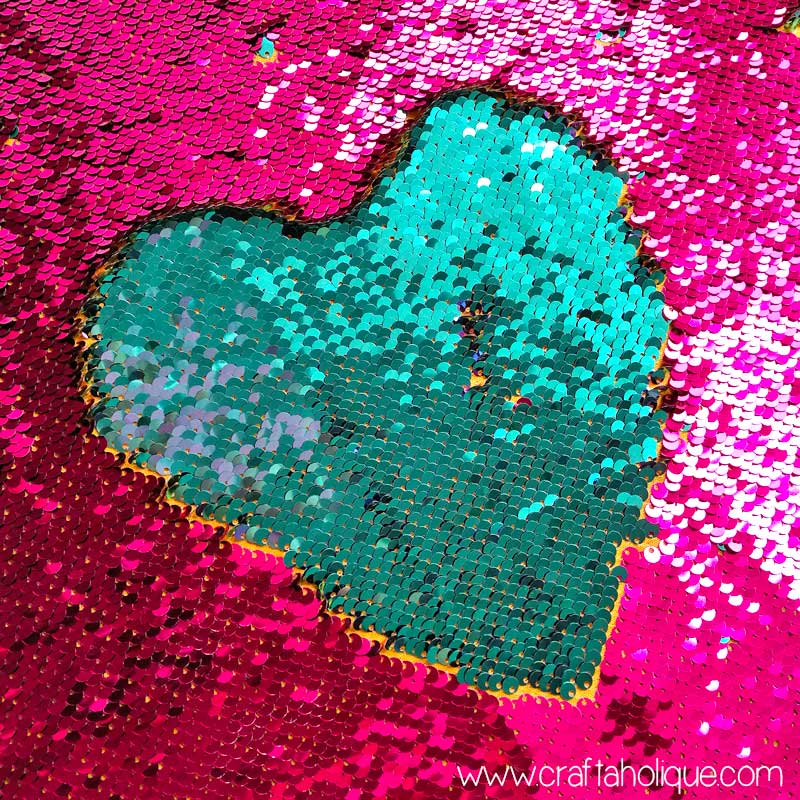
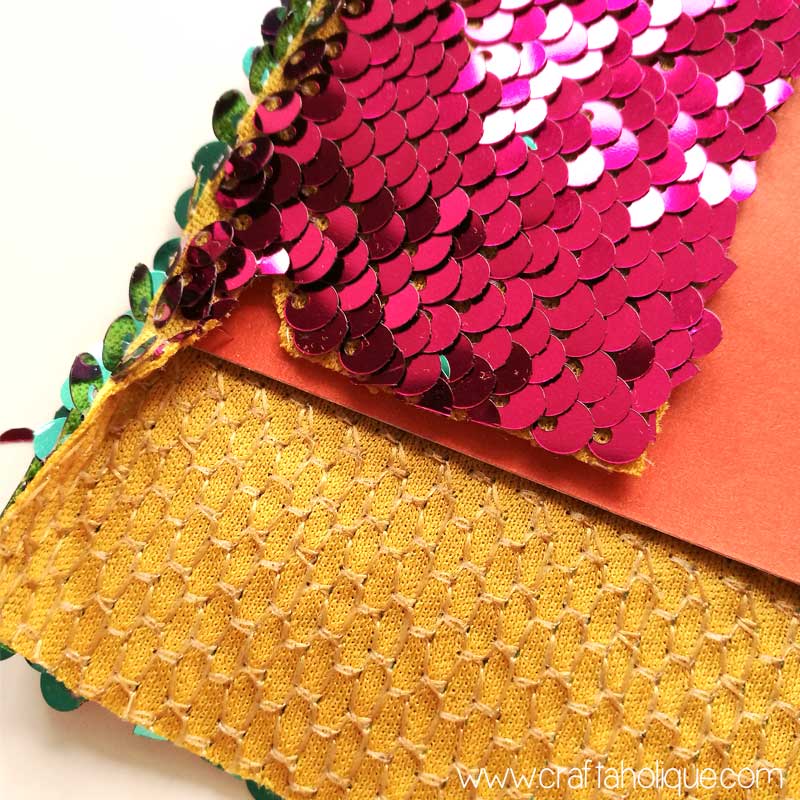
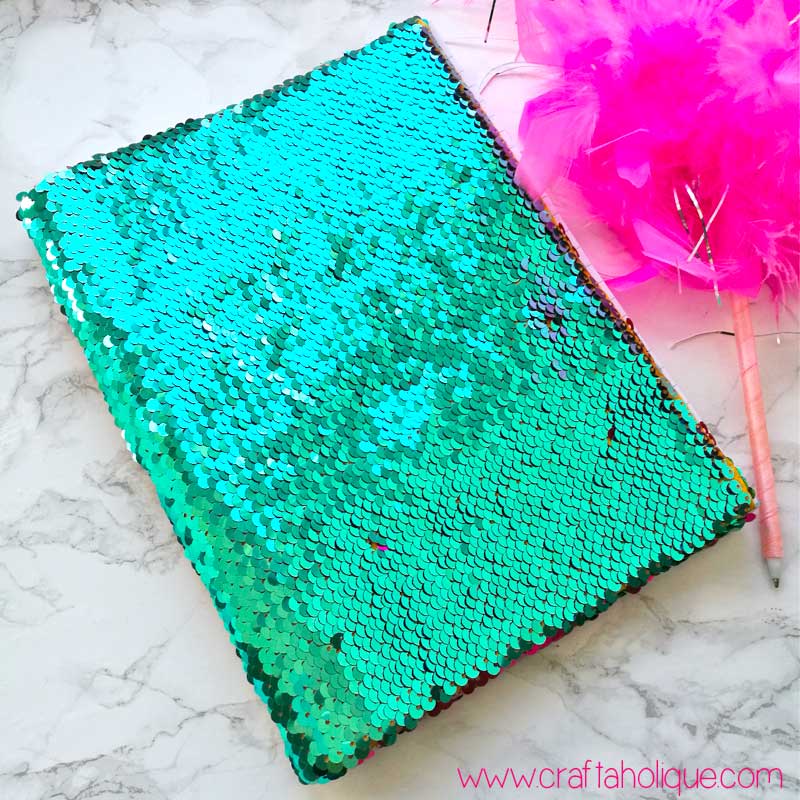
And that’s it! It’s easy to transform a very plain notebook into something much more beautiful without spending a fortune. Take a look at it below, with the sequins reversed the other way – it’s so pretty!

Mermaid Sequin Notebook Tutorial

Why not make one of these as a gift for someone? The one I’ve made is going to be my daughter’s new handwriting practice book. I thought it might encourage her to spend a little more time on what would be an otherwise tedious task!

I hope you enjoyed this tutorial. If you did, please take a moment to share this post online!

Before you go, why not check out some of my other craft tutorials below:

  • Felt Dog Keyring Kit Review
  • How to Make Easter Egg Fairy Lights
  • Candy Bead & Memory Wire Bracelet Tutorial

*Affiliate links to Etsy are included in this post. This means that if you make a purchase through one of my links, I will earn a small commission at no cost to you or any of the designers above. I only ever recommend products that I truly love and any commissions help me to keep this site up and running. Thank you for using my links if you’re able to.

Reversible Sequin Fabric Notebook Tutorial by Craftaholique

**All images © Craftaholique.

Share this post!
  • save 
  • share 
  • tweet 
  • email 

Filed Under: Crafts, Other, Tutorials Hayley 4 Comments

Reader Interactions

Handmade Showcase: Unique Mother’s Day Gift Ideas
BeadCreator Pro 6 Review – Bead Pattern Design Software

Comments

  1. 1

    Beverley says

    February 24, 2018 at 9:24 pm

    Hi Hayley, thank you for sharing your tutorial for the sequin notebook lovely idea to create your own. I was wondering if it would be possible to adhere something on the front of the notebook-on the sequin fabric such as a heart shape or would I not be able to adhere anything to the sequins? Thank you

    Reply
    • 2

      Hayley says

      February 25, 2018 at 5:53 pm

      Hello, thanks for stopping by and commenting! Yes, I should think you can stick something to the sequins on the front. I was able to glue the sequin fabric into place, even when the sequins were touching each other in the corners. I would probably use a material like felt to be on the safe side – that worked well on the inside of the cover. Hope this helps! 🙂

      Reply
  2. 3

    Diane says

    February 27, 2018 at 6:43 am

    This looks fantastic! And it looks so easy to make. Thank you for sharing this.

    Reply
    • 4

      Hayley says

      March 2, 2018 at 6:52 pm

      Thank you so much Diane, appreciate you stopping by. I’ll head over to check out your blog shortly!

      Reply

Leave a Reply Cancel reply

Your email address will not be published. Required fields are marked *

Primary Sidebar

Welcome!

Welcome!

Hi, I'm Hayley! Thanks for visiting Craftaholique, my little corner of the internet where I blog about crafts, beading, handmade products and lots of other stuff relating to creativity. Stay a while and have a browse!

Connect

  • E-mail
  • Facebook
  • Instagram
  • Pinterest
  • Twitter

Advert


Instagram

Work in progress! A new pattern I'm working on. Lo Work in progress! A new pattern I'm working on. Loving the metallic green colour. 😍 #beads #beadwork #peyote #bracelets #braceletpattern #peyotestitch #jewellerymaking #crafts #crafting
Hi all! It's been a very long time since I've post Hi all! It's been a very long time since I've posted here. I've been working on a new venture - surface pattern design. This is my first attempt at a seamless pattern. It's part of a collection I'm working on called 'Mum's Garden'. Mum loved hedgehogs, and they always frequented her garden to enjoy the food she put out for them. 😍 Honest opinions! What do you think? Could this work for wrapping paper, notebook covers, etc? Thanks for looking! #surfacepatterndesign #creativebusiness #creativeentrepreneur #graphicdesign #digitalart #hedgehogs #patterns #seamlesspattern
I finally finished this bead loom bracelet! Starte I finally finished this bead loom bracelet! Started it before the first lockdown... I think I lost my mojo for a while! So this is a flat piece of beadwork, which I then glued onto a cuff bracelet blank.
Started this loom beading project last May... Prou Started this loom beading project last May... Proud to say I finally finished it more than one year later! More photos coming soon! What's your longest ever project? #beads #beadwork #loombeading #crafts #crafting #craftblogger #crafty #longestprojectever
My latest beaded creation! Peyote with a twist. Lo My latest beaded creation! Peyote with a twist. Love the chunkiness of it and how it shimmers with the galvanised silver Miyuki Delica beads. #beads #beadwork #beadweavingpeyote #peyote #flatpeyotestitch #silver #beaded #beadedjewelryofinstagram #beadedring #beadedjewelry #miyukidelica #miyukipeyote #miyuki #miyukibeads #beading #crafts #crafting #craftblogger
My latest tubular peyote bracelet! It's made up of My latest tubular peyote bracelet! It's made up of hundreds of tiny Miyuki Delica beads in vibrant colours of metallic blue, silver, white and pink. The pattern is available in my Etsy shop, Craftaholique Designs. #beads #beadwork #beadweavingpeyote #tubularpeyotestitch #miyukipeyote #beading #beadingpattern #etsyshop #etsysellersofinstagram #etsyseller #etsyshopowner #bracelets #vibrant #tubularpeyote #beadaddict #beadaddiction #miyuki #miyukibeads
My finished bead embroidery - I've used it as an e My finished bead embroidery - I've used it as an embellishment for a beadwork storage case I've just made. I upcycled the case from an old padfolio / conference folder. Inside there's an integrated beading mat where I can do my beadwork - no more beads rolling away! I've posted a tutorial on my blog (link in bio).
My latest project... Bead embroidered flowers! I'm My latest project... Bead embroidered flowers! I'm making this as an embellishment for something. Will post the final project pic soon! #beadwork #beadembroidery #embroidery #embroiderydesign #embroideryart #embroidelicious #flowers #beads #beadedembroidery #beadedembellishment #crafts #crafting #keepcraftingcarryon #keepcraftalive #keepcraftingandcarryon #beaded #beadaddict #beadaddiction #embroideryhoop #craftblogger #crafty
Just finished this set of Miyuki Delica bracelets Just finished this set of Miyuki Delica bracelets in pretty colours of peach, white, pink and gold! I made the two diamond pattern bracelets using a bead loom. The single strand bracelet I just strung together. What do you think to my creation? #beads #beadwork #beadloom #beadloompattern #beadloomingbracelet #beadlooming #beadloombracelets #beadweaving #loombeading #loombead #beadingpattern #beadedjewelryofinstagram #beadaddict #beadaddiction #miyuki #miyukibeads #miyukidelica #crafts #crafting #craftblogger #crafty #bead #craftblogger #beadedbracelets #cuffbracelet #stackingbracelets
Though I've been beading for many years, this is t Though I've been beading for many years, this is the first time I've used a bead loom! It's pretty straightforward and quicker than peyote. #beading #beadloom #beadlooming #beadloomingbracelet #beadloomingnewbie #beadloombracelets #beadloompattern #beadwork #beadingpattern #miyuki #miyukibeads
I had tons of fun over the Easter weekend making t I had tons of fun over the Easter weekend making this rag rug sample with a kit from @raggedlife. This was part of an online workshop on rag rugging, with four other craft bloggers (hosted on Zoom by Elspeth at Ragged Life). It was brilliant! I'd highly recommend it. I've just posted about my experience on the blog - see link in bio.
Tomorrow, I'm taking part in an online rag rug wor Tomorrow, I'm taking part in an online rag rug workshop with @raggedlife! Can't wait, I've been wanting to try out rag rugging for ages. The class is being hosted on Zoom and will be fully interactive. Will post my project when I've done it!
Load More… Follow me on Instagram

Popular Posts

Popular Posts

Recent Posts

  • Craftaholique is being revived!
  • I’m back (with a new bead loom bracelet pattern)
  • Leaf Art Craft Project with Sharpie Pens
  • Chevron Tubular Peyote Bracelet Pattern
  • DIY Beadwork Storage Case (with Beading Mat)

Advert


Recent Comments

  • Hayley on BeadTool 4 Review – Make Your Own Beading Patterns
  • Susan Nicholas on BeadTool 4 Review – Make Your Own Beading Patterns
  • Heather on How I Salvaged My Tarnished Silver Pandora Bracelet
  • Hayley on DIY Beadwork Storage Case (with Beading Mat)
  • Hayley on How to Use Pinterest to Significantly Boost Your Etsy Sales

Looking for Something?

Footer

My favourite place to shop handmade!

Featured on Feedspot

Disclaimer

Craftaholique is a personal blog. The content you'll find here is for your entertainment purposes only. Craftaholique is a participant in the Amazon Services LLC Associates Program, an affiliate advertising program designed to provide a means for sites to earn advertising fees by advertising and linking to www.amazon.co.uk and www.amazon.com. Read the full site disclaimer here.

Blogroll

  • Free Pretty Things For You
  • Golden Age Beads
  • Off The Beaded Path
  • The Graphics Fairy

© 2020 Craftaholique