
*Collaborative post.
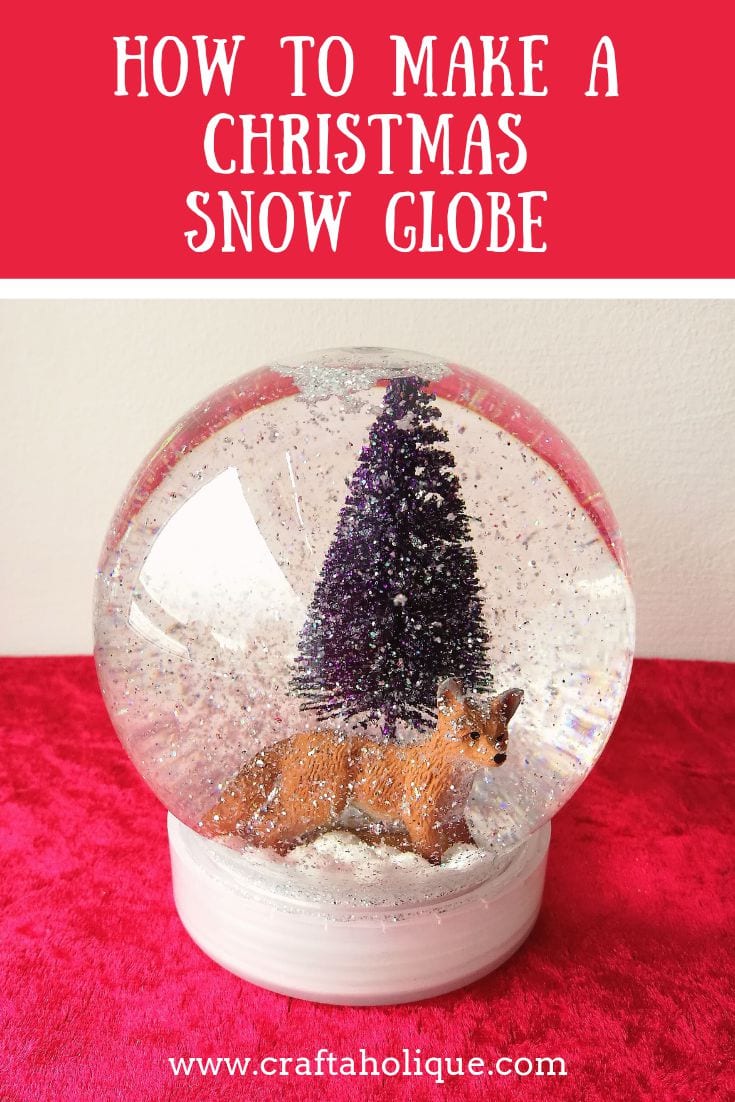
I have a fun Christmas craft tutorial for you today on how to make a pretty snow globe. I’ve always been entranced by snow globes – watching those tiny snowflakes softly fall is just mesmerising! Snow globes not only make lovely gifts, but they’re also a great addition to your Christmas decor.
For this project you’ll need:
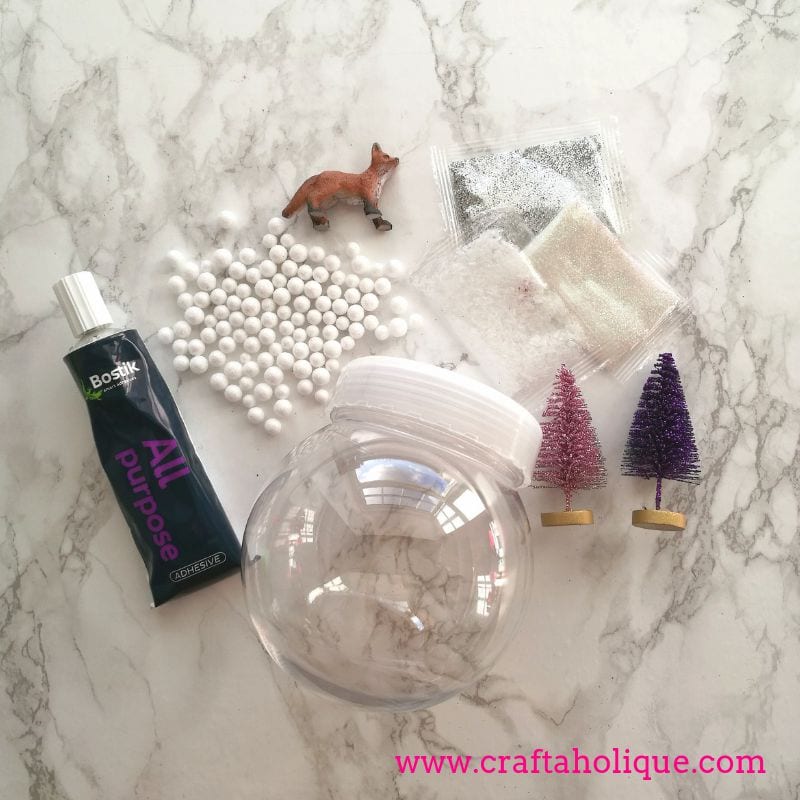
- An empty plastic snowglobe
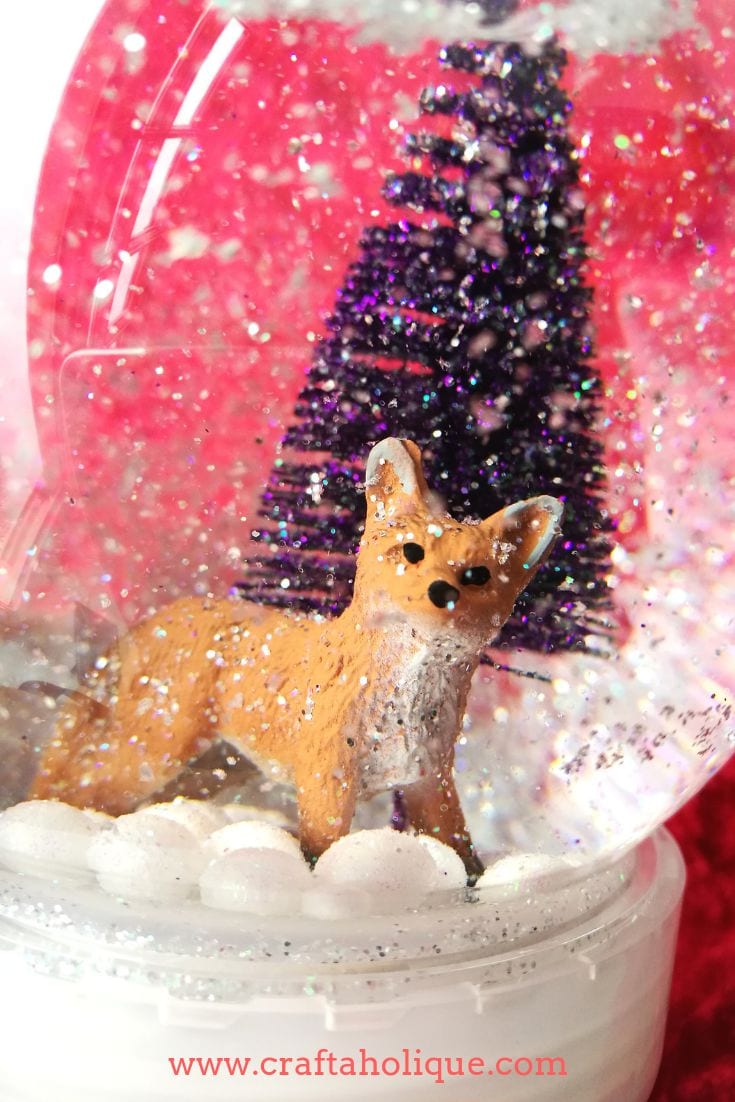
- A miniature ceramic fox figurine
- A miniature Christmas tree
- Fake snowballs
- Glitter in white and silver
- Bostik All Purpose adhesive (thank you to Bostik for sending me the glue for this project and for sponsoring this post!)
- Glycerine
- Distilled or bottled water
- A spoon
- Glue spreader
Step 1
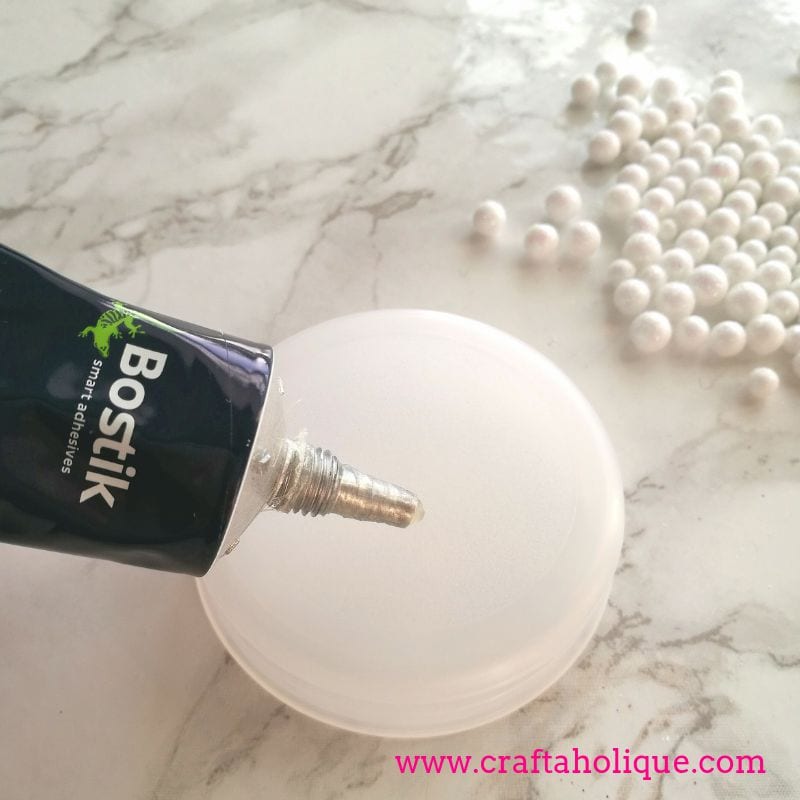
Apply the Bostik All Purpose adhesive (which is water resistant) to the flat base of the snow globe, using a glue spreader.
Step 2
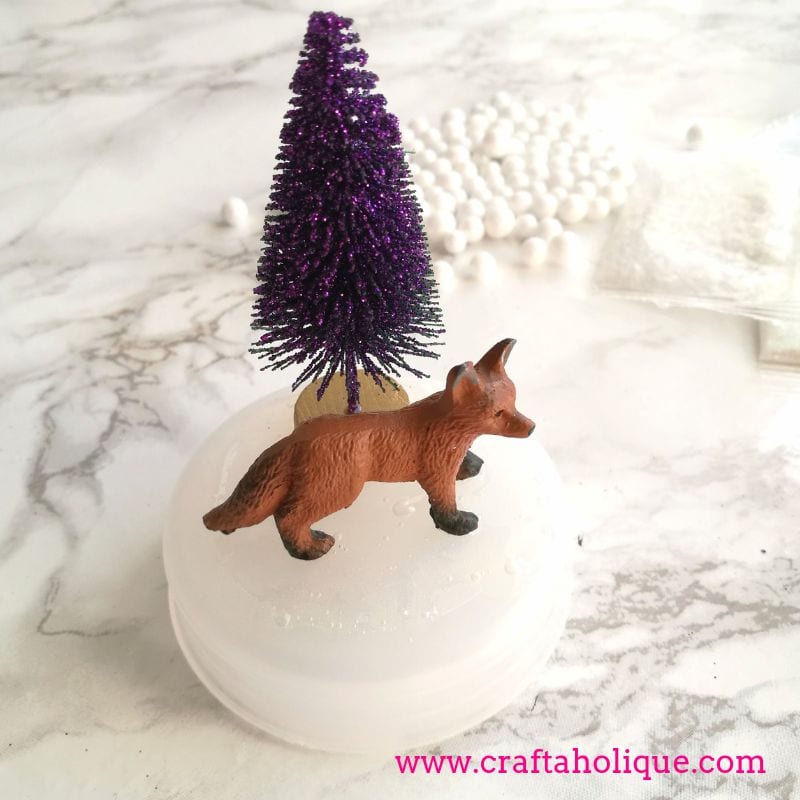
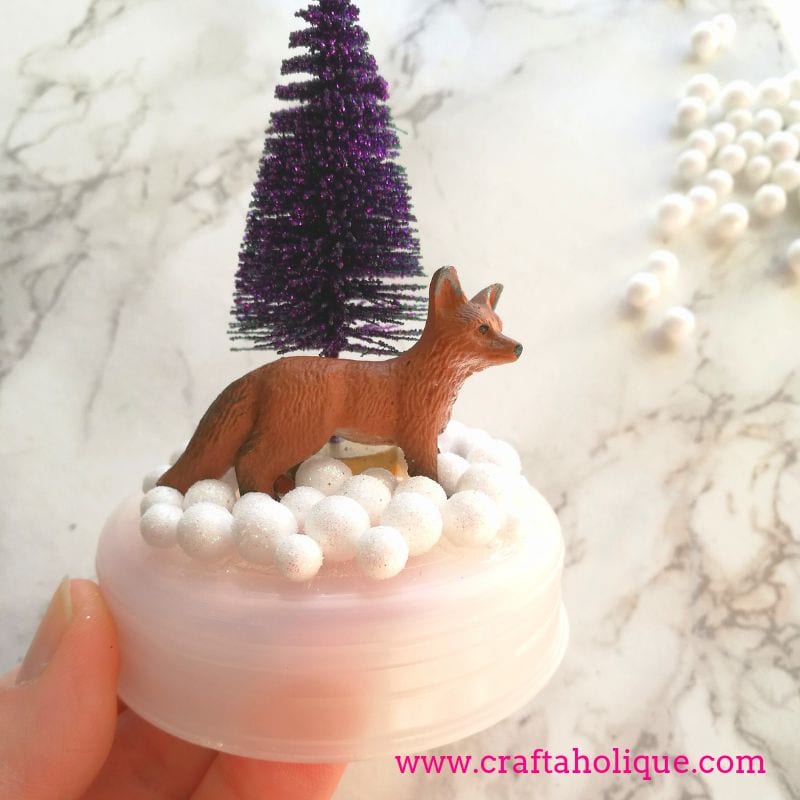
You’ll need to act quickly to stick on the figurine, the tree and the snowballs as the glue will thicken after a minute or so! Once you’re happy with the placement of these, let the glue dry fully overnight.
Step 3
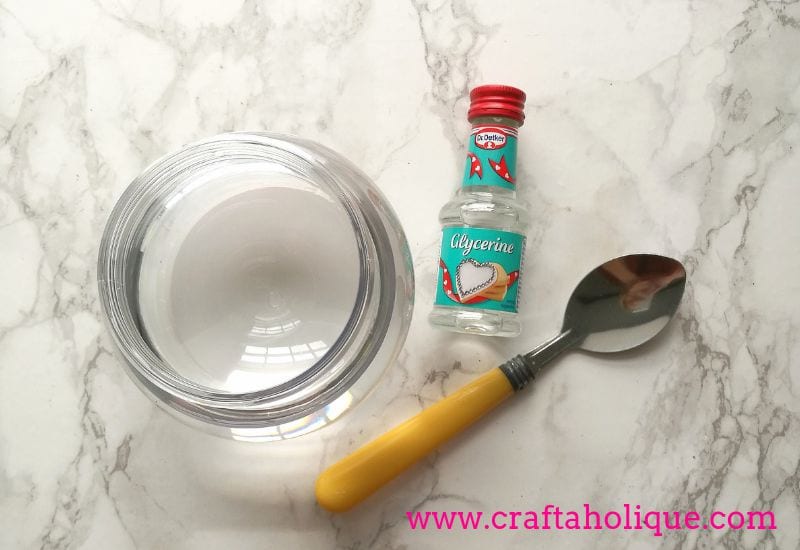
Fill the snow globe with water (stand the globe inside its lid to do this). It’s best to use distilled water as ordinary tap water can be cloudy and discolour over time. You can distill water yourself at home but the process takes several hours. I ended up using bottled water for this reason – although since doing this, I have been informed you can buy distilled water in petrol stations!
When you’ve added the water to the snowglobe, add a couple of teaspoons of glycerine to it. This will help your “snowflakes” fall slowly.
Step 4
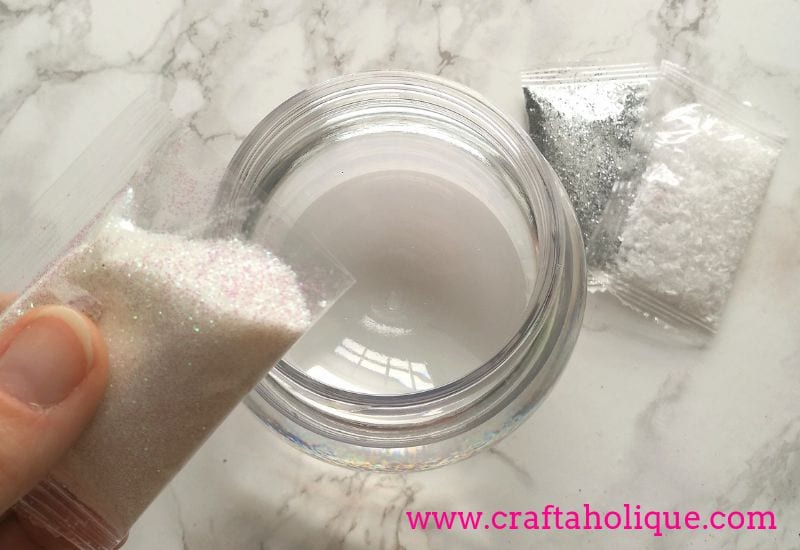
Next, add two different colours of glitter, I used silver and white. Then mix the liquid with a spoon. You’ll notice that the glitter clumps together a little – don’t worry about this, it will mostly separate, but the clumps that don’t will look like snowflakes.
Step 5
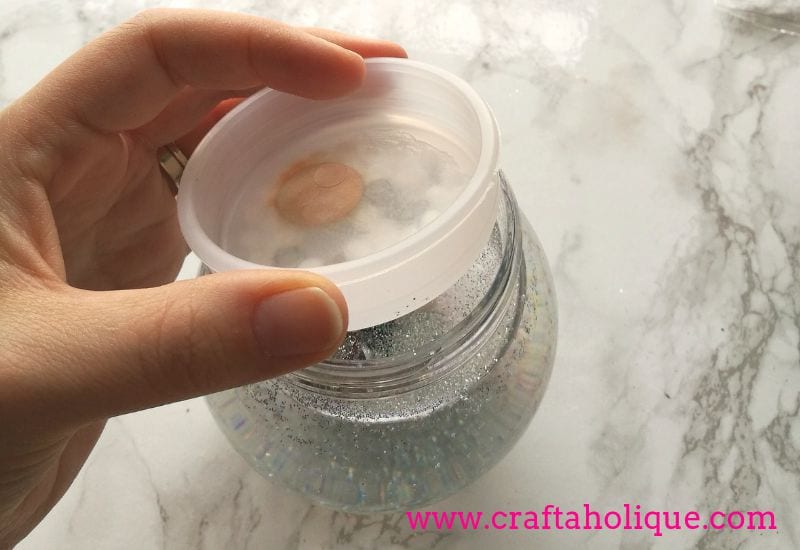
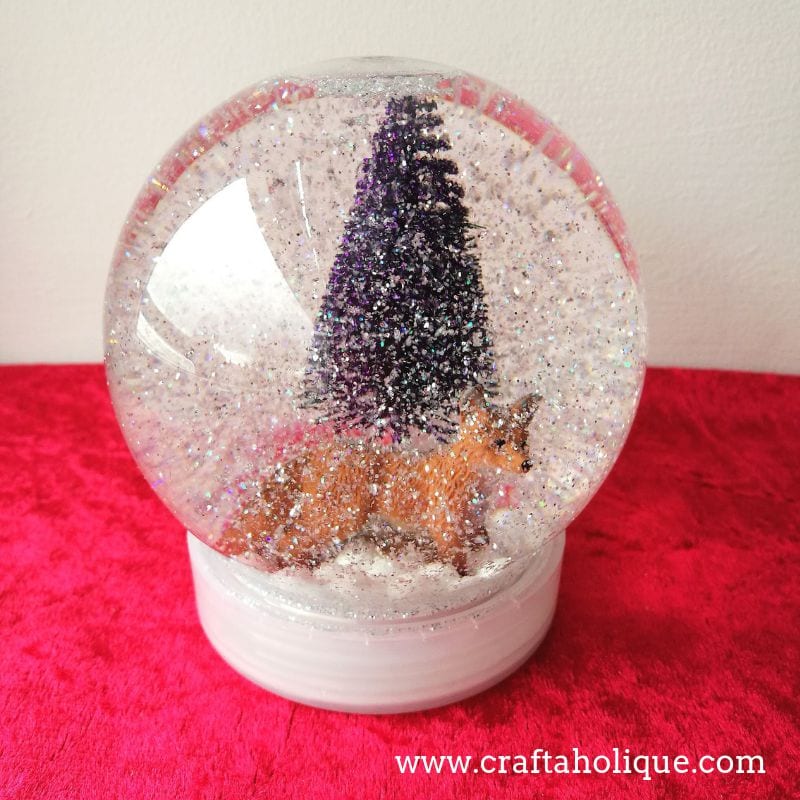
Then add the base, on which you’ve glued the figurines, into the snow globe. It should fit snugly without any water spilling over the sides of the globe. Finally, screw on the lid of the snow globe. That’s it, you’re done! Give it a good shake to see the full effect. Here’s a close up of the little fella inside mine…
I hope you enjoyed this Christmas craft tutorial in collaboration with Bostik! You might be interested to know that Bostik is running a great competition on their Facebook page at the moment, where one lucky winner will receive an Amazon Echo Plus! The competition is open to UK and Ireland residents and closes on 3rd December 2018 – check out the details here.
Please take a minute to share this post online – thank you! Before you go, please check out some of my other Christmas craft tutorials below:
- How to make Christmas Crackers
- How to make Beaded Angel Earrings
- How to make a Snowman Cutlery Holder
- Snowflakes Peyote Stitch Beadwork Pattern
** All photos © Craftaholique.
This is such a cute idea! Fab kids craft idea too. My daughter would love this activity 🙂
Love this but can’t find empty plastic snow globes?
Thank you! Hobbycraft used to do these empty snow globes but I think it’s a seasonal product for them. I have found this one on Etsy: http://tidd.ly/ea9e7e5b (there are others on Etsy too). Hope this helps!
Amazon has them as well