• Skip to primary navigation
  • Skip to main content
  • Skip to primary sidebar
  • Skip to footer
  • Home
  • Tutorials
  • Crafts
    • Jewellery Making
      • Everything jewellery
      • Beadwork
      • Wire jewellery
      • Book reviews
    • Feltmaking
    • Crochet
    • Knitting
    • Kid’s crafts
    • Book reviews
    • Other
  • Inspiration
    • Everything inspirational
    • Handmade showcase
    • Colours
    • Materials
    • Crafty Links
    • Start a Blog
  • Lifestyle
    • Tips
    • Recipes
  • About
    • Advertise
  • Contact
  • Privacy Policy
    • Cookie Policy
  • Disclaimer / Disclosure

Craftaholique

Embracing The Handmade Life | UK Craft Blog

You are here: Home / Jewellery making / DIY Boho / Festival Earrings Tutorial

June 22, 2017

DIY Boho / Festival Earrings Tutorial

Boho Festival Earrings Tutorial by Craftaholique

*Affiliate links are included in this post.

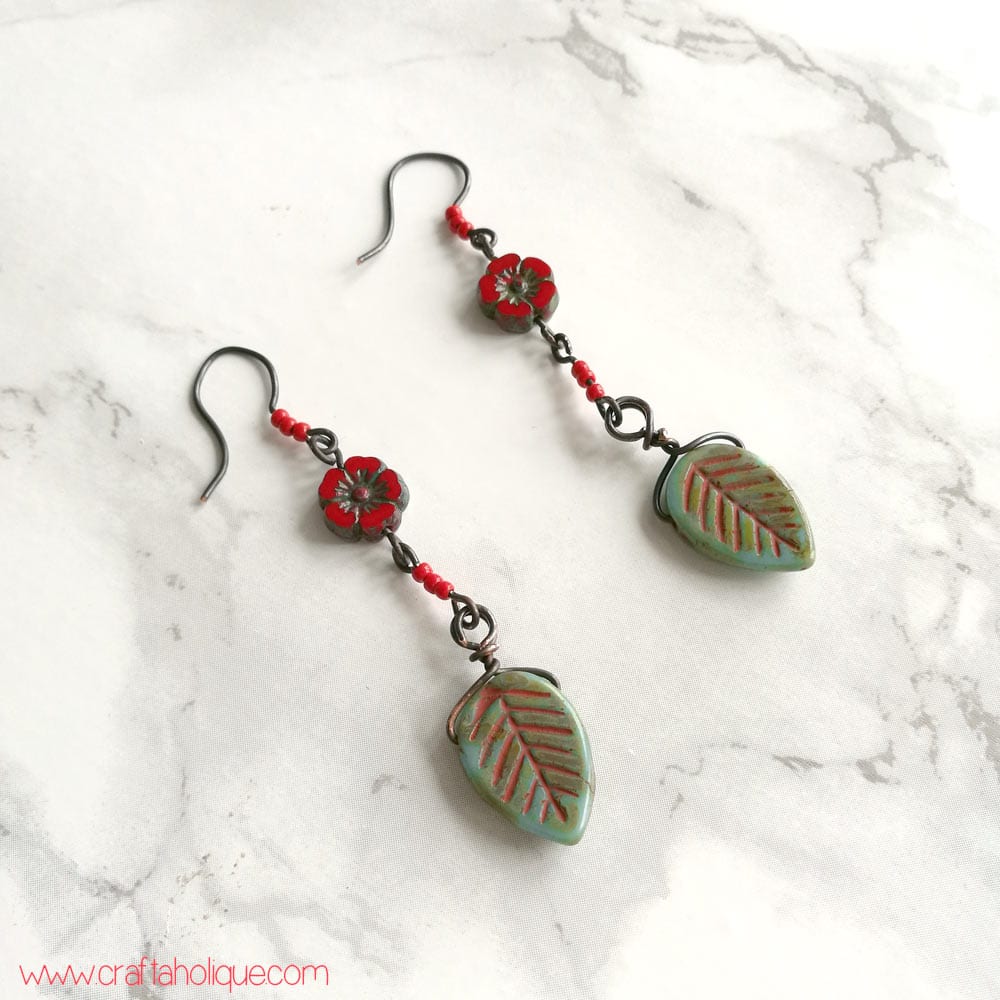
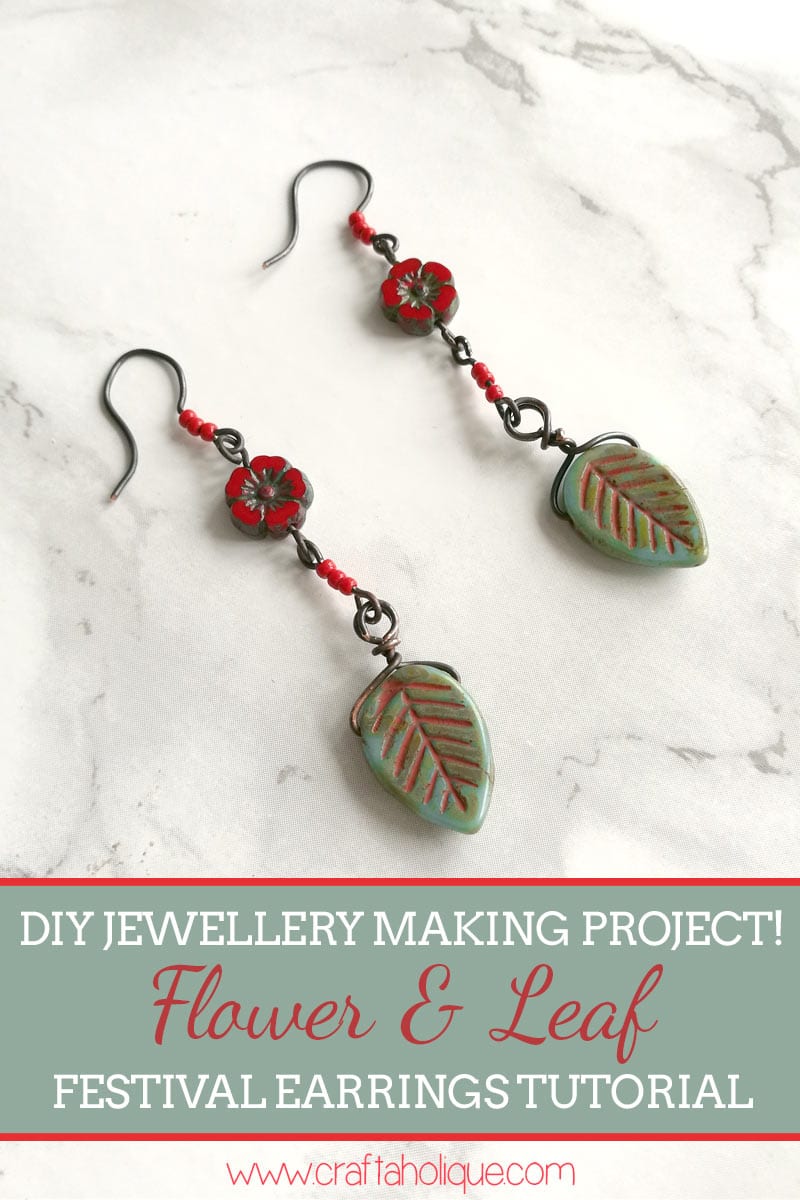
Today’s tutorial is for a pair of beautiful boho style festival earrings!

I’ve been wanting to make these for a very long time, ever since I came across some gorgeous artisan flower and leaf beads from The Curious Bead Shop on Etsy. I bought them ages ago and finally, I’ve been able to do them justice!

What I love about these beads (and art beads in general), is that they are wonderfully unique and high quality. Both the flower and leaf beads have a Picasso finish, which darkens them in all the right places to give them depth and definition. I’ve also used some hand-antiqued wire for this project to make all of the wire components, which I bought from the same store.

If you’d like to have a go at this earring project, here’s what you’ll need!

Festival earrings tutorial with artisan beads from The Curious Bead Shop

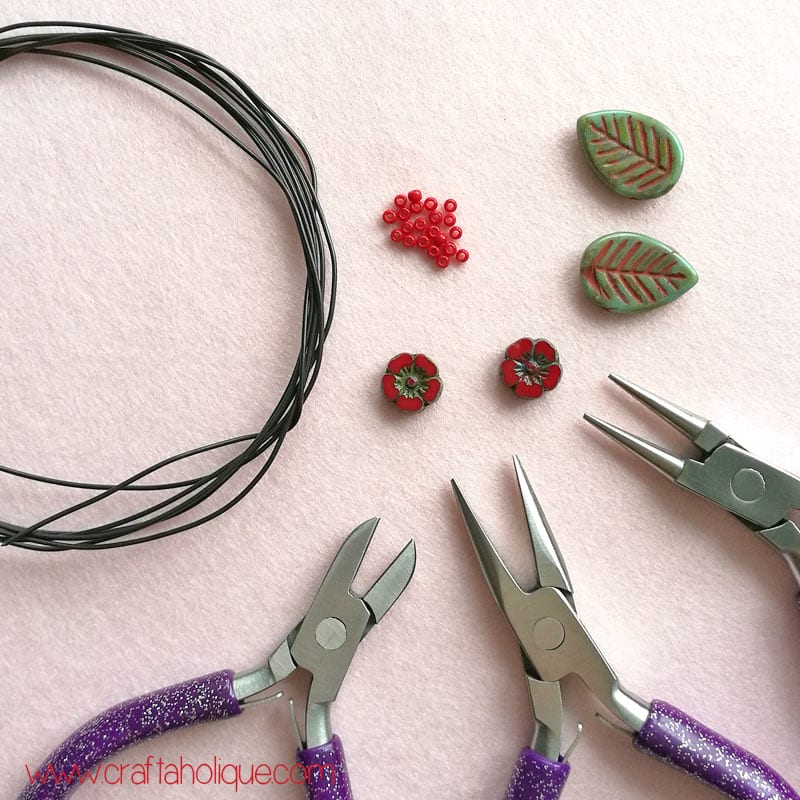
  • 2 x 11mm or 12mm Crimson Lil’ Bloom beads (red flower beads).
  • 2 x 16mm Autumn Picasso Leaves (green leaf beads).
  • 12 x Toho red seed beads size 11/0.
  • Hand-antiqued Copper Wire – 21 gauge should work well.
  • Jewellery making pliers (round nose and chain nose pliers plus wire cutters).

Step 1: Wire wrapping the leaf beads

Wire wrapping earrings tutorial from Craftaholique

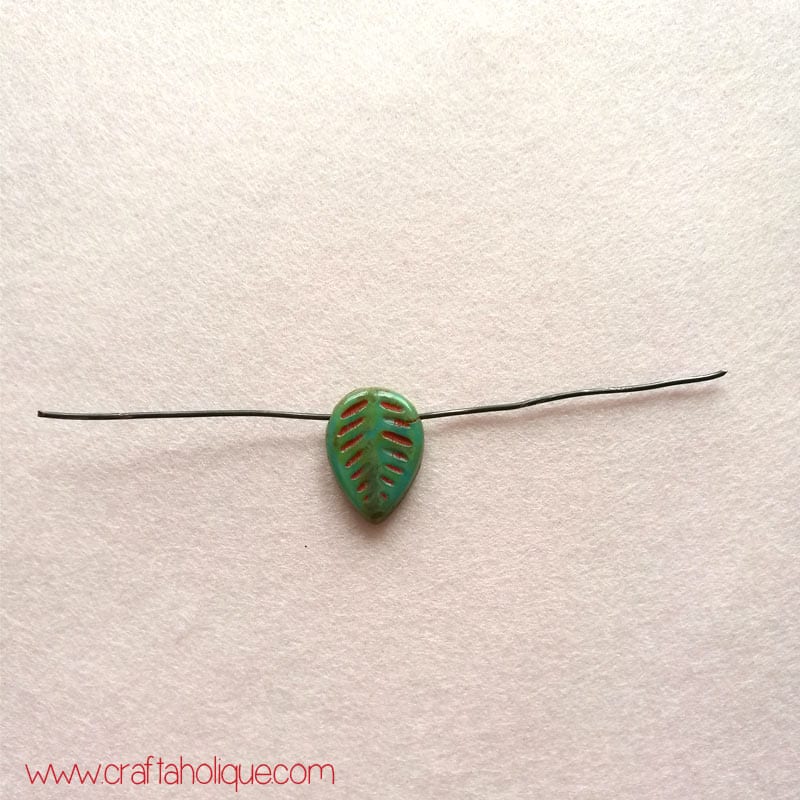
Trim off a length of wire around 4 inches long. The leaf beads are top drilled from side to side, so thread the wire through the bead as shown in the photo above.

Wire wrapping earrings tutorial from Craftaholique

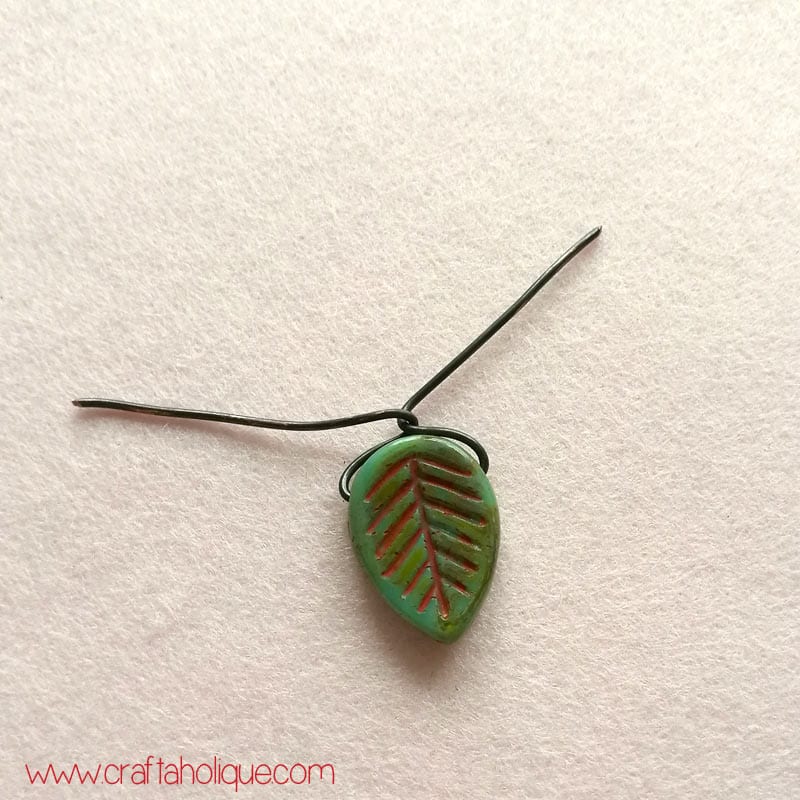
Twist the two ends of the wire together a couple of times…

How to make loops in wire - wirework earrings tutorial

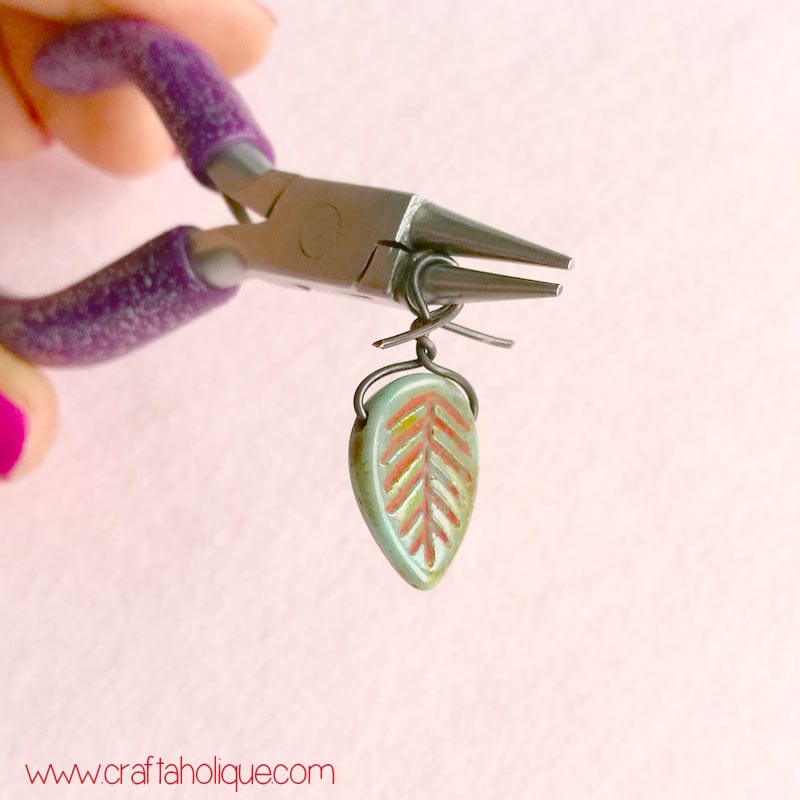
And then use your round nose pliers to make a loop with each of the wires. Curl the wires inwards towards the centre of the leaf bead.

How to make loops in wire - wirework earrings tutorial

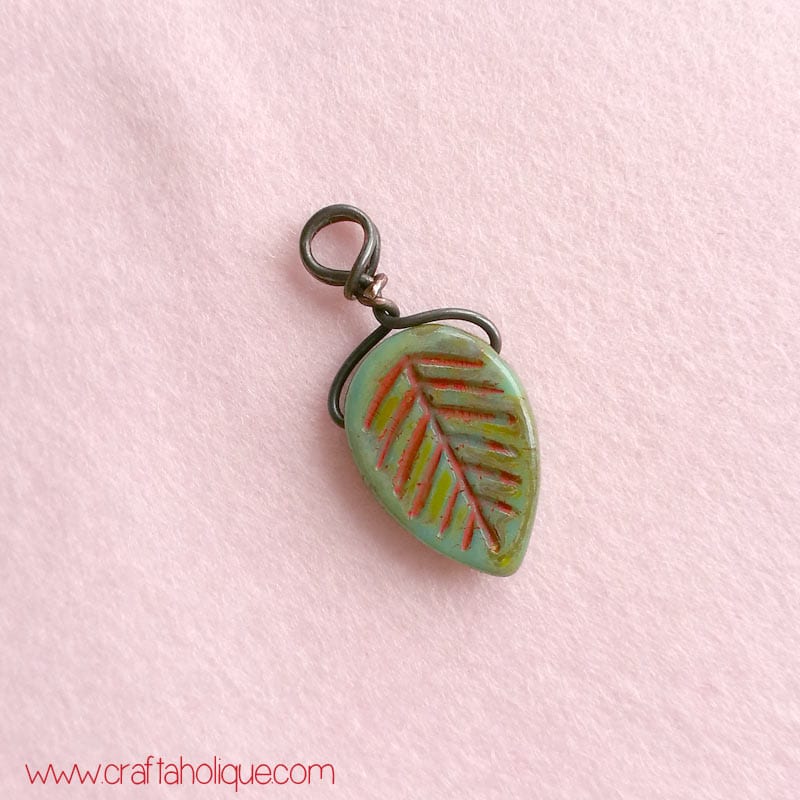
Trim off excess wire and bend the ends in so that you won’t have any sharp edges sticking out! Your component should look something like the above when you’re done, with a double wire loop above the leaf bead.

Step 2: Making a beaded wire component

DIY Festival Earrings with Artisan Beads

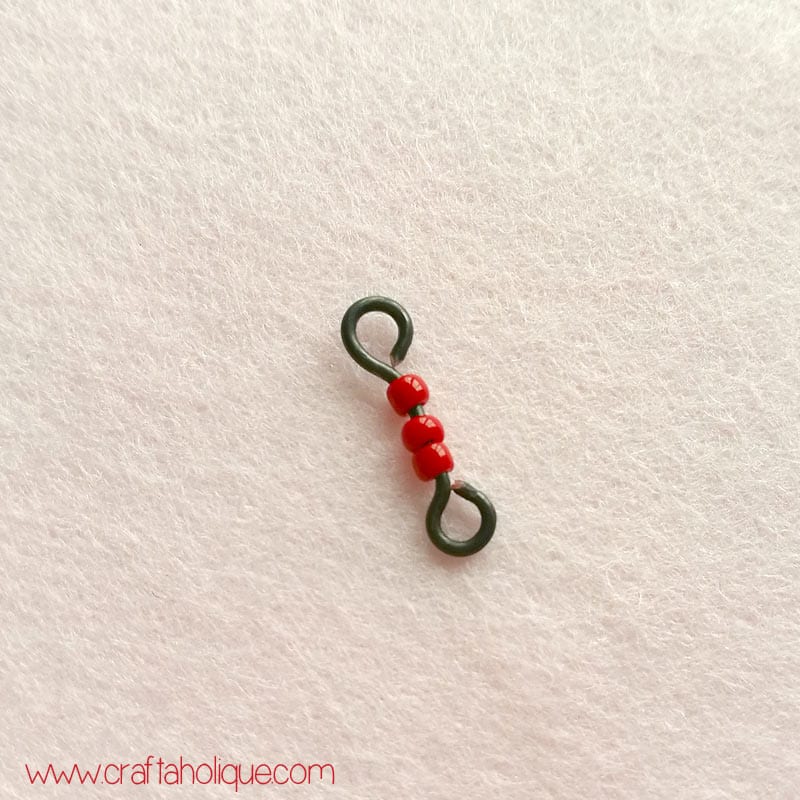
Trim off another piece of wire around two inches in length. Make a loop at one end with your round nose pliers, then thread on three red seed beads, before making a loop at the other end and trimming away any excess wire.

Step 3: Making the flower component

Crimson Lil' Bloom flower beads from The Curious Bead Shop

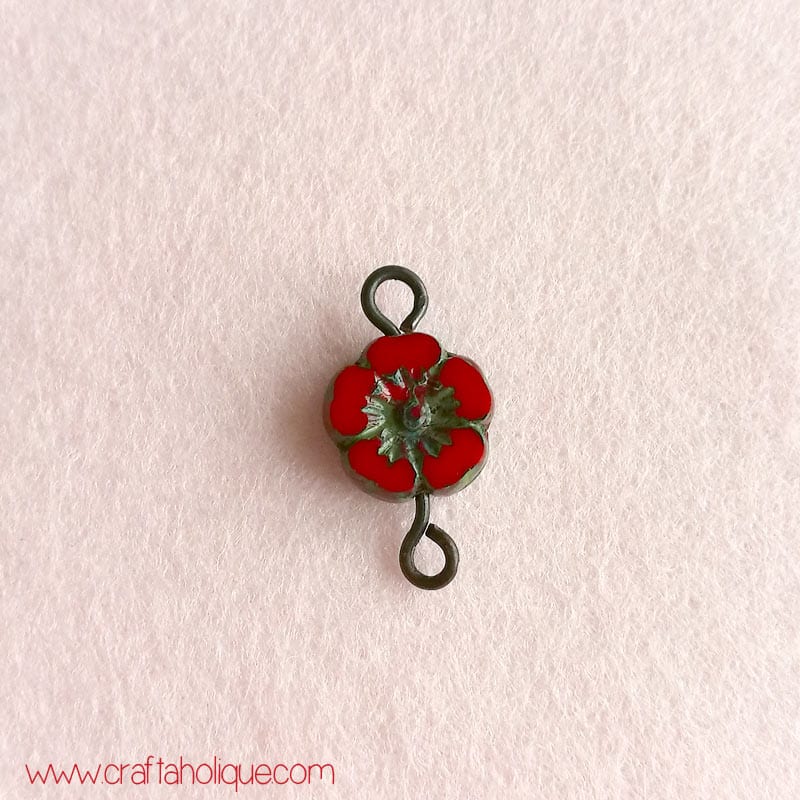
Do exactly the same as before, but with the flower bead this time!

Step 4: Making the earwire

How to make an earwire with beads

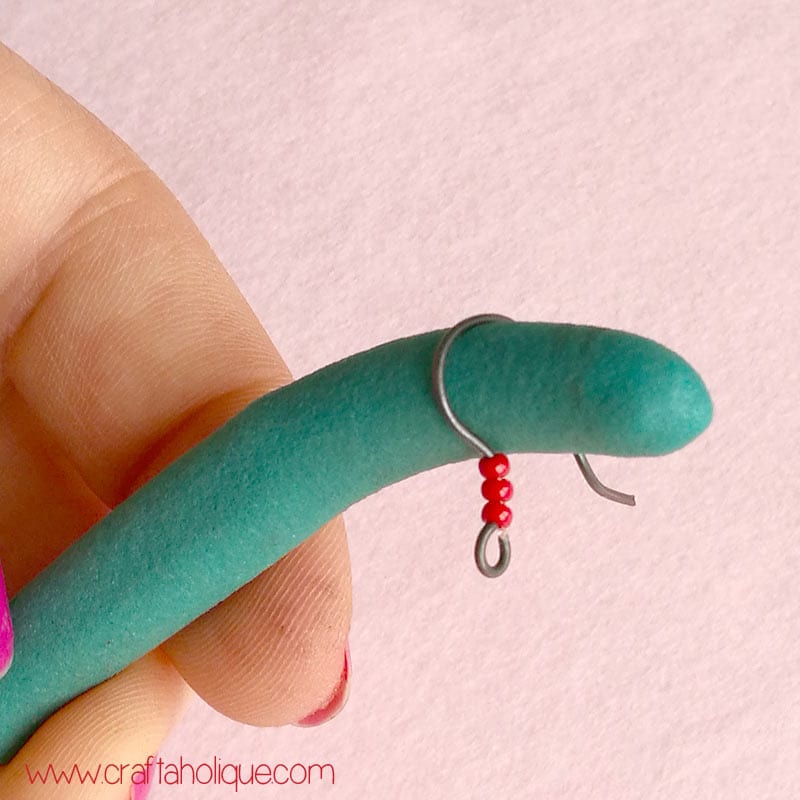
Did you know that you can make your own earwires rather than buying them? Trim off a length of wire that is around 3 inches. Make a loop at one end and thread on three red seed beads. Place the tip of your round nose pliers right above the last seed bead and pull the wire over to one side.

Then take something round to form the shape of your earwire. I’ve used the handle from an old pair of jewellery pliers, as you can see in the photo above! Simply bend the wire around the handle and trim off any excess wire. Make a slight bend in the opposite direction at the other end of the wire to give the earwire a nice shape.

Once you’ve done that, all you need to do afterwards is link the components together! Then repeat steps 1 to 4 to make the other earring.

Finally…

This is a good project to do if you want to start working with wire, as you’ll be able to create a few different shapes / components as you move through the steps involved. I hope you enjoyed this tutorial – if you did, please take a moment to share this post online!

Before you go, you might like to check out these tutorials too:

  • Mini Tassel Earrings (30 Minute Make).
  • Beautiful Waterfall Earrings Project.
  • Autumn Leaf Earrings DIY.

*Affiliate links to Etsy are included in this post. This means that if you make a purchase through one of my links, I will earn a small commission at no cost to you. I only ever recommend products that I think are great and any commissions help me to keep this site up and running. Thank you for using my links if you’re able to.

Boho Festival Earring Tutorial with Artisan Beads by Craftaholique

*Images © Craftaholique.

Share this post!
  • save 
  • share 
  • tweet 
  • email 

Filed Under: Jewellery making, Tutorials, Wire jewellery Hayley Leave a Comment

Reader Interactions

Spiralling – Gorgeous Peyote Stitch Bracelet Pattern
8 Brilliant Crafty Reads from Around the Web

Leave a Reply Cancel reply

Your email address will not be published. Required fields are marked *

Primary Sidebar

Welcome!

Welcome!

Hi, I'm Hayley! Thanks for visiting Craftaholique, my little corner of the internet where I blog about crafts, beading, handmade products and lots of other stuff relating to creativity. Stay a while and have a browse!

Connect

  • E-mail
  • Facebook
  • Instagram
  • Pinterest
  • Twitter

Advert


Instagram

Work in progress! A new pattern I'm working on. Lo Work in progress! A new pattern I'm working on. Loving the metallic green colour. 😍 #beads #beadwork #peyote #bracelets #braceletpattern #peyotestitch #jewellerymaking #crafts #crafting
Hi all! It's been a very long time since I've post Hi all! It's been a very long time since I've posted here. I've been working on a new venture - surface pattern design. This is my first attempt at a seamless pattern. It's part of a collection I'm working on called 'Mum's Garden'. Mum loved hedgehogs, and they always frequented her garden to enjoy the food she put out for them. 😍 Honest opinions! What do you think? Could this work for wrapping paper, notebook covers, etc? Thanks for looking! #surfacepatterndesign #creativebusiness #creativeentrepreneur #graphicdesign #digitalart #hedgehogs #patterns #seamlesspattern
I finally finished this bead loom bracelet! Starte I finally finished this bead loom bracelet! Started it before the first lockdown... I think I lost my mojo for a while! So this is a flat piece of beadwork, which I then glued onto a cuff bracelet blank.
Started this loom beading project last May... Prou Started this loom beading project last May... Proud to say I finally finished it more than one year later! More photos coming soon! What's your longest ever project? #beads #beadwork #loombeading #crafts #crafting #craftblogger #crafty #longestprojectever
My latest beaded creation! Peyote with a twist. Lo My latest beaded creation! Peyote with a twist. Love the chunkiness of it and how it shimmers with the galvanised silver Miyuki Delica beads. #beads #beadwork #beadweavingpeyote #peyote #flatpeyotestitch #silver #beaded #beadedjewelryofinstagram #beadedring #beadedjewelry #miyukidelica #miyukipeyote #miyuki #miyukibeads #beading #crafts #crafting #craftblogger
My latest tubular peyote bracelet! It's made up of My latest tubular peyote bracelet! It's made up of hundreds of tiny Miyuki Delica beads in vibrant colours of metallic blue, silver, white and pink. The pattern is available in my Etsy shop, Craftaholique Designs. #beads #beadwork #beadweavingpeyote #tubularpeyotestitch #miyukipeyote #beading #beadingpattern #etsyshop #etsysellersofinstagram #etsyseller #etsyshopowner #bracelets #vibrant #tubularpeyote #beadaddict #beadaddiction #miyuki #miyukibeads
My finished bead embroidery - I've used it as an e My finished bead embroidery - I've used it as an embellishment for a beadwork storage case I've just made. I upcycled the case from an old padfolio / conference folder. Inside there's an integrated beading mat where I can do my beadwork - no more beads rolling away! I've posted a tutorial on my blog (link in bio).
My latest project... Bead embroidered flowers! I'm My latest project... Bead embroidered flowers! I'm making this as an embellishment for something. Will post the final project pic soon! #beadwork #beadembroidery #embroidery #embroiderydesign #embroideryart #embroidelicious #flowers #beads #beadedembroidery #beadedembellishment #crafts #crafting #keepcraftingcarryon #keepcraftalive #keepcraftingandcarryon #beaded #beadaddict #beadaddiction #embroideryhoop #craftblogger #crafty
Just finished this set of Miyuki Delica bracelets Just finished this set of Miyuki Delica bracelets in pretty colours of peach, white, pink and gold! I made the two diamond pattern bracelets using a bead loom. The single strand bracelet I just strung together. What do you think to my creation? #beads #beadwork #beadloom #beadloompattern #beadloomingbracelet #beadlooming #beadloombracelets #beadweaving #loombeading #loombead #beadingpattern #beadedjewelryofinstagram #beadaddict #beadaddiction #miyuki #miyukibeads #miyukidelica #crafts #crafting #craftblogger #crafty #bead #craftblogger #beadedbracelets #cuffbracelet #stackingbracelets
Though I've been beading for many years, this is t Though I've been beading for many years, this is the first time I've used a bead loom! It's pretty straightforward and quicker than peyote. #beading #beadloom #beadlooming #beadloomingbracelet #beadloomingnewbie #beadloombracelets #beadloompattern #beadwork #beadingpattern #miyuki #miyukibeads
I had tons of fun over the Easter weekend making t I had tons of fun over the Easter weekend making this rag rug sample with a kit from @raggedlife. This was part of an online workshop on rag rugging, with four other craft bloggers (hosted on Zoom by Elspeth at Ragged Life). It was brilliant! I'd highly recommend it. I've just posted about my experience on the blog - see link in bio.
Tomorrow, I'm taking part in an online rag rug wor Tomorrow, I'm taking part in an online rag rug workshop with @raggedlife! Can't wait, I've been wanting to try out rag rugging for ages. The class is being hosted on Zoom and will be fully interactive. Will post my project when I've done it!
Load More… Follow me on Instagram

Popular Posts

Popular Posts

Recent Posts

  • Craftaholique is being revived!
  • I’m back (with a new bead loom bracelet pattern)
  • Leaf Art Craft Project with Sharpie Pens
  • Chevron Tubular Peyote Bracelet Pattern
  • DIY Beadwork Storage Case (with Beading Mat)

Advert


Recent Comments

  • Hayley on BeadTool 4 Review – Make Your Own Beading Patterns
  • Susan Nicholas on BeadTool 4 Review – Make Your Own Beading Patterns
  • Heather on How I Salvaged My Tarnished Silver Pandora Bracelet
  • Hayley on DIY Beadwork Storage Case (with Beading Mat)
  • Hayley on How to Use Pinterest to Significantly Boost Your Etsy Sales

Looking for Something?

Footer

My favourite place to shop handmade!

Featured on Feedspot

Disclaimer

Craftaholique is a personal blog. The content you'll find here is for your entertainment purposes only. Craftaholique is a participant in the Amazon Services LLC Associates Program, an affiliate advertising program designed to provide a means for sites to earn advertising fees by advertising and linking to www.amazon.co.uk and www.amazon.com. Read the full site disclaimer here.

Blogroll

  • Free Pretty Things For You
  • Golden Age Beads
  • Off The Beaded Path
  • The Graphics Fairy

© 2020 Craftaholique